Philips DVDR560H/97 User Manual
Quick, Guide
Attention! The text in this document has been recognized automatically. To view the original document, you can use the "Original mode".
QUICK
USE
GUIDE
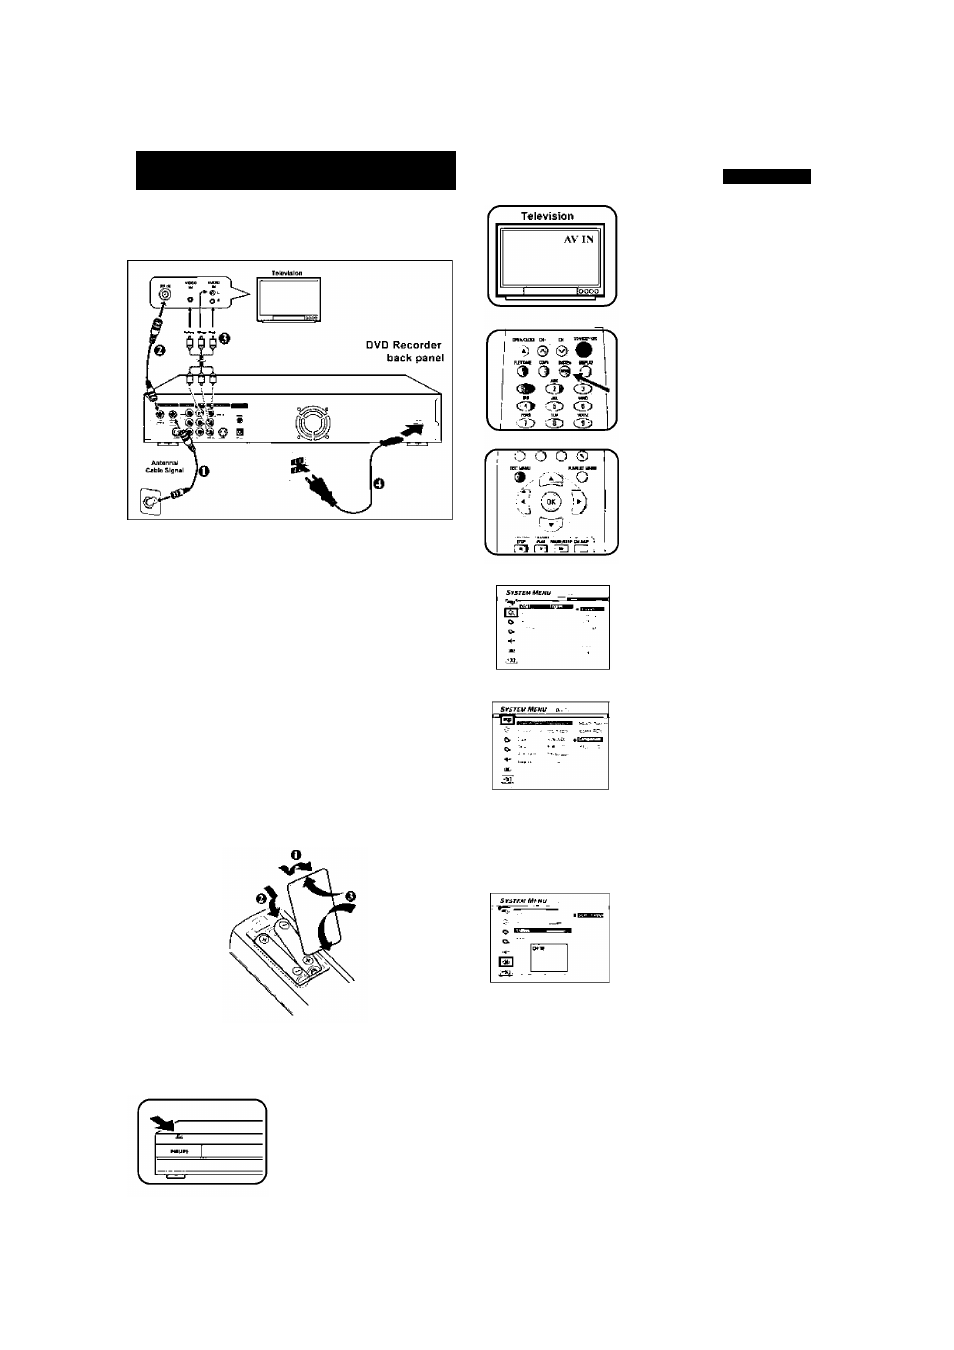
CONNECT THE DVD RECORDER
^ Connect the antenna cable from the wall
antenna outlet to the ANTENNA IN terminal
on the back of the DVD recorder.
Q Use another antenna cable to connect the DVD
recorder’s TV OUT terminal to the antenna
in terminal at the back of your TV set.
QUse AUDIO/VIDEO cables (red/white/yellow)
to connect the DVD recorder’s AV OUT
terminals to the AV IN terminals at the back of
your TV set.
Q Connect the power cable from the DVD
recorder’s AC IN terminal to the power outlet.
PREPARETHE REMOTE CONTROL
START INSTALLATION
^ Press [STANDBY-ON ] to
switch on the DVD
recorder.
D V D R 5 6 0 H
e Switch on the TV set and
select the correct
video input.
€> Press the [SYSTEM
MENU] button to adjust
your peference setting of
this DVD recorder.
Q Press [A] [T] to select
an item in the menu.
Press [►] to access the
selected item’s options.
Press [OK] to confirm your
selection.
@ Language menu
appears. OSD lanuage:
select on-screen display
language.
0 System menu appears.
Video output: sets video
output
TV Type:
sets the TV type
Date: set the system
date using the
numbered buttons.
Time: set the system
time using the numbered
buttons.
Q TV tuner menu
appears.
TV channel search: Go to
“Utilities” and then “start
scan.” Press [OK] to start
automatic TV channel
scan to search and store
available channels.
QWhen completed, press [SYSTEM MENU] to
exit the menu.
The DVD Recorder is ready for use!
NO PICTURES! Check if Video input of the TV set is switched to
"AV" and press [CHANNEL •V'] button to select the right
channel.
NO SOUND! Check if the audio L/R jacks on the recorder are con
nected to the TV set, stereo system or receiver.