Flaps flap-to-elevator mixing before after, Features & specifications – Futaba 6DA User Manual
Page 6
6
19
• If the model has separate flaps (not flaperons,
as covered on page 16) plug the flap servo into
channel 6 on the Rx.
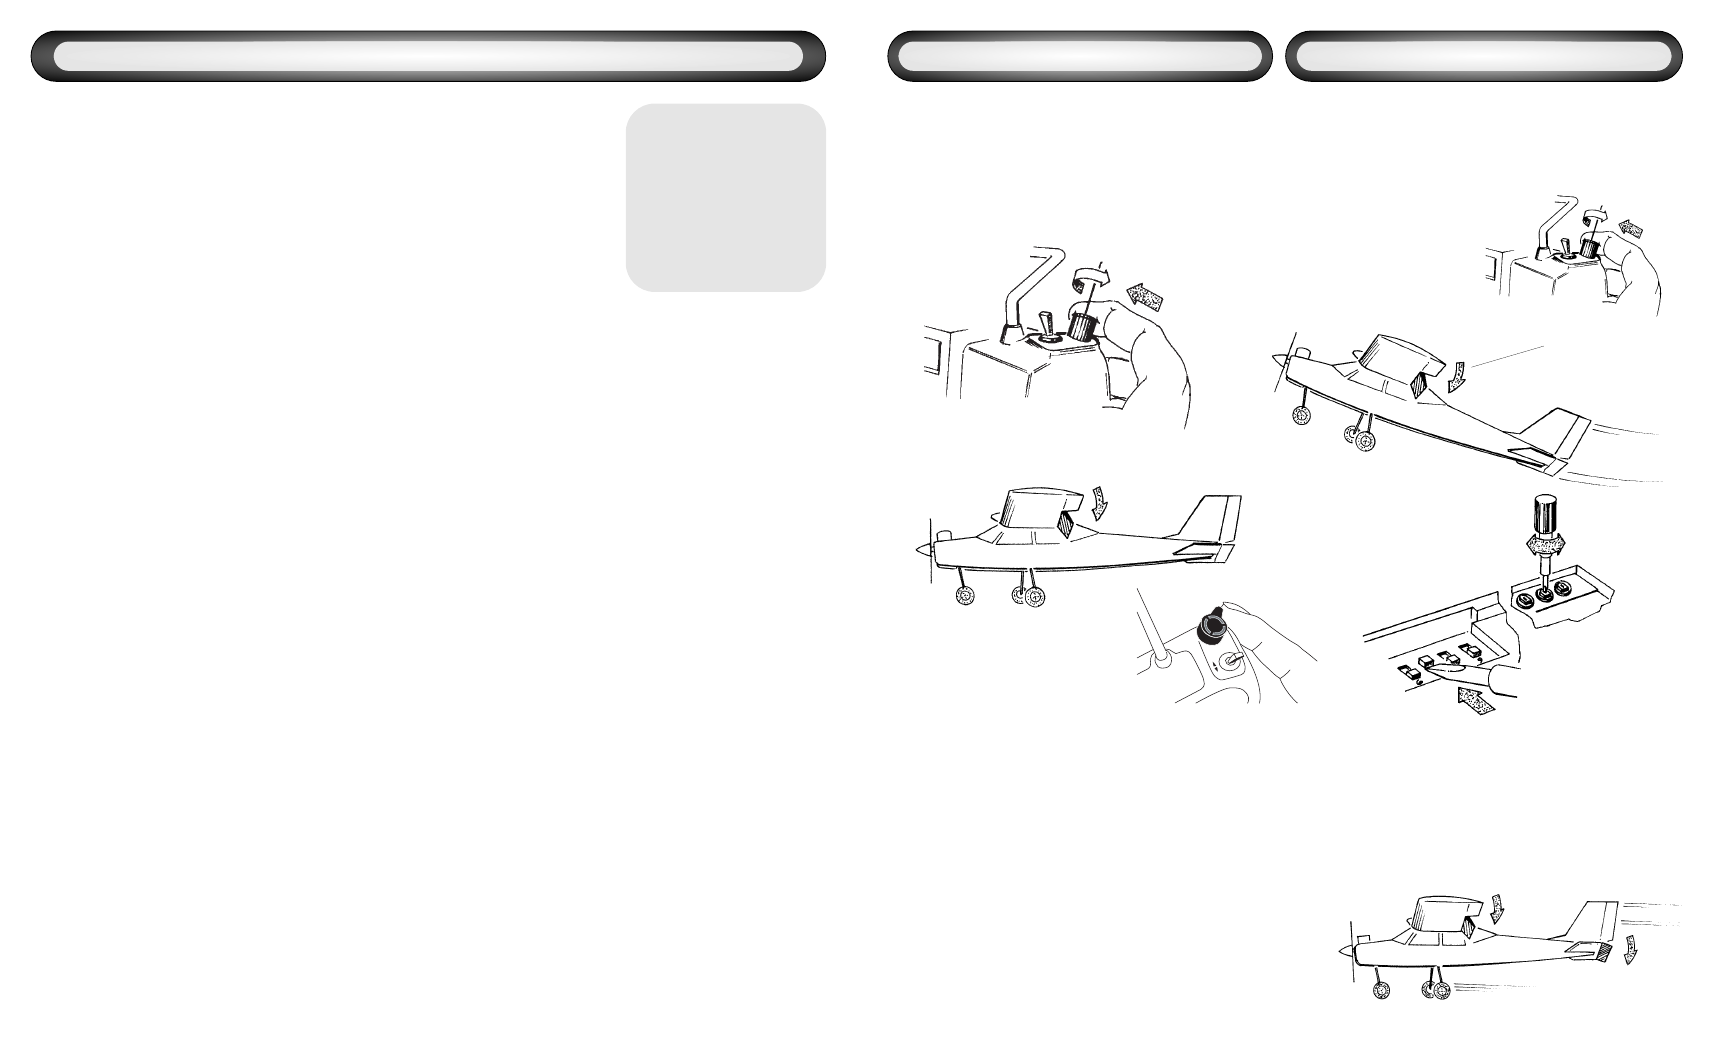
• Most models will change pitch upon deploying
flaps (some will climb; others dive). Test fly the
model and determine the direction and
amount of elevator throw required to correct
for this change.
• Activate this feature with dip switch #7 and
then turn it on with the mix switch. Adjust the
amount as required to match the amount of
elevator required in flight.
Plane balloons
when flaps drop
FLAPS
FLAP-TO-ELEVATOR MIXING
BEFORE
AFTER
Flap Control lever:
By using the flap control lever, you can set the
maximum up deflection of the flaps. This way, you
can keep from accidentally applying flaps as
spoilers during flight, and do not need to look for
center on the knob while in flight.
To use, simply turn the flap dial until the flaps are
at the upmost position you desire. Now slide the
flap control lever over the splines of the flap knob
so that the long arm is touching the side of the
radio. Now the flap knob can not be rotated
counterclockwise any further, and you have the
large lever available to easily deploy flaps!
Transmitter (Tx)
• Digital Proportional 6CH FM Two-Stick 72MHz
♦
Transmitter
• Flight Set Adjustment Control Center
• Narrow-band Transmission Technology
• Fully Proportional Flap Control
• Flaperon with Adjustable Aileron Differential Capability
• Separate Elevator and Aileron Dual Rate Switches and Adjustments
• Flap-to-Elevator (not available simultaneously with flaperon) and Aileron-to-Rudder
Separate Mix Switches and Adjustments
• Two-Position Retract Switch for Gear Operation
• Momentary-on Trainer Switch
• Analog Battery Voltage Indicator
• Electronic Analog Trim Adjustments on All Four Primary Control Surfaces
• All-Channel Servo Reversing Switches
• Throttle Hi and Low EPA Adjustments
• Elevator, Aileron and Rudder AST Adjustments
• 9.6v NiCd Rechargeable Battery and Dual Charger Included
Receiver (Rx) FP-R127DF* **
Servos (Sx) S3004
• Interchangeable Crystal, 72MHz* Freq.**
• Torque: 42 oz.-in. at 4.8V [2.99 Kg*cm]
• Size: .82" x 1.39" x .82"
• Size: .77" 1.59" x 1.41"
[20.8mm x 35.3mm x 20.8mm]
[19.6mm x 40.4mm x 35.8mm]
• Weight: 1.50 oz. [42g]
• Speed: .22 sec/60 degrees
• Dual Conversion Narrow Band Technology
• Weight: 1.50 oz. [42g]
• 4.8v NiCd Rechargeable Battery Included
*This device complies with part 15 of the FCC rules. Operation is subject to the following two conditions.
1) This device may not cause harmful interference.
2) This device must accept any interference received including interference that may cause undesired operation.
**For proper operation and the safety of all concerned, please be sure that if you choose to change your receiver's frequency to stay with in the proper
band. If your receiver was originally on channels 11-35, then it is 'low band'. If it was on 36-60, then it is 'high band'. Do not change frequencies outside
of the band of your receiver.
It is against FCC regulation for anyone but a licensed technician to change your transmitter's frequency. You may replace a damaged crystal of the
same channel, but the radio must be properly retuned after transmitter channel change.
FEATURES & SPECIFICATIONS
♦
6DA systems sold
outside the USA include:
• R138DF Receiver (Rx) on
either 35 or 40MHz.
• 6DA Transmitter (Tx) on
either 35 or 40MHz.
FLAP FL/ELE
M
IX
OFF
ON
1. Rotate Flap knob
to operate flaps.
1. Deploy flaps using
the Flap knob.
2. Observe flight
characteristics of your
airplane when flaps
are deployed.
3. Activate
FLP/ELE dip
switch and adjust
the FLP>ELE pot.
4. Level flight with
Flap to Elevator
mixing.