Cooler Master Glacer 240L User Manual
User guide, Radiator mounting, Pump mounting
Congratulations on your purchase of Cooler Master Liquid Cooling System (LCS).
Your LCS has been factory prefilled, leak-tested, and once configured for your
particular CPU socket,is designed for plug-and-play installation, as well as very
low maintenance operations.
Prior to installing your LCS, we strongly suggest that you read this installation
guide thoroughly, then make sure that all components are included in the pack-
age, and finally that you follow the installation sequence step-by-step. Improper
installation may cause permanent damage to your system as well as to the LCS.
When in doubt, always contact our technical help first:
http://www.coolermaster-usa.com/glacer
User Guide
CPU Cooler and motherboard setup for use with:
AMD
®
AM2/(+), AM3/(+), FM1, FM2, 939
1. Remove the OEM AMD Plastic bracket
from the top of the motherboard
2. Please remove the factory installed Intel
mounting brackets from the CPU Cooler.
3. Install the supplied AMD brackets to
the CPU Cooler as shown below.
4. Apply Thermal Paste to top of CPU in a
thin even layer.
5. Remove the protective film on bottom
of CPU Cooler.
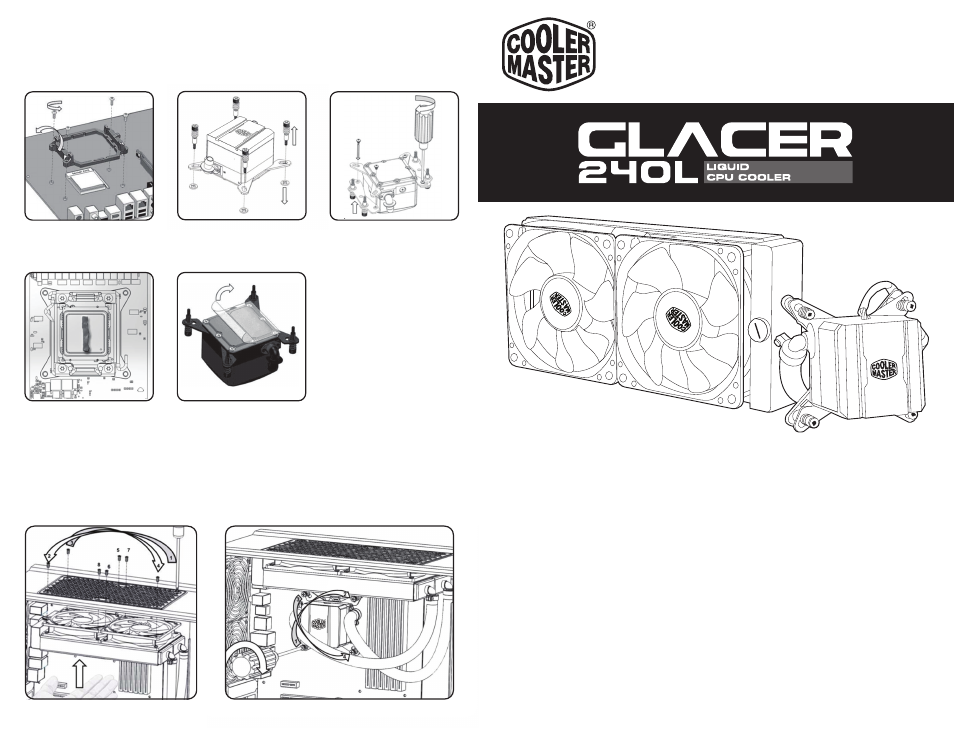
Radiator Mounting
With the CPU cooler hanging freely, and holding the
radiator as shown, fasten it to the case using the
provided screws.
Orientation of the radiator may vary depending on your case. A typical
(most common) example is shown here.
Alternate tightening the 4 screws to the motherboard and back plate to
provide even pressure to the CPU.
Pump Mounting