Using your refrigerator, Power saving control, Adjusting the shelves and meat pan – Whirlpool EB19AKXL User Manual
Page 4: Removing non-adjustable shelves, Removing the crispers and crisper covers
Attention! The text in this document has been recognized automatically. To view the original document, you can use the "Original mode".
Using your refrigerator
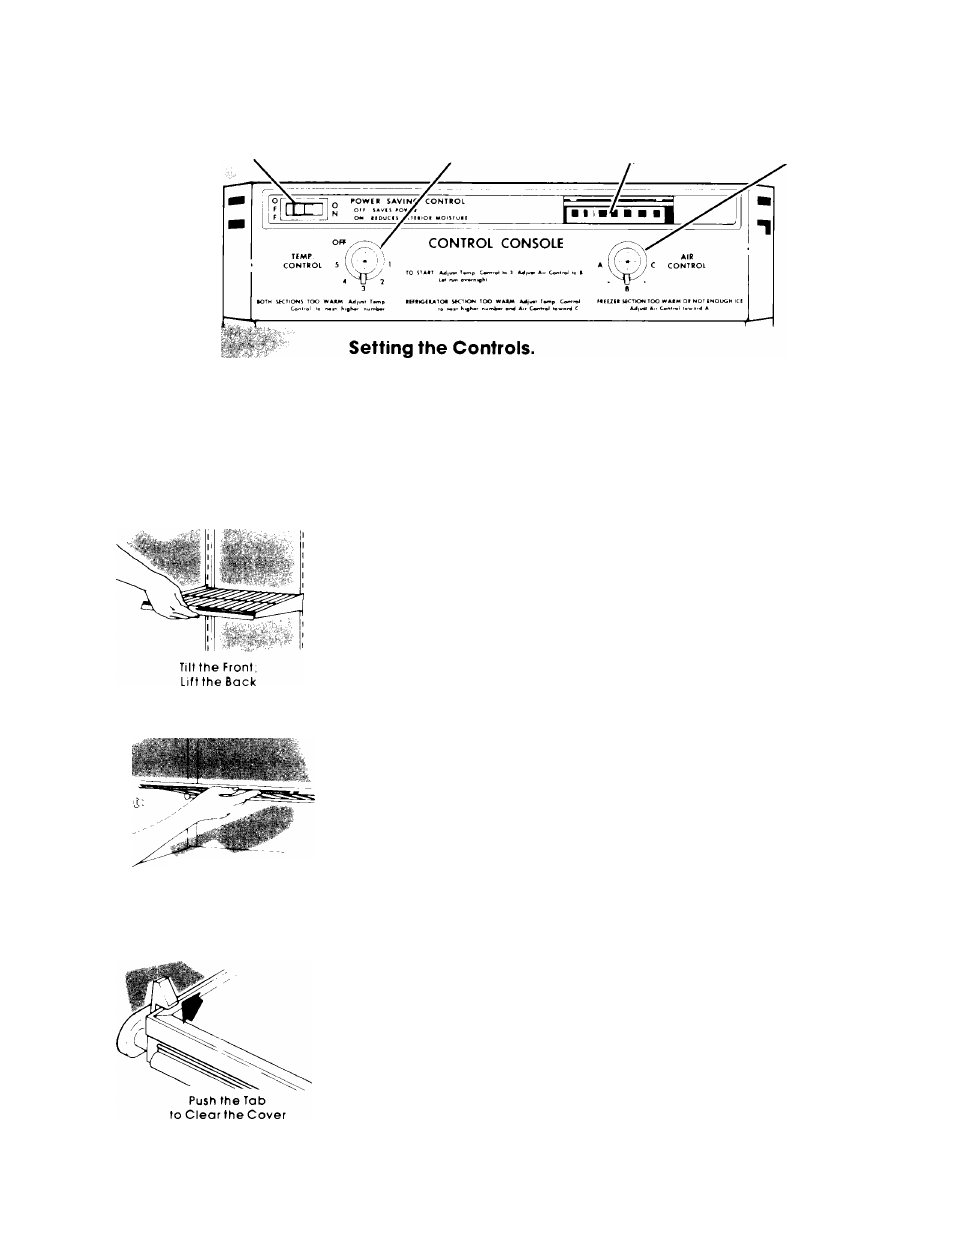
Power Saving Control Temperature Control Dial - Set an 3
Air Outlet Air Control - Set on B
Lift the Front;
Then the Back
The Temperature Control and Air Control dials are on a console
inside the refrigerator. To startthe refrigerator, turn the TEMP CONTROL
dial to 3 and the AIR OONTROL dial to B. These are normal settings.
It takes time for your refrigerator to reach proper storage temper
atures. When you first turn it on, it will run continuously until the interior
gets properly cold. Before loading with food, be sure the refrigerator
has cycled at least once (turned on, turned off, and on again).
Controls will be set about right if your milk or juice is as cold as your
family likes it, and when ice cream is firm.
The control console has directions for raising or lowering the tem
peratures, If needed
Power Saving Control.
The Power Saving Control inside your refrigerator controls electric
heaters These heaters help prevent moisture from forming on the
outside of the refrigerator when humidity is high. Use the OFF setting
when humidity is low. Use ON if moisture forms on the outside of the
refrigerator.
Adjusting the Shelves and Meat Pan.
Arrange your refrigerator shelves and meat pan to suit yourself.
You can put two shelves together to make one full-width shelf, or put
them on different levels.
To remove them, tilt up at the front Then lift up at the back. When
replacing them, keep them tilted; guide the rear hooks into the slots
in the shelf bracket. Lower the front.
Before moving the meat pan itself, remove the pan by pulling it
out, lifting the front and then pulling out the rest of the way.
Removing Non-Adjustable Shelves.
To remove a shelf, lift up the front. Then lift up at the back. To
replace it, put the rear notches onto the shelf supports. Lower the
front into place
Removing the Crispers and Crisper Covers.
To remove the crispers, slide them out until they stop. Lift the front a
little and slide them the rest of the way out.
Each cover is held in place by two pegs at the back and two
notched tabs in the front. Press the tabs out of the way to lift the front
Lift the back oft the pegs
To put the covers back, replace the center leg. Replace each
cover by first fitting the back notches over the pegs Then push the
front down into the notched tabs.
The center leg can be made shorter or longer to help level the
crisper covers, if necessary Turn the leg clockwise to make it longer.
Turn it counter-clockwise to shorten it.