Set up, Instructions for use, Assembly – Bullet Tools Magnum SHUT-N-CUT (1901-26-01) User Manual
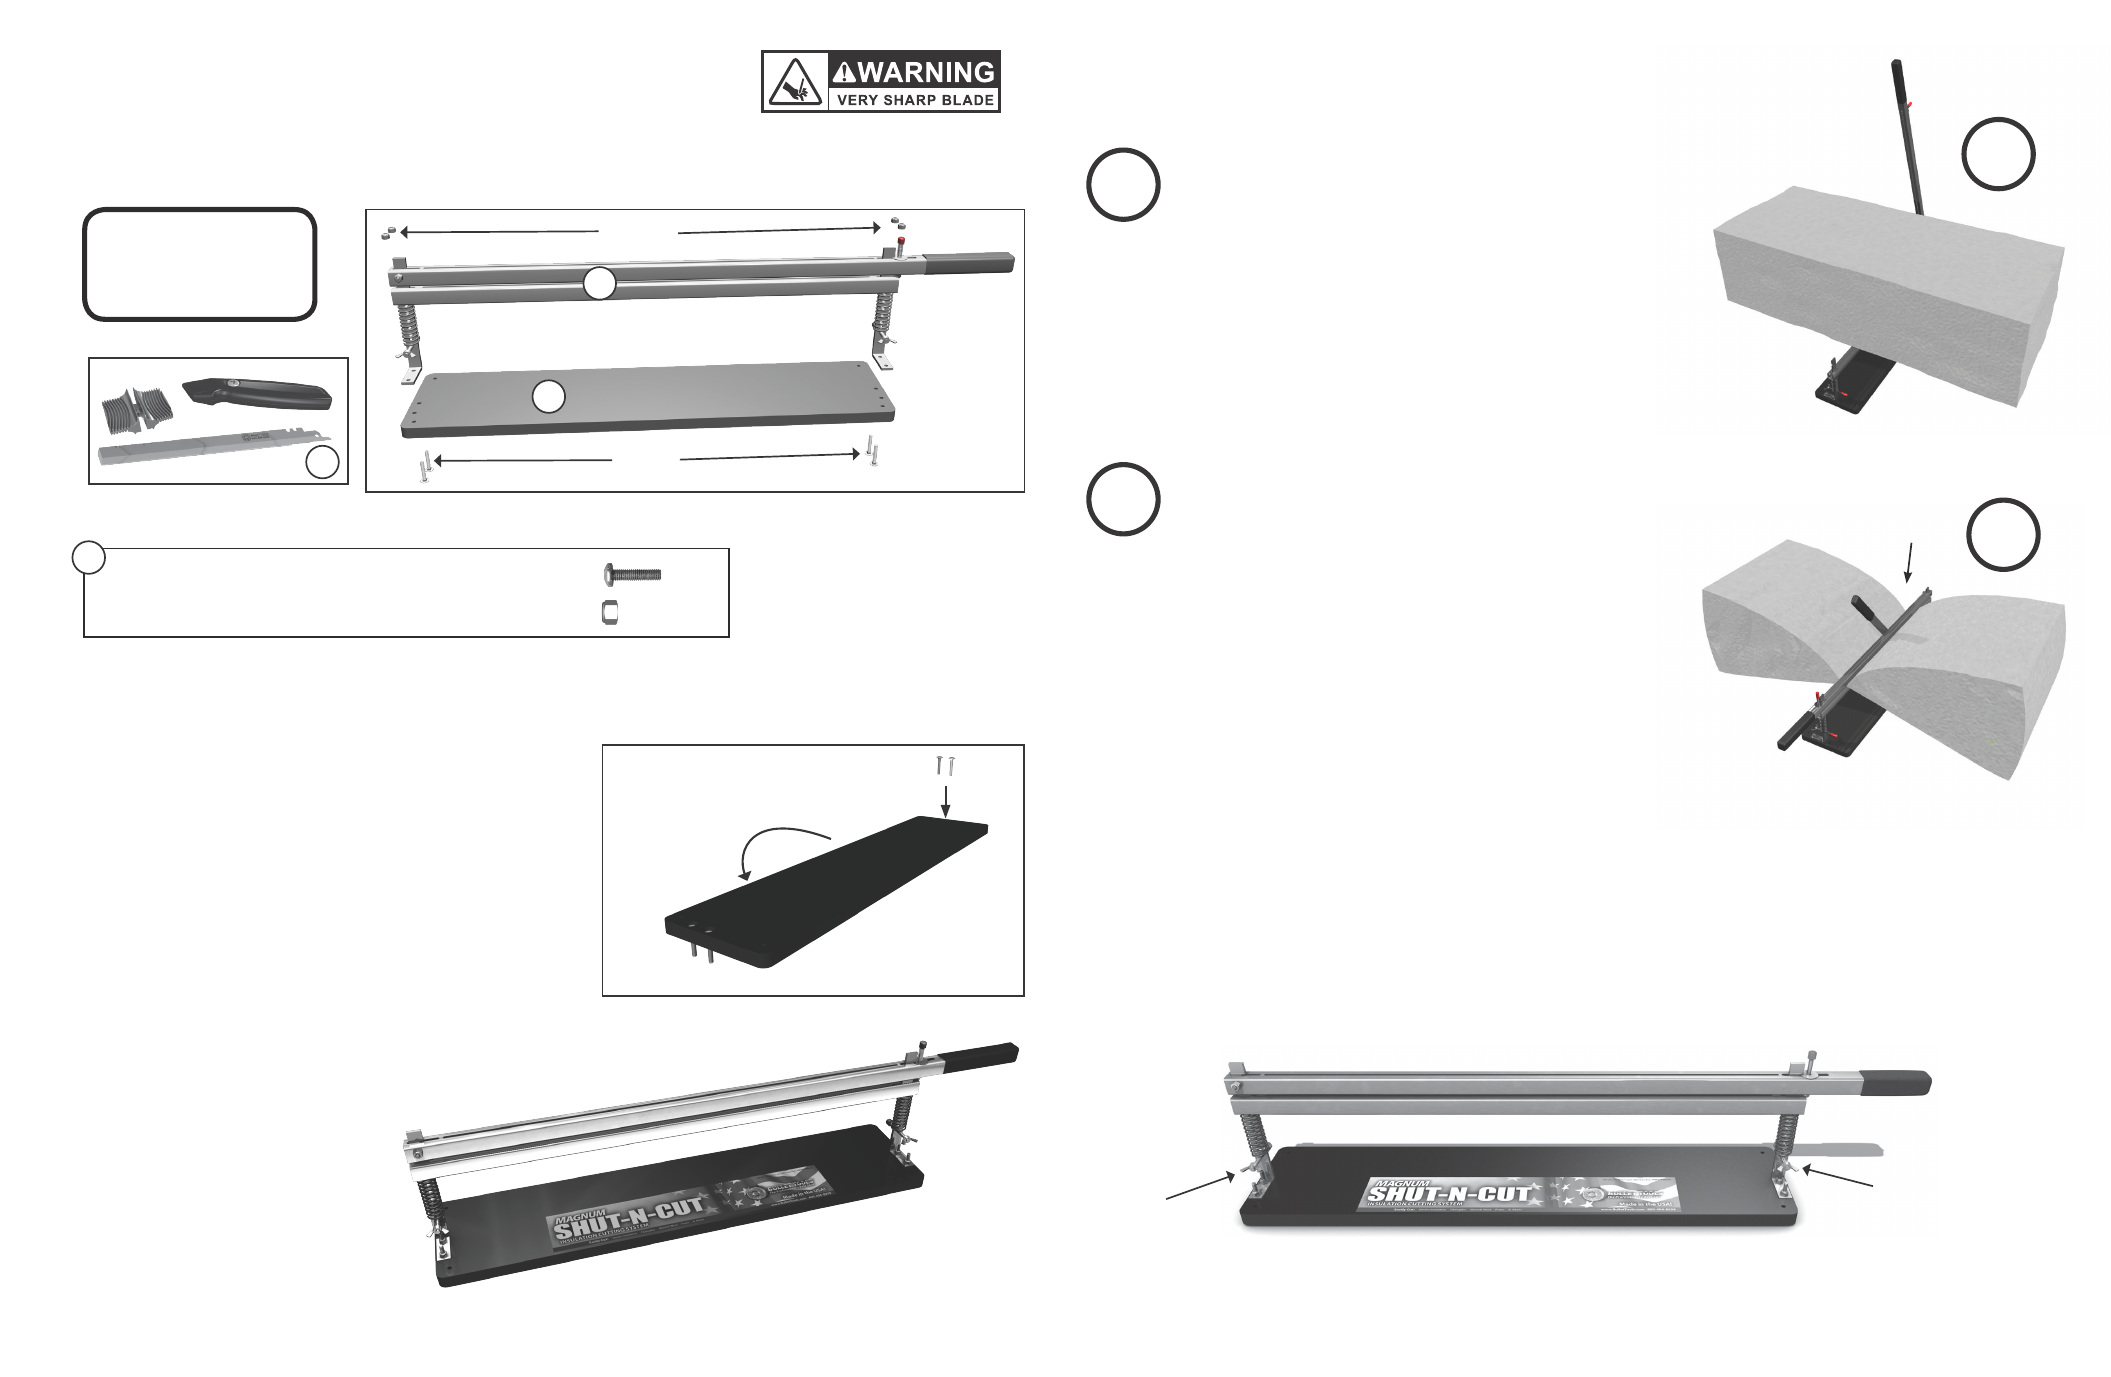
Page 2: Hardware kit
INSTRUCTIONS FOR USE
Insert knife
in slot
Clamp Pressure Adjustment
1) Remove the wingnuts.
2) Move the spring-rest pins to the desired setting.
For very low pressure, remove the pins completely.
3) Replace the wingnuts.
STEP 1: With Deck upside down, insert four Item A
screws through the four holes in the Deck. Turn Deck
back over and set on a level surface.
STEP 2: Align the Clamp Assembly
and secure to Deck using the four
screws and four Item B nuts. Do
not over tighten. Cut zip tie after
mounting.
Screws
Deck
Turn Over
ASSEMBLY
SET UP
WELCOME! YOUR MAGNUM SHUT-N-CUT COMES READY TO ASSEMBLE.*
*You will need a #3 Phillips head screwdriver
and a 7/16” (11mm) socket or wrench.
Please Review and Verify Parts Included in Box:
HARDWARE KIT:
1. Clamp Assembly
2. Base
3. Knife Kit
4. Hardware Kit
Item A. (4) 1/4”-20 x 1-1/2” PH Phillips Screws
Item B. (4) 1/4”-20 Nuts
A.
B.
• Pull back on the red-capped Lock Lever to unlock the Clamp
Arm. Pivot the Clamp Arm to the full-open position.
• Set insulation on the lower Clamp Bar so that the cutting slot
is in-line with the desired cut.
1
1
2
2
• Close the Clamp Arm to compress the product, pressing
down until the Lock Lever engages.
• Insert the EZ Insulation Knife (included) into the cutting
slot on the Clamp Arm.
• Cut through the insulation product with a sawing motion,
drawing the blade toward you.
wingnut
Item B
Item A
wingnut
1
3
4
2