Buick 2006 Rainier User Manual
Page 397
3. Loosen the cable by turning the wheel wrench
counterclockwise three or four turns.
4. Repeat this procedure at least two times.
If the spare tire lowers to the ground, continue
with Step 2 of Removing the Spare Tire and Tools
on page 5-72.
5. Turn the wrench counterclockwise until
approximately 6 inches (15 cm) of cable is exposed.
6. Attach the jack handle, extension(s) and the wheel
wrench to the jack and place it under the vehicle
towards the front of the rear bumper. Position
the center lift point of the jack under the center
of the spare tire.
7. Turn the wrench clockwise to raise the jack until it
lifts the end fitting.
8. Continue raising the jack until the spare tire stops
moving upward and is held firmly in place. The
secondary latch has released and the spare tire is
balancing on the jack.
9. Lower the jack by turning the wheel wrench
counterclockwise. Keep lowering the jack until the
spare tire slides off the jack or is hanging by
the cable.
10. Disconnect the jack handle from the jack and
carefully remove the jack. Use one hand to push
against the spare while firmly pulling the jack out
from under the spare tire with the other hand.
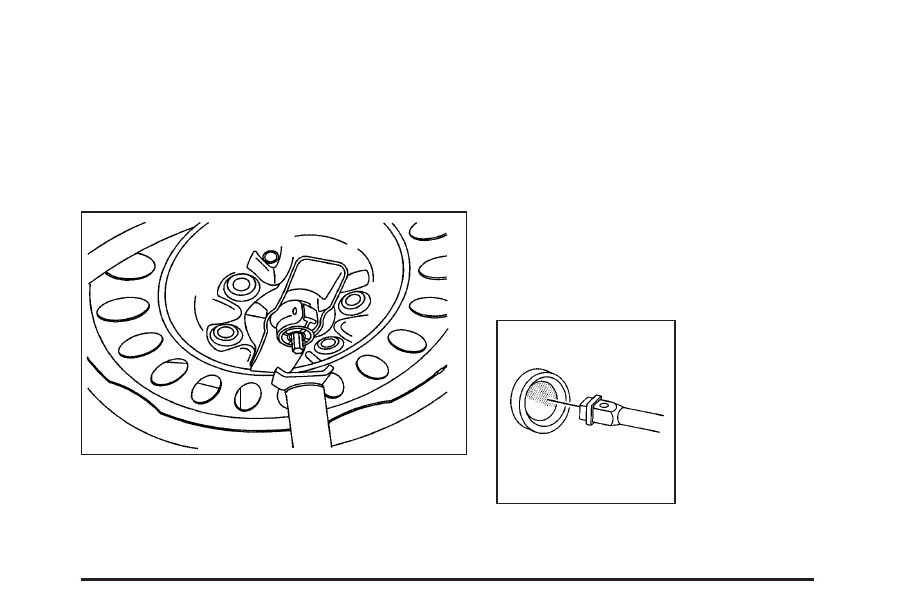
11. If the spare tire is
hanging from the
cable, insert the socket
end of the extension
connected to the
wheel wrench into the
hoist shaft hole just
above the rear bumper
on a 45 degree
angle downward.
5-81