American Diagnostic Corporation (ADC) 424 Adtemp User Manual
Page 3
ment itself. If damaged, do not attempt to repair the instrument!
• Earwax in the ear canal may cause a lower temperature reading. Make sure subject's ear
canal is clean to ensure an accurate reading. Use caution when cleaning ears.
• The ADC® 424 Digital Ear Thermometer consists of high quality precision parts. Protect
it from severe impact and shock. Keep the unit in its storage case when not in use.
WARNING:
• Please keep the probe covers out of the reach of children. They may present a choking hazard.
• Use of this thermometer is not intended as a substitute for consultation with your physician.
• This thermometer is not waterproof! NEVER immerse into liquids!
• Cleaning the ear canal using improper techniques can harm the inner ear. Follow doctors
instructions for proper cleaning.
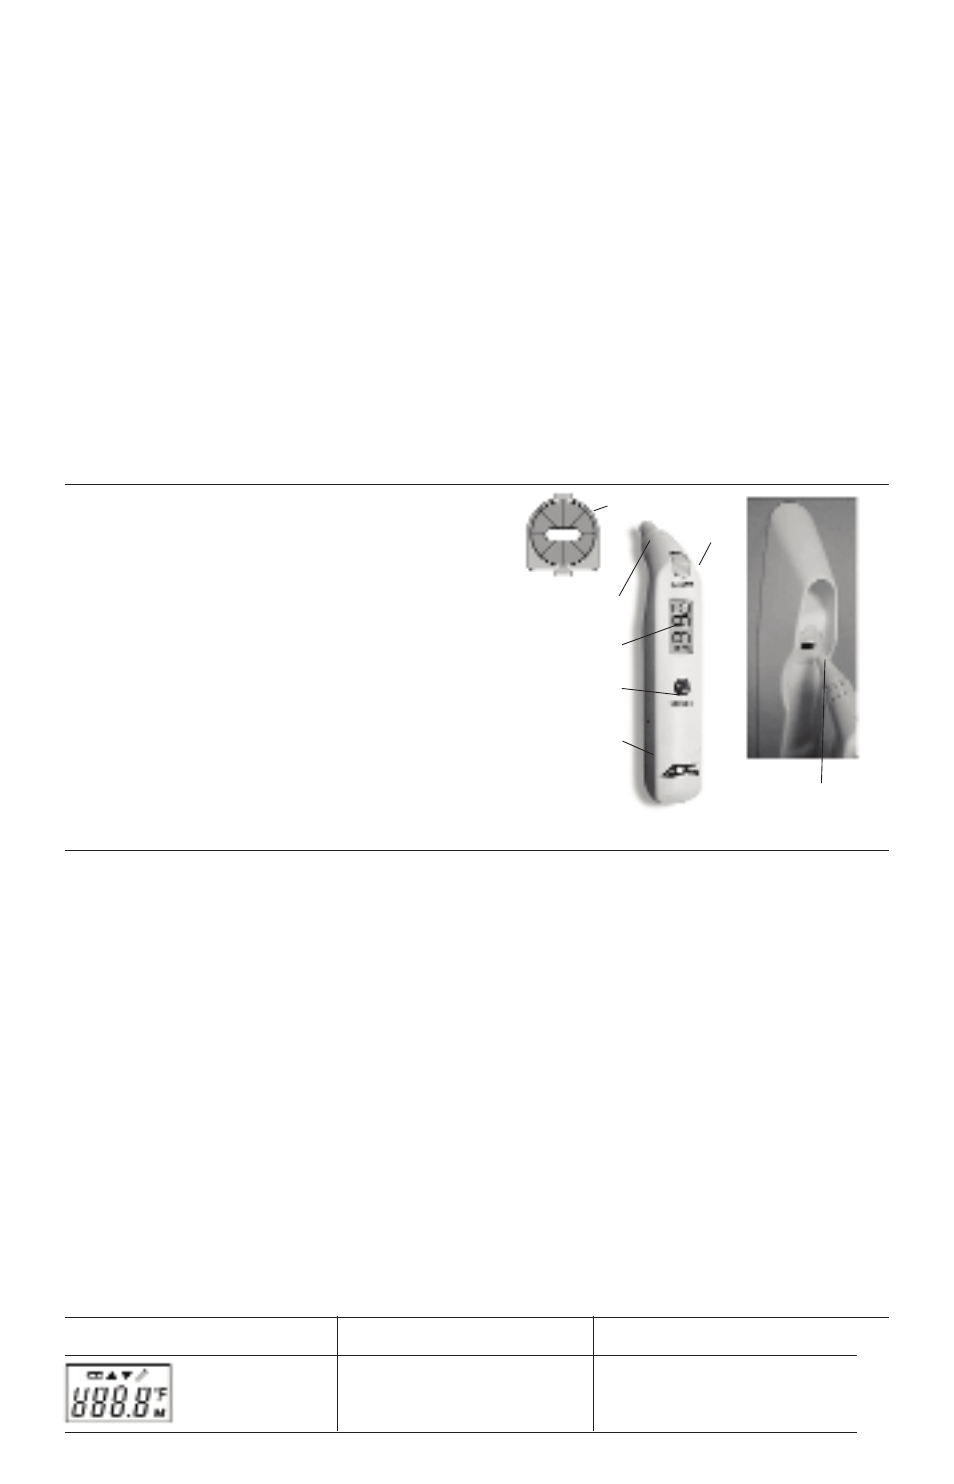
3. Product Description
(1)Probe Cover
(2)Probe
(3)Start button/ mode change
(4)Display
(5)ON/OFF button
(6)Battery Cover
(7)Storage case/ probe cover applicator
4. How to Measure Body Temperature
The ADC® 424 Digital Ear Thermometer measures the heat radiated from the eardrum
and the surrounding tissue. This energy is collected through the lens and converted to a temperature
value. The measured reading obtained directly from the eardrum (Tympanic Membrane) can ensure
the most accurate body temperature. Measurements taken from the surrounding tissue of the ear canal
generate lower readings and may result in misdiagnosis of a fever.
To avoid an inaccurate measurement:
Use ONLY ADC® probe covers, as this unit is calibrated to work with probe covers.
•
Straighten the ear canal by gently pulling the middle of the ear back and up. This en-
•
sures measurement of heat from the eardrum. (Please note: Pull outer ear out for new-
borns - age 1)
Place the probe firmly into the ear canal. Press the Start button and keep the probe in the
•
ear until the thermometer beeps to indicate completion of the measurement.
The 424 Digital Ear Thermometer has been clinically tested and proven to be safe and
•
accurate when used in accordance with operating instructions.
5. How to Read the Display
Display
Display Meaning
Description
(1)
(2)
(3)
(4)
(5)
(6)
(7) Probe Cover
Applicator Hole
Seen when you turn
on the unit.
Shown for 2 seconds.
Self-check ensures
proper functioning
Press the ON/OFF button to turn on
the unit. All icons will be
shown for 2 seconds.