Jaclo Lumiere Circolare horizontal stripes - 12R-LH-101 User Manual
Page 2
JACLO.COM
| PG 2
LUMIERE CIRCOLARE
1 › Shower requires 1/2” female IPS connection in ceiling
2 › Roughing: Requires open box in ceiling approximately
1” smaller in diameter then top shade support.
Blocking will be required in center for shower arm
flange mounting.
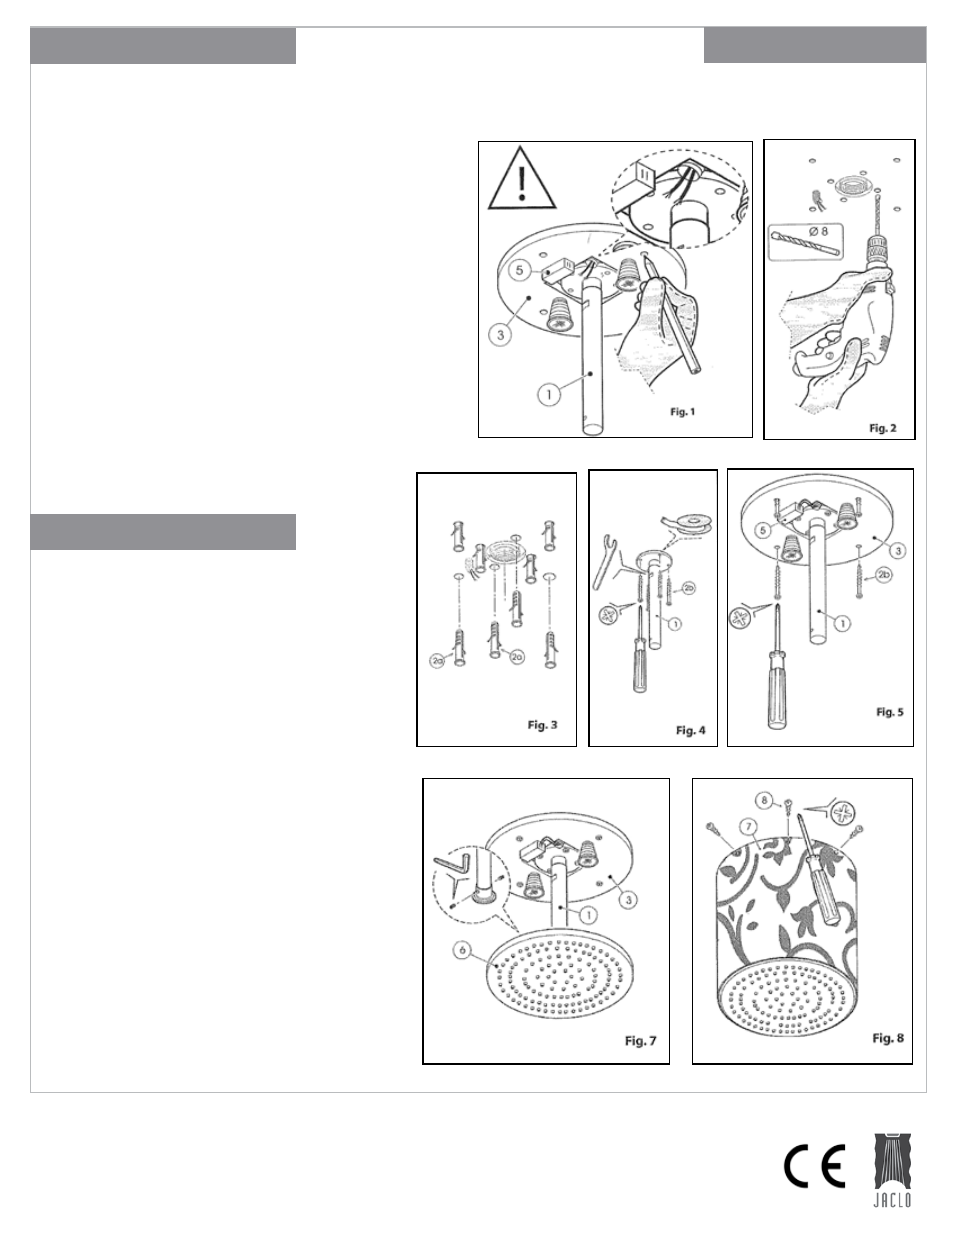
3 › Insert the top shade support centering the hole with
the ceiling arm support flange and mark all the fixture
holes ( Fig. 1 ).
4 › Make holes in the ceiling ( Fig. 2 ) and mount the
expansion bolts ( Fig. 3 ).
5 › Apply Teflon to the threaded end of the 1/2” shower
arm, then screw it onto the water intake and, using
screws 2b, secure the support flange to the ceilling
( Fig. 4 ).
6 › Fix the top shade support (3) to the ceiling using
screws 2b ( Fig. 5 ).
8 › Mount the shower head to the shower arm
using the two set screws. ( Fig. 7 ).
9 › Put the cover on (7) and secure it to the ceiling
support (3) with screws (8). ( Fig. 8 ).
Power connection: arrange your shower box with the
electrical connection for the showerhead LED lights,
placing it above the false ceiling (Fig. 1). Warning: The
electrician must use a power cable that is two-pole, 1
mm2 size, outside diameter between 5 and 13 mm.
Power source must be externally switched
GFCI circuit and must be installed in accordance
with local and national codes.
The transformer: 7VDC / 110VAC / 60Hz must be
installed outside the shower box in a safe place (Fig. 1).
Turning the LED lights on: LEDs are devices that
generate monochromatic light. For them to work
properly, they need only a small amount of power
supply and voltage and therefore use little energy and
run on low temperatures
INSTALLATION INSTRUCTIONS
ELECTRICAL EQUIpMENT
pOwER REQUIREMENTS
110 VAC 2AMP GFI branch circuit
Note: GFI outlet must be installed in
accesible location.