Jaclo 16" x 20 Rettango spa rain canopy - 1620-RC" User Manual
Page 3
JACLO.COM
| PG 3
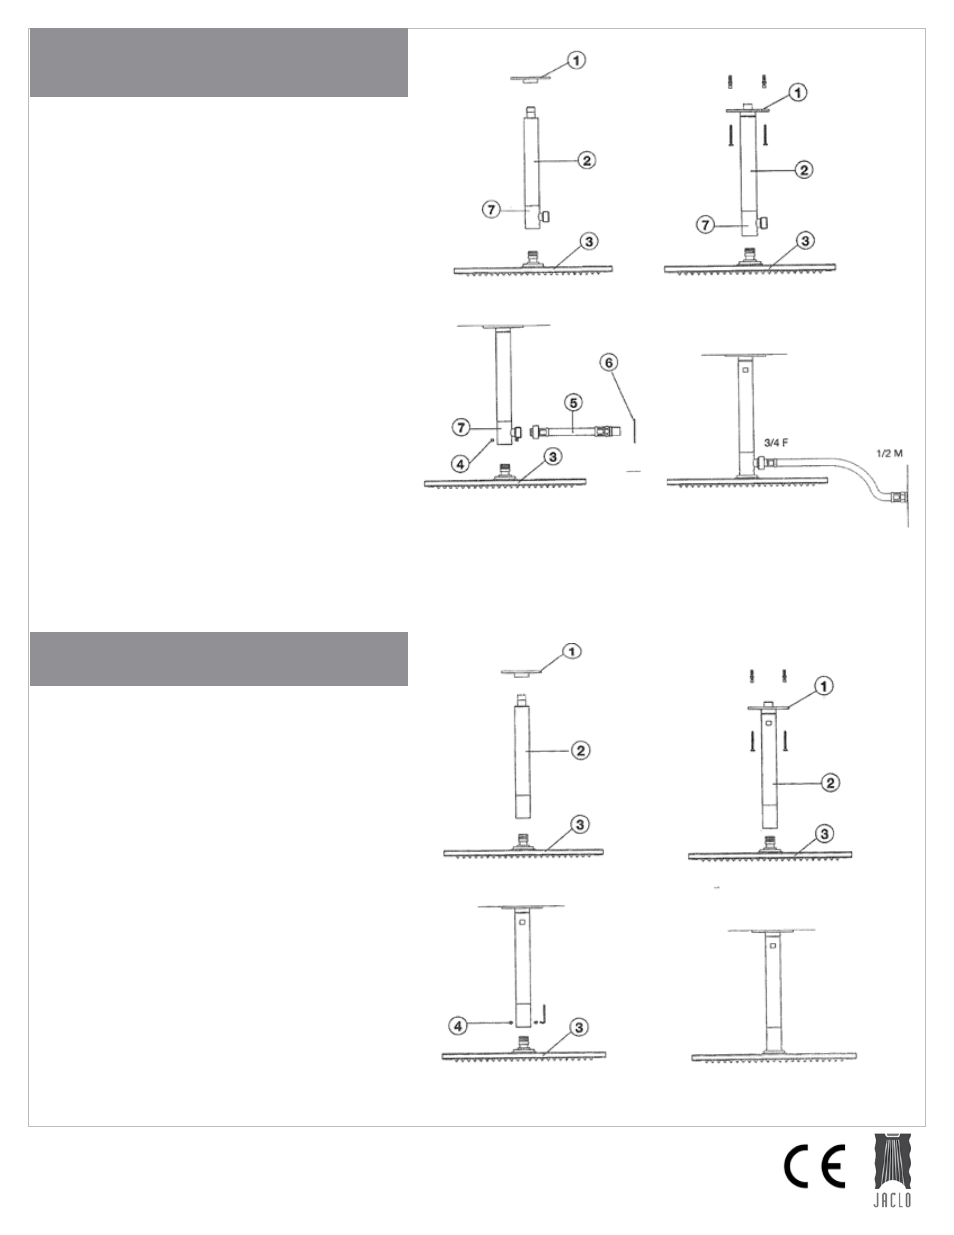
RAIN CANOPY
Screw flange (1) onto the ½" male arm (2).
Cut the ½" male thread portion extending
out of the flange.
Put flange and arm set against the ceiling
and mark with a pencil the corresponding
fixation holes.
Drill the four fixation holes using a 8mm bit.,
then secure the arm and flange set to ceiling
by mean of the four screws included in the
package.
Snap-in shower head (3) onto connection (7)
mounted on the arm end (2). Tighten the two
grab screws (4) with Allan key.
Finally screw the ¾" female hose end (5) to
connection (7) and connect the outer hose
end with ½" male nut and flange (6) to wall
water outlet.
Screw flange (1) onto the ½" male arm (2)
and temporarily mount the arm on the ceiling.
Mark with a pencil the corresponding fixation
holes.
Remove the arm and flange from ceiling and
drill the four fixation holes using a 8mm bit.
Screw flange (1) onto the arm and mount
again on the ceiling, then secure by mean of
the four screws included in package.
Finally mount onto arm (2) the shower head (3)
provided with snap-in connection and tighten
the two grab screws (4) with Allan key.
INSTALLATION INSTRUCTIONS
ShOweRheAd wITh CeILINg wATeR INLeT ARM
INSTALLATION INSTRUCTIONS
ShOweRheAd wITh CeILINg fIxATION ARM
ANd fLexIbLe wALL CONNeCTION