Jaclo 16" Quadrato dream light rain canopy - 1616-DLRC User Manual
Page 3
JACLO.COM
| PG 3
LUXURY DREAM LIGHT
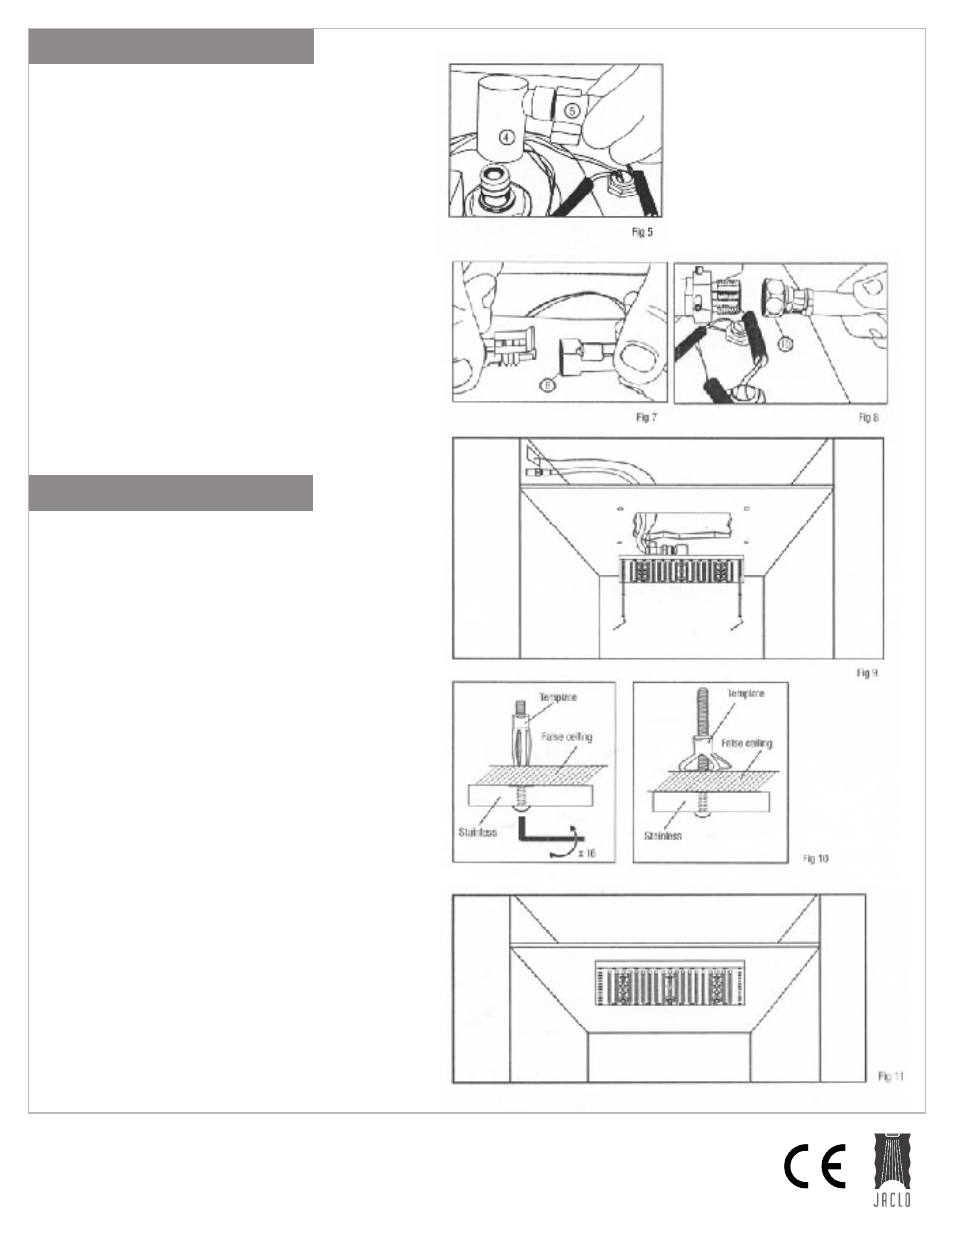
Make the beak-through (Fig.3).
Insert the 4 expansion screws and make sure that
they are placed accurately (Fig.4).
Insert the quick disconnect coupling (4), complete
with flow switch (5) to the showerhead, and block
the Allen screws using their wrench (15), (Fig.5).
Connect the bipolar connector sockets (6) (Fig.7).
Connect one end of the hose (10) to the flow switch
(5) and the other end to the water supply line on the
wall (Fig.8). If there is a 1/2"F wall connection, use
the adaptor (14) 1/2"M x 1/2"M that is included.
Lay the showerhead in correspondence of the four
expansion screws that were previously inserted
in the false ceiling, and tighten the 4 screws (12)
included (Fig.9) until the showerhead is properly
fitted to the false ceiling (Fig.11). Make sure that the
screws are fully tightened, about 16 full turns every
screw (Fig.10).
1
›
Electric connection
110VAC / 60Hz
2
›
Electric cable
bipolar, 1 mm
2
size, outside diameter 5 mm to
13 mm (supplied by customer)
3
›
Dream Rectangular lights 500x400 mm
12 low voltage LEDs
4
›
Dream Cube lights 400x400 mm
10 low voltage LEDs
5
›
Dream OKI lights, 400 mm dia.
8 low voltage LEDs
6
›
Safety Transformer
7VDC / 110VAC
7
›
Type of connector protection
bipolar IP 68
8
›
Safety mark
CE
The electrical systems must be installed by
a qualified technitian in accordance with the
national and international laws in force.
SHOWERHEAD INSTALLATION
TECHNICAL SPECIFICATIONS