Cub Cadet GT-2544 User Manual
Page 39
39
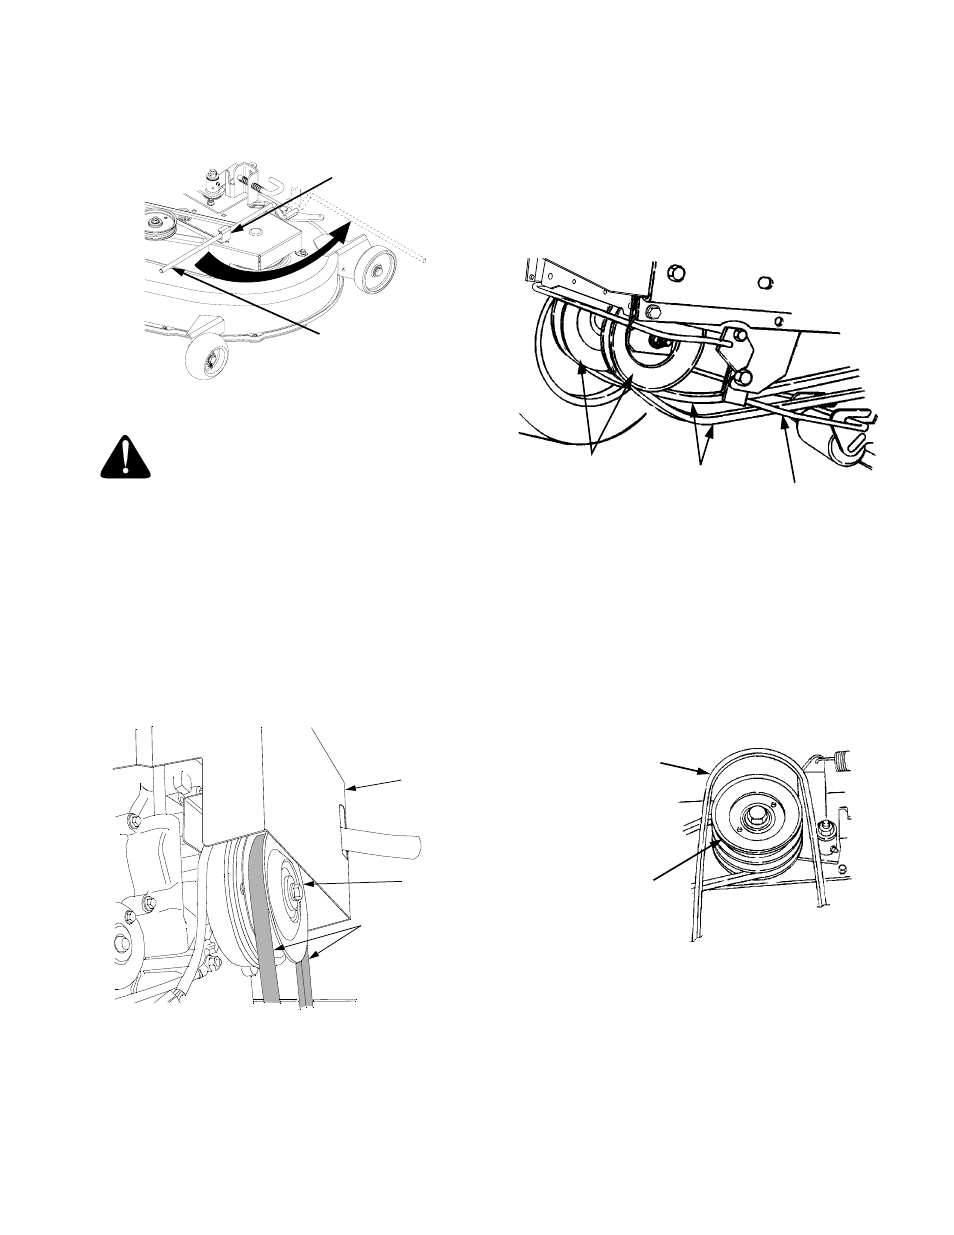
10. Disengage the deck idler arm lever from its stop
bracket and release the spring tension by rotating
the lever out and rearward (See Figure 48).
Figure 48
WARNING: The exhaust system is HOT.
To avoid personal injury, allow the
engine and exhaust system to cool
before proceeding with the following
PTO belt installation instructions.
11. Open the tractor hood. From the front of the tractor
pass the belt upward in front of the lower front
pulleys and inside the tractor frame (Refer to
Figure 50).
12. Loop the PTO belt with the narrow side of the ‘V’
belt inward; then maneuver the loop of the belt up
between the front of the PTO pulley and the heat
shield on the front of the engine, and place the belt
into the groove of the PTO pulley. See Figure 49.
Figure 49
13. Twist the two sides of the PTO belt 1/4 turn inward
to engage the narrow sides of the belt into the
grooves of the two tractor front-lower pulleys (See
Figure 50).
14. Route the PTO belt through the center of the front
lift rod, toward the center of the deck. Ensure that
the forward end of the belt remains positioned
inside the front lower pulleys.
Figure 50
15. Working from the left/rear of the mower deck,
install the rearward end of the PTO belt on the
upper pulley of the deck center double-pulley (See
Figure 51). Ensure that the narrow side of the belt
engages the groove of the upper pulley, and that
there is no more than a 1/4 twist in the belt
between the front pulleys and the double pulley.
Figure 51
IDLER ARM
LEVER
LEVER STOP
BRACKET
PTO
CLUTCH
PULLEY
PTO
BELT
HEAT
SHIELD
TRACTOR FRONT
LOWER PULLEYS
PTO BELT
FRONT LIFT
ROD/BRACKET
ASSEMBLY
MOWER DECK
CENTER DOUBLE
PULLEY
PTO BELT
FRONT OF DECK