Changing the engine oil – Cub Cadet GT-1554 User Manual
Page 19
19
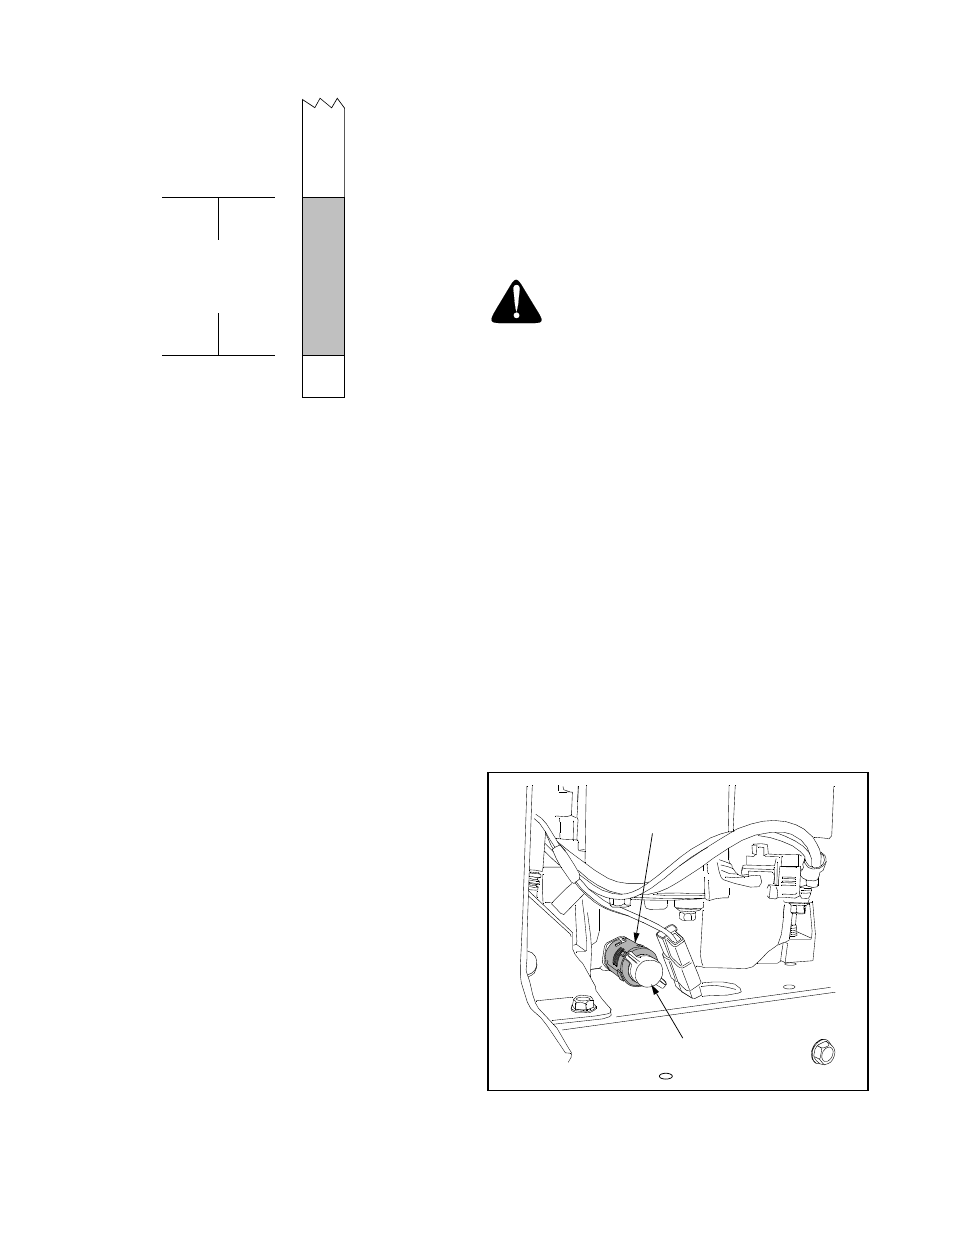
Figure 15
•
Always keep the oil level at or near the FULL mark
on the dipstick. If the oil is low, add oil of the proper
type up to the FULL mark. Always re-check the oil
level with the dipstick before adding more oil.
IMPORTANT:
Never operate the engine with the oil level
below the ADD mark or above the FULL mark on the
dipstick.
•
After checking the oil level (and adding oil, if neces-
sary), insert the oil fill cap/dipstick into the oil fill
tube and turn clockwise until tightened.
Adding Oil
If, after checking the oil level, you find the dipstick reads
ADD, proceed as follows.
•
Place the tractor on a level surface and engage the
parking brake. Stop the tractor engine and remove
the ignition key.
•
Clean the area around the oil fill cap and fill tube to
prevent debris from entering the crankcase.
•
Remove the oil fill cap/dipstick from the oil fill tube
and SLOWLY pour oil into the oil fill tube. Do NOT
pour more than 6 oz. of oil at a time without first
stopping and re-checking the oil level.
•
Fill the crankcase until the oil level reaches the full
(Full) mark on the dipstick. Refer to Figure 15.
Refer to the viscosity oil chart earlier in this section
for information regarding the proper type of oil to
add to the crankcase.
IMPORTANT:
The engine (w/oil filter) has a capacity of
2.1 qts. (2.0 liters). Never overfill the engine crankcase.
IMPORTANT:
The engine may overheat and/or damage
may result if the oil level is below the ADD or over the
FULL on the dipstick.
•
Reinstall the oil fill cap/dipstick securely onto the oil
fill tube.
IMPORTANT:
The oil fill cap/dipstick must be installed
securely onto the tube at all times when the engine
is operating. Severe engine damage could result from
failure to do so.
Changing the Engine OIl
The engine oil and oil filter should be changed after the
first 24 hours of operation, and after every 100 hours of
operation thereafter.
WARNING:
If the engine has been recently
run, the engine, muffler and surrounding
metal surfaces will be hot and can cause
burns to the skin. Allow the tractor to cool and
use caution when removing
IMPORTANT:
The oil filter should be changed at every
oil change interval.
To complete an oil change, proceed as follows:
Draining the Oil
Run the engine for a few minutes to allow the oil in the
crankcase to warm up. Warm oil will flow more freely
and carry away more of the engine sediment which may
have settled at the bottom of the crankcase. Use care to
avoid burns from hot oil.
•
Pop open the protective cap on the end of the oil
drain valve to expose the drain port. See Figure 16
•
Remove the oil fill cap/ dipstick from the oil fill tube.
•
Push the oil drain hose (packed with this manual)
onto the oil drain port. Route the opposite end of
the hose into an appropriate oil collection container
with a capacity great enough to collect the used oil
(approximately 2.5 liters).
•
Push the oil drain valve in slightly, then rotate
counterclockwise and pull outward to begin
draining oil.
Figure 16
FULL
ADD
Operating Range
Engine
Oil Drain
Oil Drain Cap