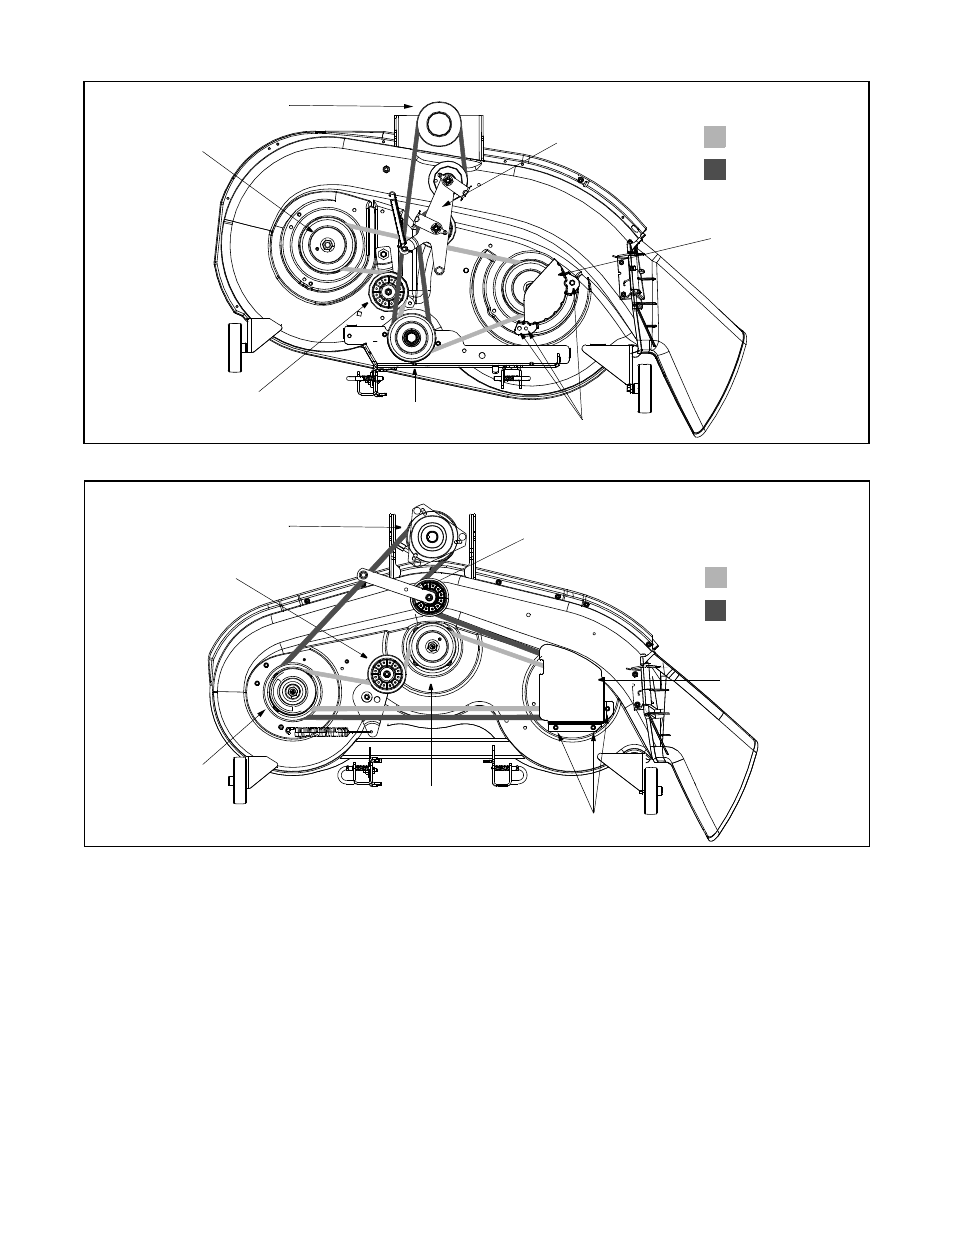
Models with manual pto, Models with electric pto – Cub Cadet CLT-160 User Manual
Page 25
25
Figure 25
Figure 26
Upper Drive Belt
•
Locate the transmission idler pulley on the upper
drive belt by looking through the battery tray
opening. See Figure 27.
•
Grasp the bracket and pivot the transmission idler
pulley toward the rear of the tractor to release
tension on the upper drive belt.
•
Remove the belt from around the transmission idler
pulley.
•
Remove the upper drive belt from around the
transmission pulley and the variable-speed pulley.
NOTE:
Slowly rotate the pulley counterclockwise to
roll the belt off of it.
•
Remove the upper drive belt by pulling it up through
the battery tray opening.
•
Reroute the new upper drive belt as shown in
Figure 27.
Lower Drive Belt
IMPORTANT:
Proper removal of the lower drive belt
requires the removal of several tractor components.
Read through the following procedure prior to
attempting it to determine if you feel you could
successfully complete it. If you don’t, see an authorized
service dealer to have the belt changed.
IMPORTANT:
Note the routing of the lower drive belt
around both the pulleys and the belt keepers BEFORE
performing the following steps.
Engine Pulley
PTO Idler Bracket
Left Hand Pulley
Right Hand Pulley
(beneath belt guard)
Center Pulley
Deck Idler Pulley
Self-Tapping Screws
(mounted on tractor)
NOTE:
Left hand belt cover not shown for clarity.
Models with Manual PTO
Deck belt (Bottom)
PTO belt (Top)
Electric PTO Clutch
Left Hand
Double Pulley
Right Hand
Double Pulley
Center Pulley
Deck Idler Pulley
Self-Tapping Screws
(beneath belt guard)
PTO Idler Bracket
(mounted on tractor)
NOTE:
Left hand belt cover not shown for clarity.
Deck belt (Bottom)
PTO belt (Top)
Models with Electric PTO