Cutting deck removal, Changing the mower deck belts – Cub Cadet 1529 User Manual
Page 26
26
It can be found under the hood mounted behind the top
of the dash panel on the support bar. Pull the fuse out
and inspect it to determine if it is good or blown.
IMPORTANT:
Always use a fuse with the same
amperage capacity for replacement.
WARNING:
Before servicing, repairing, or
inspecting, always disengage PTO, set
parking brake, stop engine and remove key to
prevent unintended starting.
Cutting Deck Removal
To remove the cutting deck, proceed as follows:
•
Place the PTO knob in the disengaged (OFF)
position and engage the parking brake.
•
Lower the deck by moving the deck lift lever into the
bottom notch on the right fender.
•
Working from the right side of the tractor, just
behind the front wheel, pull the PTO idler pulley
away from the backside of the PTO belt and slide
the belt off the idler pulley. Carefully release the
spring tension from the idler pulley/bracket. Refer to
Figure 27.
•
Remove the PTO belt from around the tractor’s
electric PTO clutch. Refer to Figure 27.
•
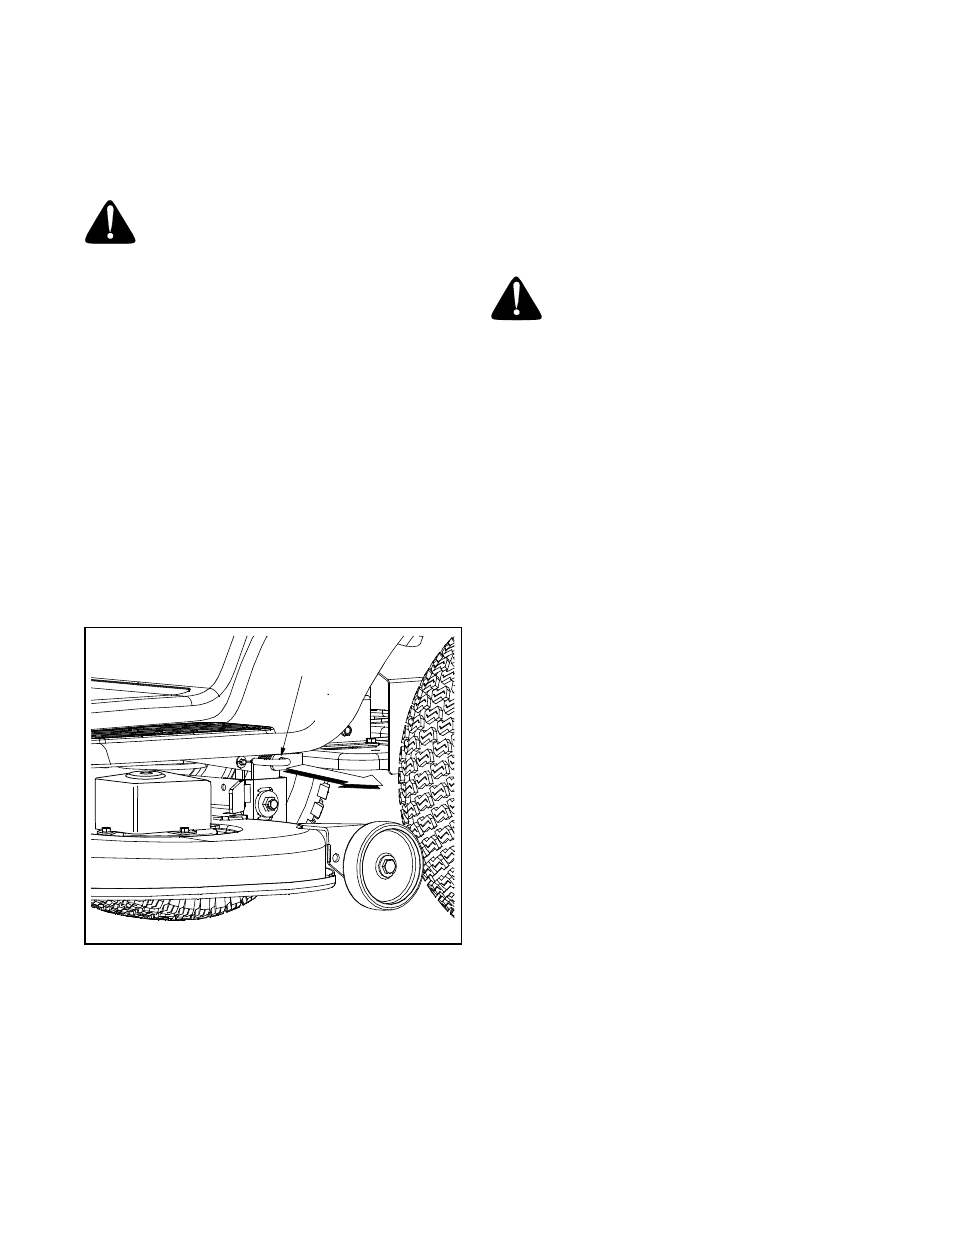
Looking at the cutting deck from the left side of the
tractor, locate the deck support pin on the rear left
side of the deck. Refer to Figure 26.
Figure 26
•
Pull the deck support pin outward to release the left
side of the deck from the deck lift arm. See Figure
26.
•
From the right side of the tractor release the right
side of the deck by pulling the right deck support pin
outward.
•
Move the deck lift lever into the top notch on the
right fender to raise the deck lift arms up and out of
the way.
•
Gently roll the cutting deck toward the front of the
tractor to allow the deck stabilizer rod to be lifted out
of the hook slots on the front of the deck.
•
Using care to prevent the stabilizer rod from falling
back into the hook slots, gently slide the cutting
deck (from the right side) out from underneath the
tractor.
Changing the Mower Deck Belts
WARNING:
Be sure to shut the engine off,
remove ignition key, disconnect the spark
plug wires to prevent unintended starting
before removing the belts.
All belts on your tractor are subject to wear and should
be replaced if any signs of wear are present.
IMPORTANT:
The V-belts found on your tractor are
specially designed to engage and disengage safely.
Usage of a substitute (non-OEM) V-belt can create an
extremely dangerous situation by not disengaging
completely. For your safety and for a properly working
machine, use ONLY the factory approved belts.
Changing the PTO Belt
To replace the PTO belt, proceed as follows:
•
Lower the deck by moving the deck lift lever into the
bottom notch on the right fender.
•
Working from the right side of the tractor, just
behind the front wheel, pull the PTO idler pulley
away from the backside of the PTO belt and slide
the belt off the idler pulley. Carefully release the
spring tension from the idler pulley/bracket. Refer to
Figure 27.
•
Remove the PTO belt from around the tractor’s
electric PTO clutch. Refer to Figure 27.
•
Remove the belt guards from above the two outer
deck spindles by removing the self-tapping screws
that fasten them to the deck. See Figure 27.
•
Route the new belt as shown in or Figure 27.
•
Remount the belt guards removed earlier.
Changing the Deck Drive Belt
To replace the deck drive belt, proceed as follows:
•
Remove the cutting deck from the tractor following
the instructions provided earlier in this section.
•
Remove the belt guards from above the two outer
deck spindles by removing the self-tapping screws
that fasten them to the deck. See Figure 27.
•
Remove the PTO belt from the deck.
•
After first noting the routing of the deck belt, pull the
deck idler pulley away from the backside of the
deck belt to relieve the belt tension.
•
Lift the deck belt up above the idler pulley and
carefully release the spring tension from the idler
pulley/bracket. Refer to Figure 27.
•
Remove the deck belt from around all pulleys.
Support Pin