Setup and adjustment, Warning – Cub Cadet V469 User Manual
Page 7
7
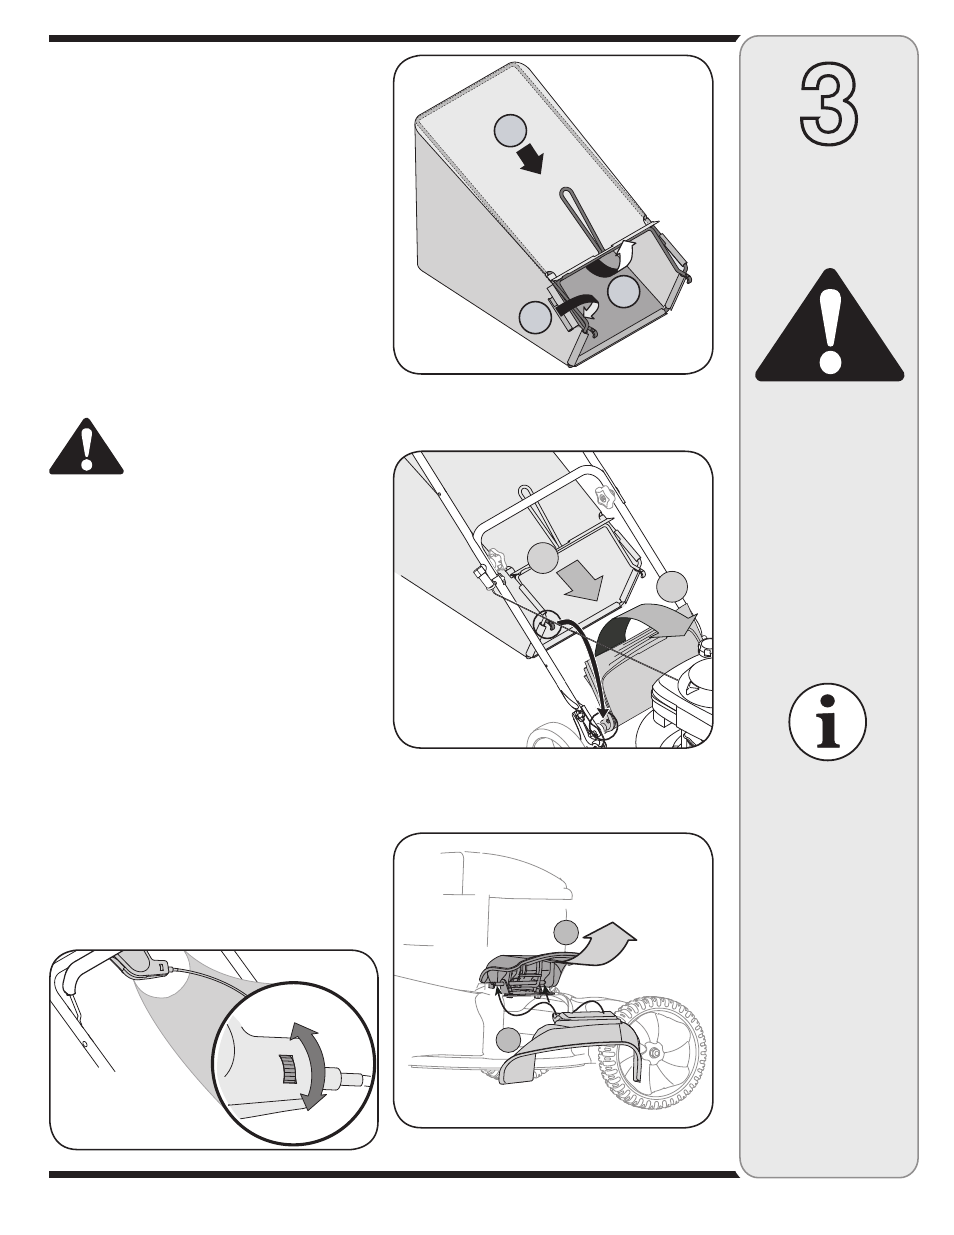
Figure 3-5
CUTTING HEIGHT
Step 5
All wheels must be
placed in the same
relative position.
GRASS CATCHER
Step 6
Make certain bag is
turned right side out
before assembling
(warning label will be
on the outside).
3
Setup and
Adjustment
Figure 3-6
Figure 3-7
Never operate mower
unless the hooks on
the grass catcher are
firmly seated in the
slots on the handle
bracket assemblies,
and the rear dis-
charge door rests
firmly against top of
the grass catcher.
6. Follow steps below to assemble the grass catcher:
a. Place bag over frame so that its black plastic side
is at the bottom. See Figure 3-5.
b. Slip plastic channel of grass bag over hooks on the
frame. All the plastic channels except center top of
bag attach from outside of bag.
c. Attach center top of bag from inside of bag.
7. Follow steps below to attach grass catcher:
a. Lift rear discharge door.
b. Place grass catcher on the pivot rod. Let go
of discharge door so that it rests on the grass
catcher. See Figure 3-6.
To remove grass catcher or convert to a mulcher, lift rear
discharge door on the mower as shown in Figure 3-6. Lift
grass catcher up and out of the pivot rod. Release rear
discharge door to allow it to close rear opening of mower.
WARNING: Never operate mower
unless the hooks on the grass catcher
are firmly seated in the slots on the
handle bracket assemblies, and the rear
discharge door rests firmly against top of the grass
catcher.
8. If converting to side discharge, make sure grass
catcher is off unit and rear discharge door is closed.
a. Lift mulching plug on the right side of mower.
b. Slide two hooks of side discharge chute under
the hinge pin on the mulching plug assembly and
lower the side mulching plug. See Figure 3-7.
NOTE: Do not remove the side mulching plug at any time,
even when you are not mulching.
9. The adjustment wheel is located in the drive control
handle housing and is used to tighten or loosen the
drive belt. You will have to adjust the drive control if
any of the following happens:
a. The mower does not propel itself with the drive
control engaged.
b. The mower’s drive wheels hesitate with the drive
control engaged.
If either of these conditions occur, rotate the adjustment
wheel clockwise to tighten and counter-clockwise to
loosen the cable to adjust drive control. See Figure 3-8.
WARNING
Figure 3-8
�
�
�
�
�
�
�
������
�������