Maintaining your tractor, Warning – Cub Cadet i1050 User Manual
Page 24
4
Tires
WARNING: Never exceed the maxi-
mum inflation pressure shown on the
sidewall of tire.
The recommended operating tire pressure is:
• Approximately 10 psi for the rear tires
• Approximately 14 psi for the front tires
IMPORTANT: Refer to the tire sidewall for exact tire
manufacturer’s recommended or maximum psi. Do not
overinflate. Uneven tire pressure could cause the cutting
deck to mow unevenly.
Battery
The battery is sealed and is maintenance-free. Acid
levels cannot be checked.
• Always keep the battery cables and terminals clean
and free of corrosive build-up.
• After cleaning the battery and terminals, apply a light
coat of petroleum jelly or grease to both terminals.
• Always keep the rubber boot positioned over the
positive terminal to prevent shorting.
IMPORTANT: If removing the battery for any reason,
disconnect the NEGATIVE (Black) wire from it’s terminal
FIRST, followed by the POSITIVE (Red) wire. When
re-installing the battery, always connect the POSITIVE
(Red) wire its terminal first, followed by the NEGATIVE
(Black) wire. Be certain that the wires are connected to
the correct terminals; reversing them could change the
polarity and result in damage to your engine’s alternating
system.
Charging
If the tractor has not been put into use for an extended
period of time, charge the battery with an automotive-
type 12-volt charger for a minimum of
one hour at six
amps.
WARNING:
Batteries give off an ex-
plosive gas while charging. Charge
battery in a well ventilated area and
keep away from an open flame or pilot
light as on a water heater, space heat-
er, furnace, clothes dryer or other gas
appliances.
Jump Starting
WARNING:
When removing or
installing the battery, follow these in-
structions to prevent the screwdriver
from shorting against the frame
.
IMPORTANT: Never jump your tractor’s dead battery
with the battery of a running vehicle.
1. Connect end of one jumper cable to the positive
terminal of the good battery, then the other end to
the positive terminal of the dead battery.
6
WARNING
Batteries give off an
explosive gas while
charging. Charge
the battery in a well
ventilated area and
keep away from an
open flame or pilot
light as on a water
heater, space heater,
furnace, clothes dryer
or other gas appli-
ances.
Be sure to shut the
engine off, remove
ignition key, and
disconnect the
spark plug wire(s) to
prevent unintended
starting before
removing the mower
deck.
2. Connect the other jumper cable to the negative
terminal of the good battery, then to the
frame of the
unit with the dead battery.
WARNING: Failure to use this procedure
could cause sparking, and the gas in ei-
ther battery could explode.
Cleaning the Battery
Clean the battery by removing it from the tractor and
washing with a baking soda and water solution. If neces-
sary, scrape the battery terminals with a wire brush to
remove deposits. Coat terminals and exposed wiring with
grease or petroleum jelly to prevent corrosion.
Battery Failures
Some common causes for battery failure are:
• incorrect initial activation • undercharging
• overcharging
• corroded connections
• freezing
These failures are NOT covered by your tractor’s
warranty.
Cutting Deck Removal
To remove the cutting deck, proceed as follows:
1. Disengage the PTO (Blade Engage) and engage the
parking brake.
2. Place the deck gauge wheels in their highest setting
(lowest deck setting).
3. Lower the deck by moving the deck lift lever into the
bottom notch on the right fender.
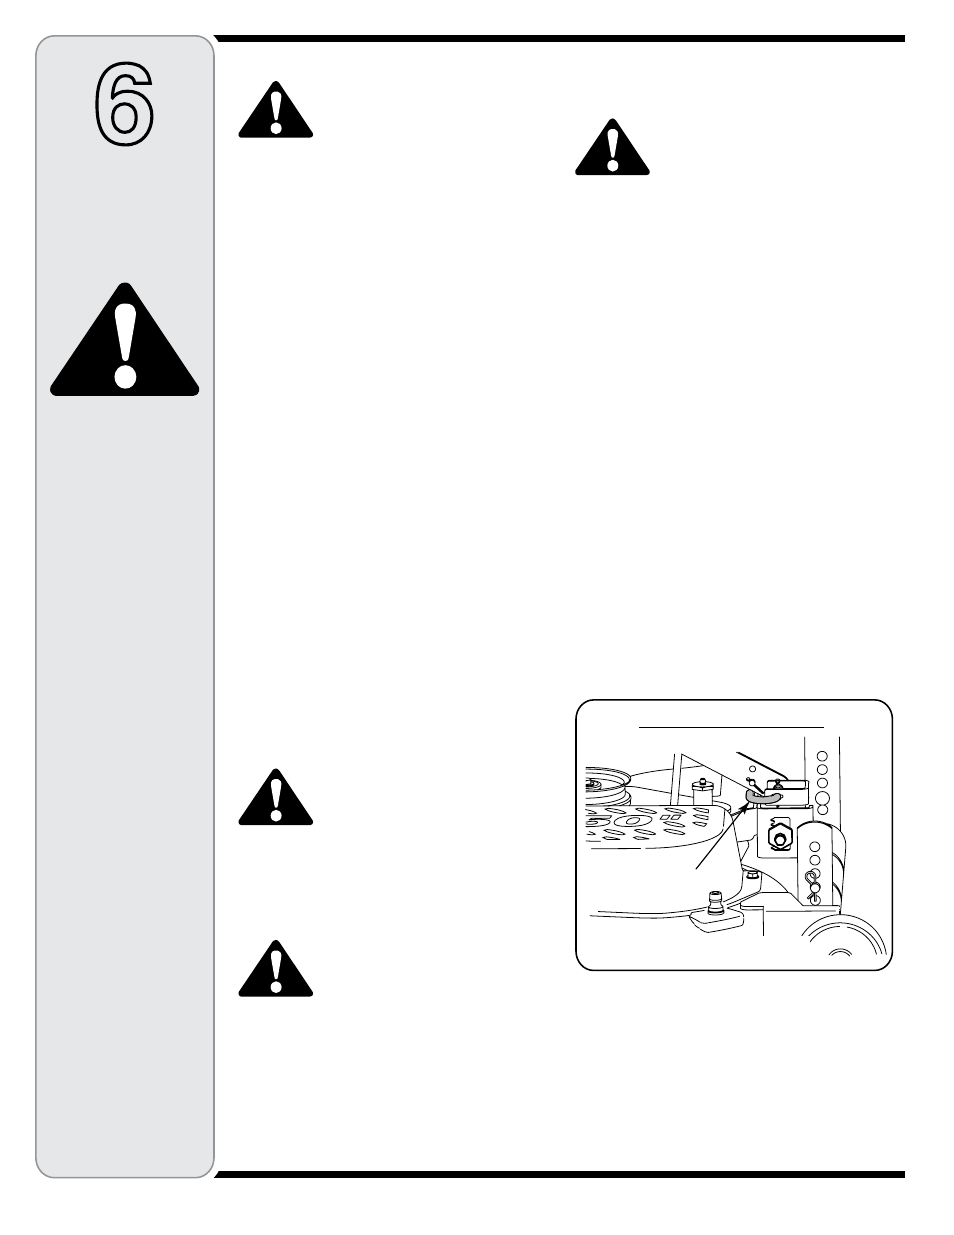
4. Looking at the cutting deck from the left side of the
tractor, locate the deck support pin on the rear left
side of the deck. See Figure 22.
5. Pull the deck support pin outward to release the deck
from the deck lift arm.
6. Move to the right side of the tractor and pull the deck
support pin outward to release the deck from the RH
lift arm.
Maintaining
Your Tractor
50" Mower Deck Shown
Deck Support
Pin
Figure