Aa b b – Cannon Instrument miniAV User Manual
Page 2
CANNON
®
miniAV Installation Guide
Revision 1.a — March, 2012; CANNON
®
Instrument Company
2139 High Tech Road • State College, PA 16803 • USA
CANNON
®
miniAV Installation Guide
Revision 1.a — March, 2012; CANNON
®
Instrument Company
2139 High Tech Road • State College, PA 16803 • USA
- 2 -
- 3 -
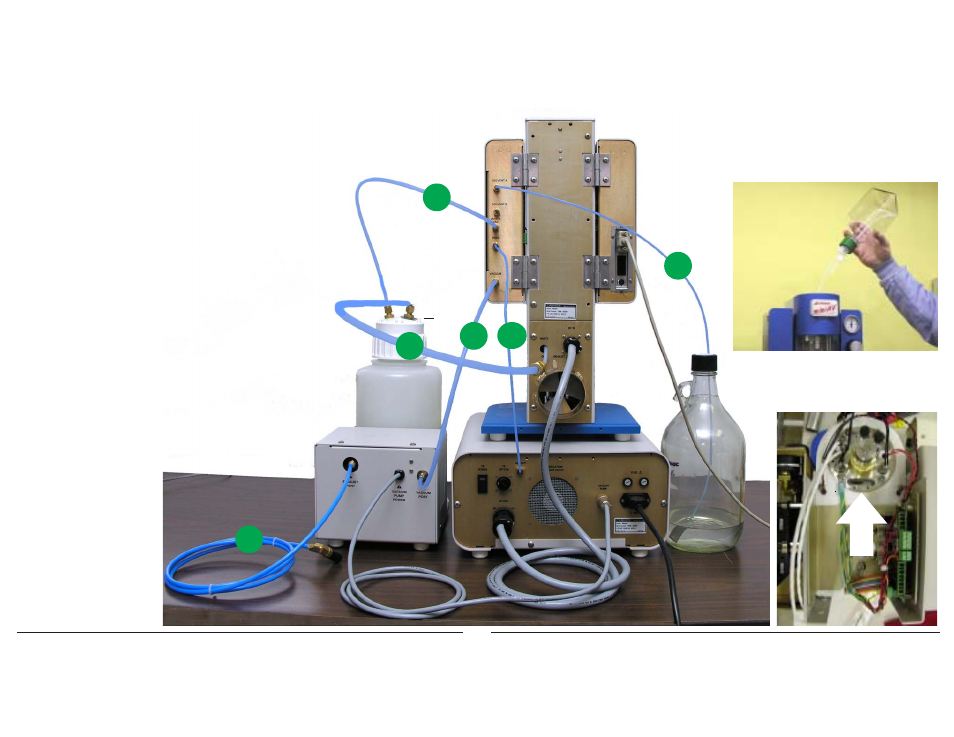
2.
Connect tubing and cables as indicated in the photo image.
Cut tubing to length as necessary
(see pages 4-6)
3.
Fill bath vessel to the fill line with silicone fluid.
(see page 77 or 79 (depending on manual version))
4.
Install VISCPRO software on the controlling PC
using the installation CD-ROM
(see page 7)
5.
Supply power to the miniAV instrument
(see page 21)
6.
Load the VISCPRO software
(see page 8).
7.
Set the desired control temperature
(see page 17).
8.
Calibrate the instrument per manual
instructions or confirm the calibration data
included with your CD-ROM installation
(see pages 19, 29)
9.
Enter sample ID
information in
VISCPRO and
begin running
samples!
(see page 21)
WASTE RECEIVER
miniAV
Power Supply
User-Supplied
Solvent Vessel
Tubing detail
A = 6 mm transparent tubing
B = 1/8” transparent tubing
C = 1/8” opaque polyethylene
A
A B
B
Waste/Vac
Ring
ABOVE: Filling the miniAV bath vessel with bath fluid using
Fill Bottle (provided)
BELOW: Top view of miniAV with fill tube
aperture highlighted
C
A