Windy Nation Suntura Series Solar Tracker HD User Manual
Page 10
SunTura HD Solar Tracker Kit Manual
Revision 1.0
Page 10 of 11
Windy
Nation
08/09/2012
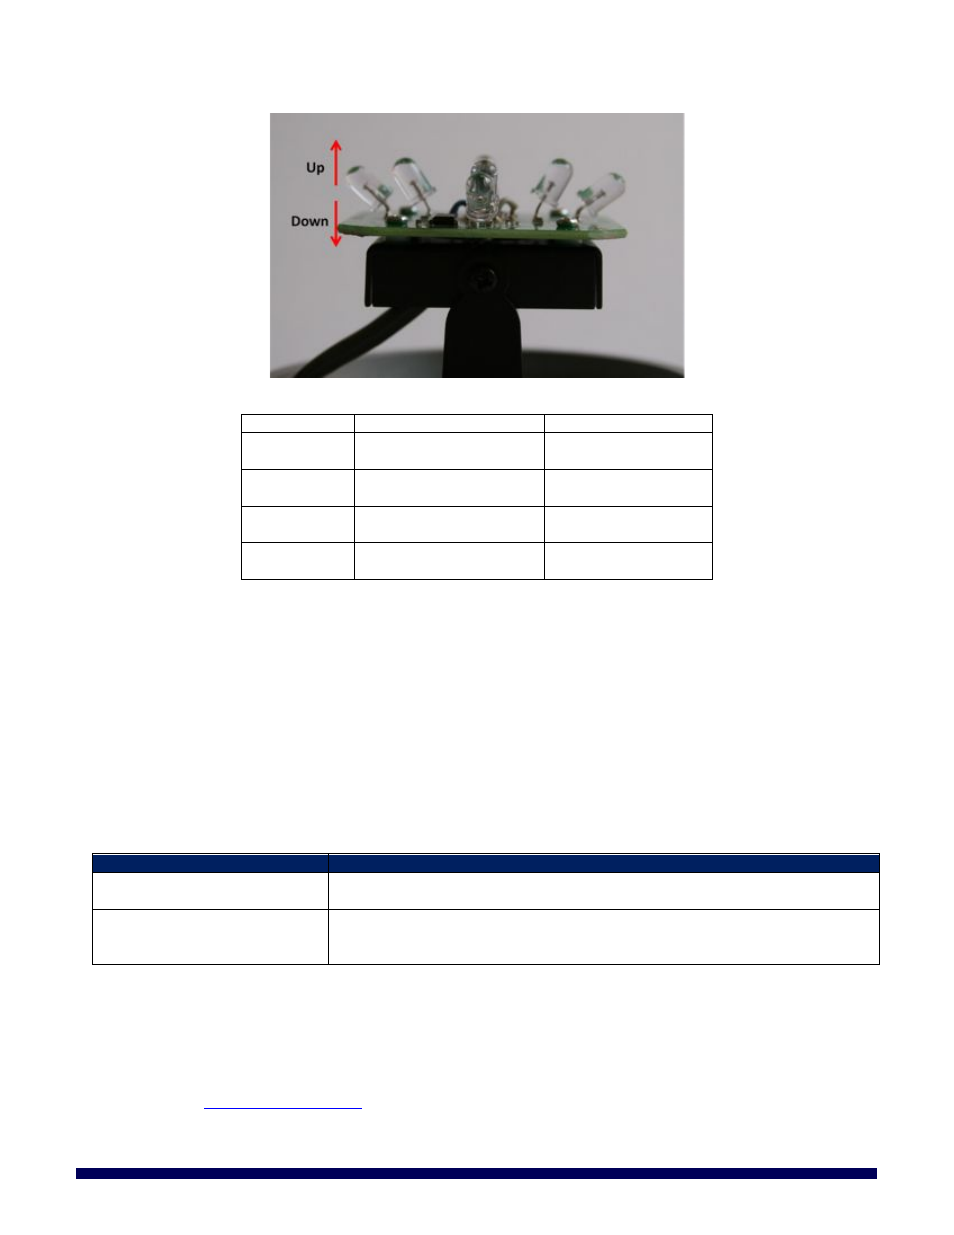
Figure 8: Bending directions for fine tuning the eight LED’s on the Photo Sensor circuit board.
To adjust the LED’s use the following table:
LED
Adjustment Direction
Result
D1 and D2
move up
move down
track more north
track more south
D3 and D4
move up
move down
track more south
track more north
D5 and D6
move up
move down
track more east
track more west
D7 and D8
move up
move down
track more west
track more east
It is highly recommended that the LED’s are adjusted on a sunny day with no clouds blocking the sun’s light.
Clouds or anything else slightly blocking the sun’s light will negatively affect the accuracy of the LED fine
tuning.
Once you are finished adjusting the LED’s on the Photo Sensor, re-attach the Photo Sensor Dome and
tighten the set screws using the Allen wrench.
TROUBLESHOOTING AND SUPPORT
4
The SunTura Solar Tracker Kit is ruggedly constructed and requires minimal care.
C
ARE
4.1
To clean your tracker, moisten a cloth with a few drops of mild hand dishwashing detergent in a cup of
lukewarm water and gently wipe clean.
T
ROUBLESHOOTING
4.2
Problem
Possible Remedies
Tracker is not accurately
tracking the sun
Follow the Fine-tuning steps included in Section 3.3
Tracker is not working
1. Check the fuse as shown in Section 3.2.1
2. Test the source voltage to the tracker Electronics Box
3. Check connections to the red and black wires going to the Electronics Box
S
UPPORT
4.3
If you are experiencing technical problems, and cannot find a solution in this manual, you can contact Windy
Nation Inc. for further assistance.
•
Call: (805) 323-6445
•
Email:
•
Write: 1082 Front Street, Unit B, Ventura, CA 93001