Assembly & set-up, Contents of carton, Assembly – Cub Cadet Timing Deck Striper/Roller User Manual
Page 2
Contents of Carton
One 42” Timing Deck Striper/Roller
•
One Operator’s Manual
•
Assembly
NOTE: On older model decks the holes used to attach the Striper/
Roller to the mowing deck will have to be drilled in order to
install the attachment.
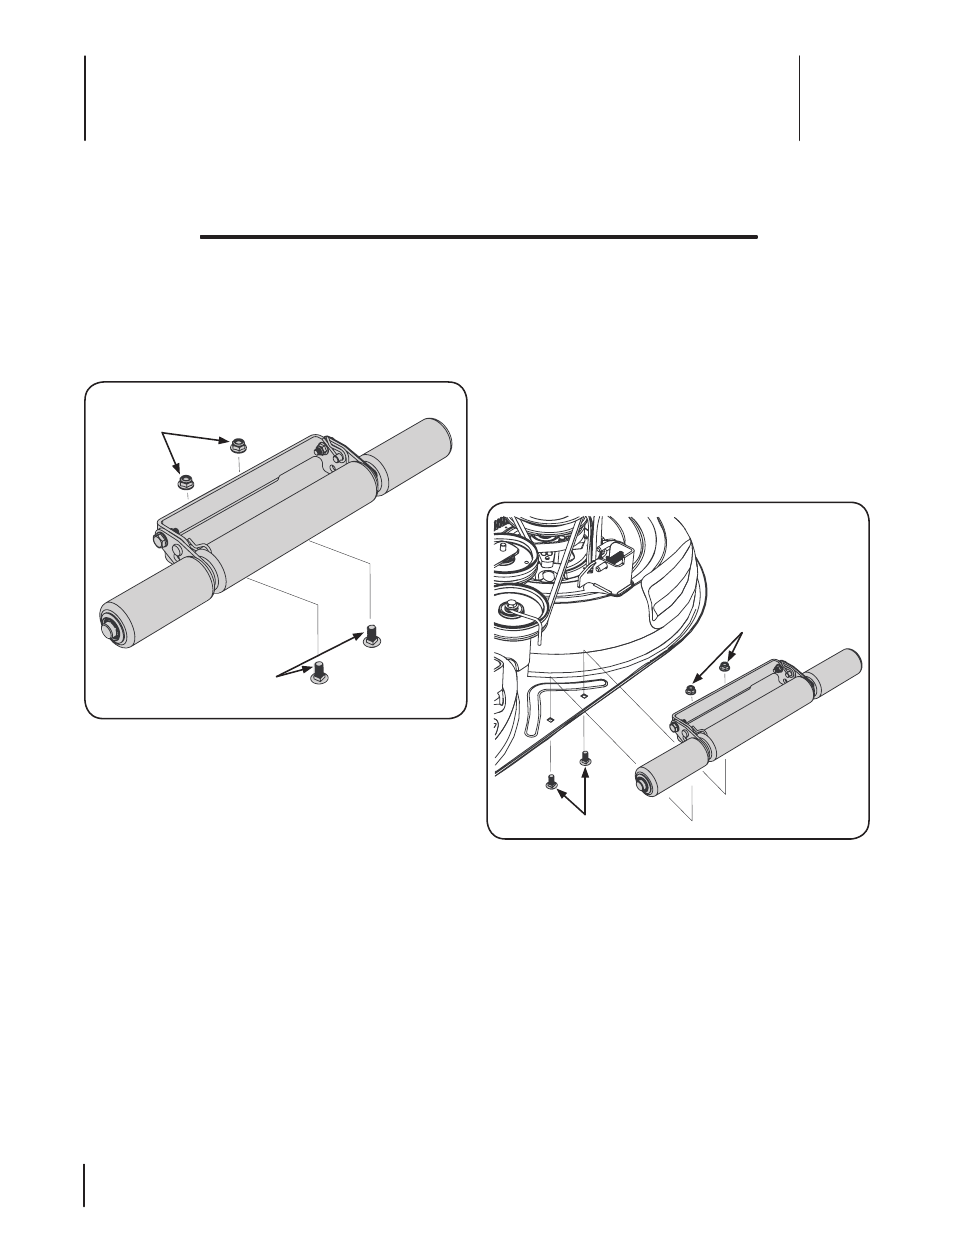
Remove the attached carriage bolts and flange nuts from
1.
the mounting bracket. See Fig. 1-1.
NOTE: If it is neccessary to drill the holes to attach the
Striper/Roller continue on to step 2, if not skip to step 5.
On the back center of the deck, lay the bracket on a spot on
2.
the deck that will not interfere with any of the belts, blades,
etc. under the deck.
When you have the bracket positioned properly use a
3.
marker to mark the location of the two holes in the bracket
onto the deck.
Use a
4.
5⁄16” drill bit to drill the previously marked holes.
NOTE: The deck is made of strong metal so be careful to
maintain a strong grip on the drill to ensure a clean hole
and avoid damage to the deck.
With the carriage bolts and flange nuts removed earlier,
5.
attach the Striper/Roller to the deck and tighten securely.
See Fig. 1-2.
Carriage Bolts
Flange Nuts
Figure 1-1
Flange Nuts
Carriage Bolts
Figure 1-2
Assembly & Set-Up
3
2