Step 7: connecting the picture frame, Engl is h – GiiNii GH-7AWP User Manual
Page 25
Getting started
EN - 19
E
ngl
is
h
to a computer
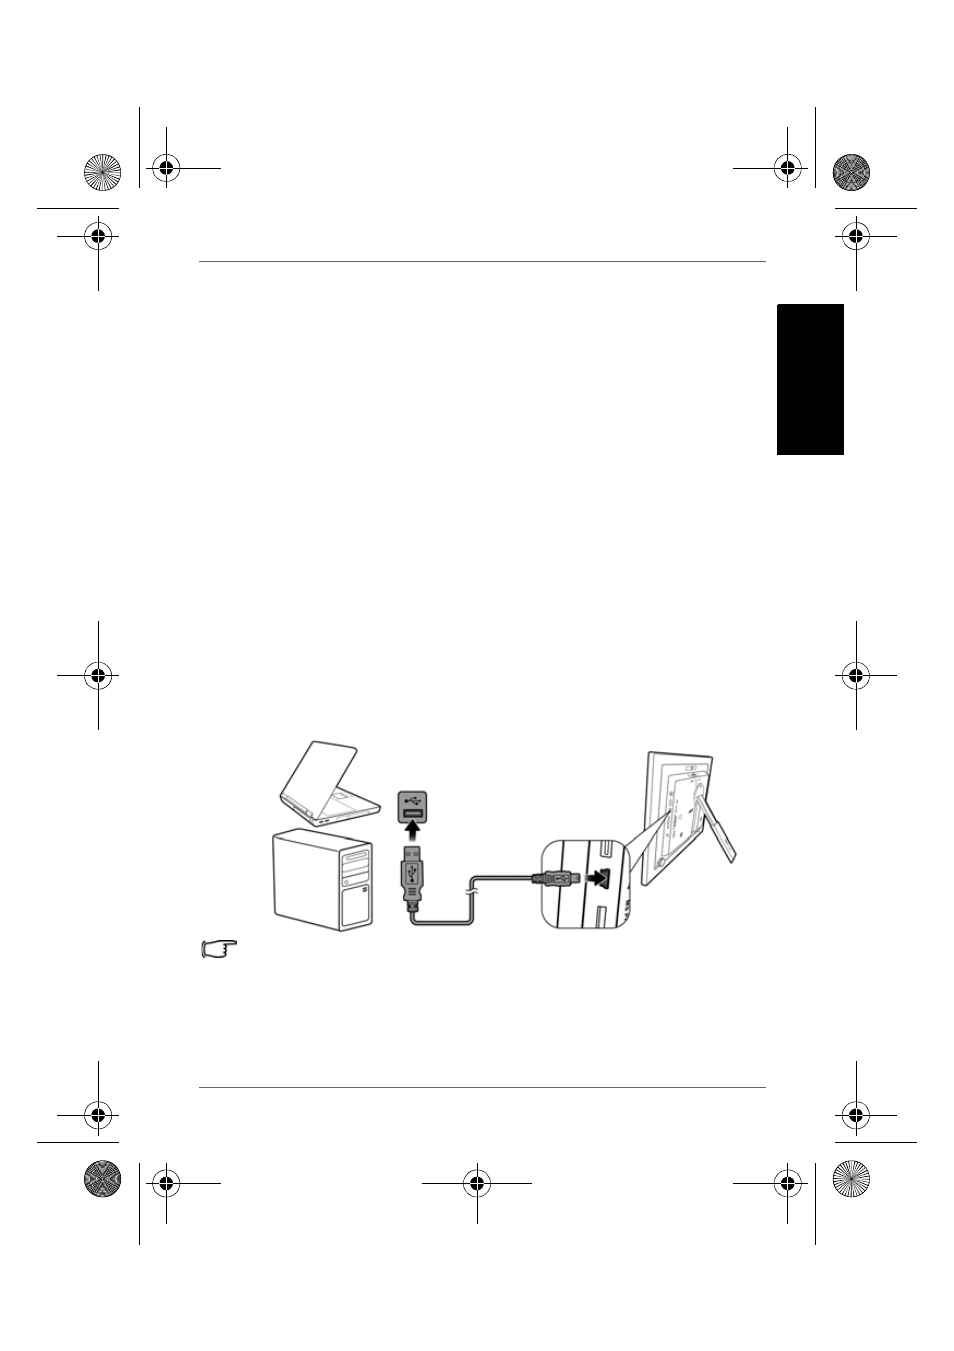
USB cable (to be purchased separately) to easily manage the
2. Connect the smaller end of the USB cable to the mini USB port
3. Connect the other end of the USB cable to a USB port on the
computer, making sure the connectors are fully inserted.
4. Once connected, the PhotoFrame will enter PC transfer mode
automatically.
disk”.
would on other disk drive.
vice versa.
• The files in the memory cards and USB flash drive cannot be
viewed/edited via USB connection.
Philips_Photo_Only_UM_en.book Page 19 Tuesday, August 3, 2010 4:15 PM
Digital Picture Frame
Step 7: Connecting the Picture Frame
You can connect the Picture Frame to a computer using a mini
Picture Frame will appear in “My Computer” as “removable
• You can copy photos from the computer to the Picture Frame, and
5. When the computer has detected the Picture Frame, the
Now you can freely transfer the files in the Picture Frame as you
files in the internal memory of the Picture Frame.
1. Start the computer and turn on the Picture Frame.
of the Picture Frame.