Please read the following carefully, Troubleshooting – Chicago Electric 65760 User Manual
Page 10
SKU 65760
For technical questions, please call 1-800-444-3353.
Page 10
If either Carbon Brush (9) is worn
c.
down by more than 1/2, replace
both Carbon Brushes.
To clean old Carbon Brushes (9)
d.
before reusing them, rub the contact
areas with a pencil eraser.
Reinsert the old Carbon Brushes (9)
e.
in the same orientation to reduce
wear.
When installing the Carbon Brushes
f.
(9), make sure the carbon portions of
the Brushes contact the Motor Arma-
ture, and that the Springs face away
from the Motor. Also, make sure the
Springs operate freely.
Replace the Brush Covers (8). Do
g.
not overtighten.
note: New Carbon Brushes (9) tend to
spark when first used until they wear
and conform to the Motor’s Armature.
(See assy. diagram.)
AFTER USE,
3.
clean external surfaces
of the tool with clean cloth. Do not
use solvents. Do not immerse the
Motor Housing in liquid.
WARNING! If the Power Cord (6) of
4.
this Mortar Mixer is damaged, it must
be replaced only by a qualified ser-
vice technician.
pleaSe read tHe
FolloWing careFullY
THE MANUFACTURER AND/OR DISTRIBUTOR
HAS PROVIDED THE PARTS LIST AND ASSEMBLy
DIAGRAM IN THIS MANUAL AS A REFERENCE
TOOL ONLy. NEITHER THE MANUFACTURER OR
DISTRIBUTOR MAKES ANy REPRESENTATION
OR WARRANTy OF ANy KIND TO THE BUyER
THAT HE OR SHE IS QUALIFIED TO MAKE ANy
REPAIRS TO THE PRODUCT, OR THAT HE OR
SHE IS QUALIFIED TO REPLACE ANy PARTS OF
THE PRODUCT. IN FACT, THE MANUFACTURER
AND/OR DISTRIBUTOR ExPRESSLy STATES
THAT ALL REPAIRS AND PARTS REPLACEMENTS
SHOULD BE UNDERTAKEN By CERTIFIED AND
LICENSED TECHNICIANS, AND NOT By THE
BUyER. THE BUyER ASSUMES ALL RISK AND
LIABILITy ARISING OUT OF HIS OR HER REPAIRS
TO THE ORIGINAL PRODUCT OR REPLACEMENT
PARTS THERETO, OR ARISING OUT OF HIS OR
HER INSTALLATION OF REPLACEMENT PARTS
THERETO.
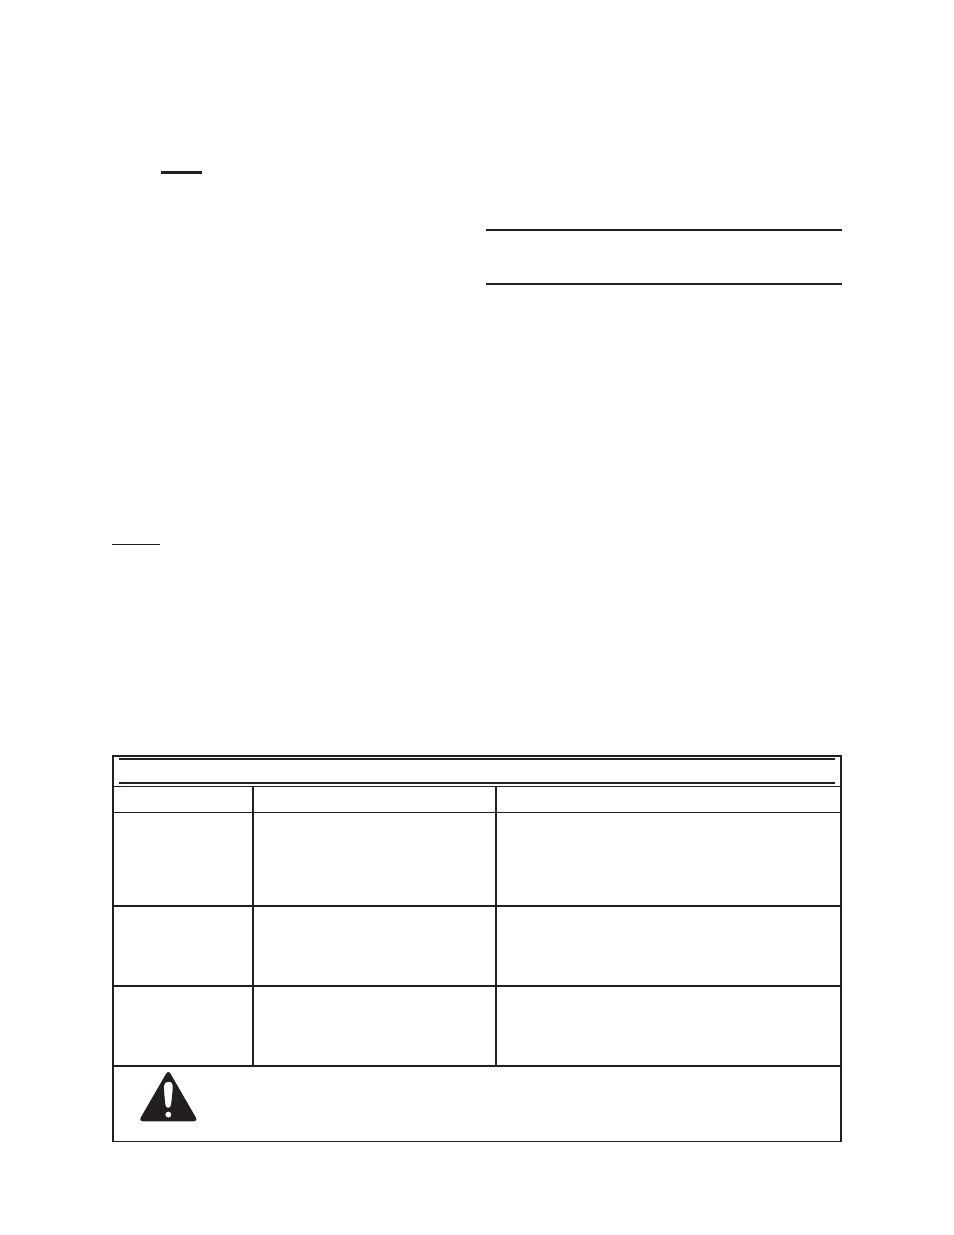
trouBleSHooting
problem
possible causes
possible Solutions
Tool will not start
No power at outlet.
1.
Cord not connected.
2.
GFCI plug not reset.
3.
Check power at outlet.
1.
Check that cord is plugged in.
2.
Push GFCI reset button. Plug indicator light
3.
must be illuminated.
Tool turns on, but
Augers do not
turn.
Left and Right Augers not
properly attached.
Make sure the Left Auger is attached to the
Output Shaft marked “L”. Make sure the Right
Auger is attached to the Output Shaft marked
“R” (Augers are stamped with “L” and “R”.
Unsatisfactory
mixing results.
Tool speed too fast or too slow.
Check with material manufacturer’s
recommendations for proper mixing speed.
Then adjust Speed Regulator and/or Speed
Regulating Knob to proper tool mixing speed.
Follow all safety precautions whenever diagnosing or servicing the
tool. disconnect power supply before service.