Thetford 1210 Series Water Dispenser User Manual
Page 4
Owner’s Manual 4
Water dispenser cleaning and disinfecting:
To clean the drain grid and the drip cup:
- Remove the drain grid and the drip cup from the well.
- Wash the water dispenser, the drain grid, and the drip cup with a mild
cleaner or a solution of liquid dish detergent and warm water.
- Rinse with clean water.
- Dry with clean cloth.
NOTE: Do not use abrasive cleaners, chemicals, or scouring pads
because they can damage the finish of the parts.
- Put the drain grid and drip cup back in the original positions.
- Follow the instructions of the RV manufacturer to disinfect the drinking
water supply of the vehicle.
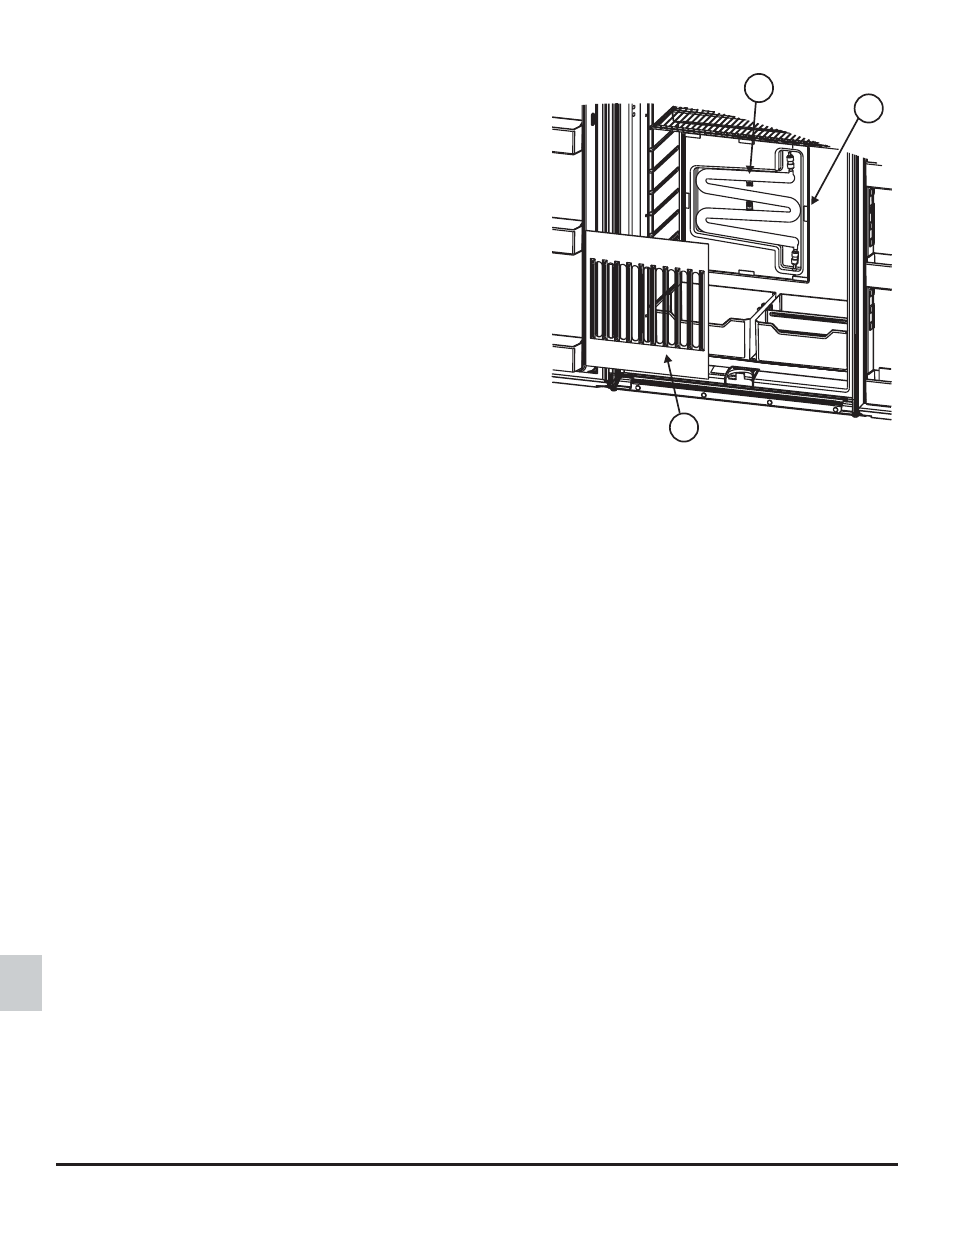
Occasionally food or liquid spills may fall into the reservoir area. For ease
of removal and cleaning, the cover is attached to the inside of the refrigera-
tor with velcro. To clean the cover [1] and reservoir [2] (See Art01725):
- Remove the wire shelves and the crisper bins from the refrigerator.
- Remove the reservoir cover.
- Put your finger through the cover at a corner and gently pull the cover forward to loosen the velcro tab at the corner.
- Slide your finger around the back of the cover to the next velcro t
ab.
- Gently pull the cover forward to loosen the velcro tab.
- Repeat until the cover is removed.
- Wash the reservoir, the cover, and the area around the reservoir with a mild cleaner or a solution of liquid dish detergent and
warm water.
- If you need to clean behind the reservoir, remove the two screws [3] that attach the reservoir to the refrigerator cabinet.
- Gently clean behind the reservoir.
- Put the two screws back in the original position.
Message center for non-metal door models only (optional):
An optional message center, for non-metal doors only, is available for purchase. The message center [2] may be located to the right
of the water dispenser
(See Art01791).
You may use magnets or self-stick notes to attach papers to the message center.
Art01725
1
3
2