Tool set up – Chicago Electric Power Tools / 1" Variable Speed SDS Rotary Hammer 69276 User Manual
Page 9
Page 9
For technical questions, please call 1-800-444-3353.
Item 69276
Operating instructions
Read the EntiRE impORtant SaFEtY inFORmatiOn section at the beginning of this
manual including all text under subheadings therein before set up or use of this product.
tool Set up
tO pREVEnt SERiOuS injuRY FROm aCCiDEntal OpERatiOn:
press and release the trigger and unplug the tool from its electrical
outlet before adjusting tool or installing accessories.
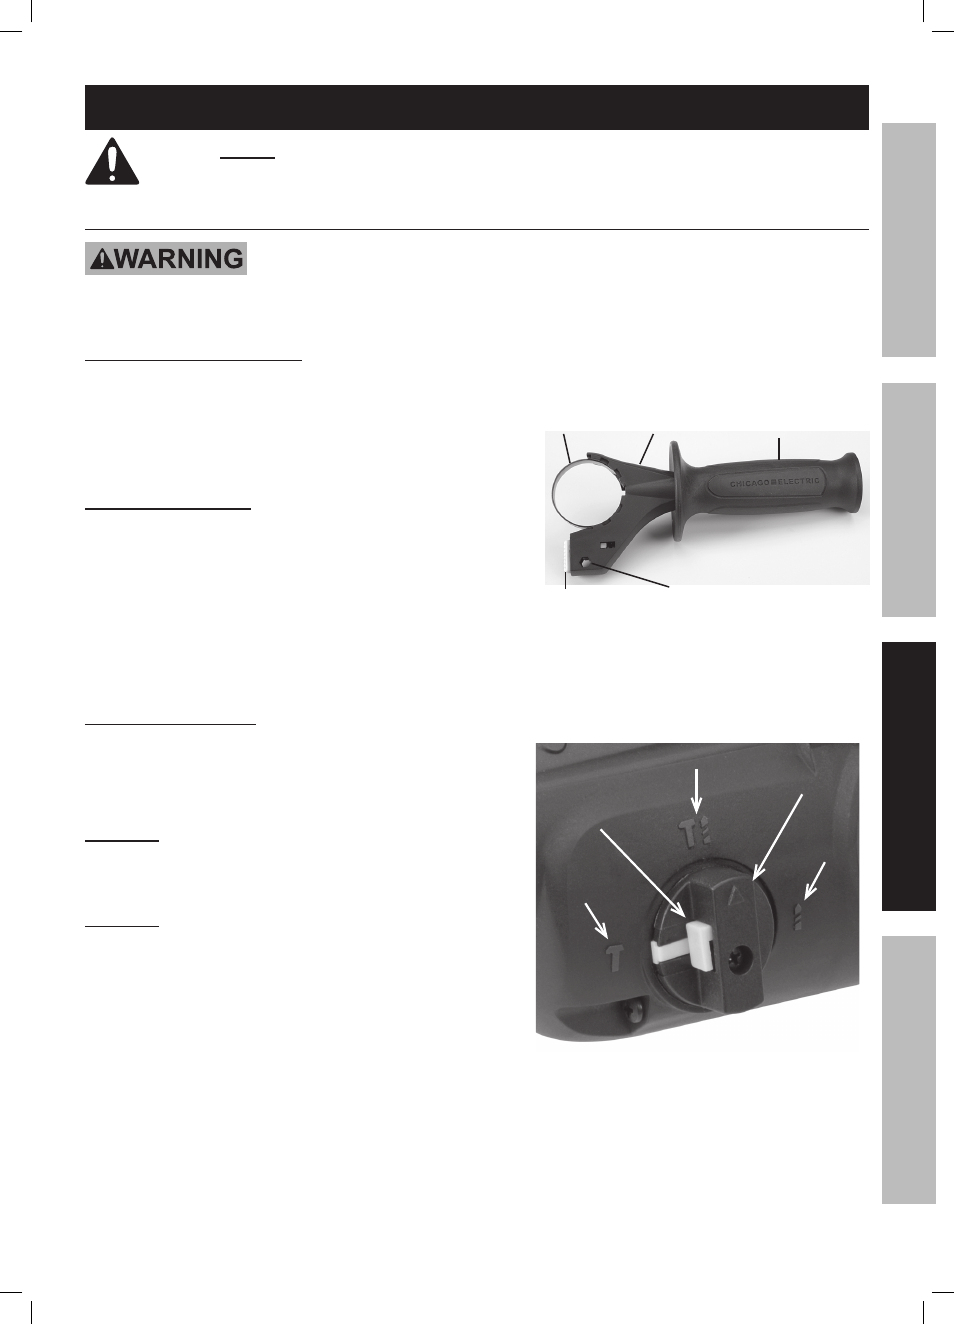
adjusting the auxiliary handle
1. The Auxiliary Handle can be placed in a variety of positions.
2. To adjust the Auxiliary Handle, turn the Handle
counterclockwise to loosen the band. Slide the Handle
on or off the Rotary Hammer or to the desired position
then turn the Handle clockwise to secure it in place.
using the Depth Gauge
1. The Depth Gauge can only be used if the Auxiliary Handle
is in place and positioned on either side or the top of the
Rotary Hammer. The body of the Hammer will interfere with
the Depth Gauge if the Handle is in the bottom position.
2. Press and hold the Lock Button and slide the Depth Gauge
through the Depth Gauge Slot on the Auxiliary Handle.
3. Position the Depth Gauge as needed, then release the Lock
Button to secure the Depth Gauge in place.
adjusting the Functions
1. Adjust the Function Dial before using the Rotary Hammer.
To adjust the Function Dial, press the Dial Release
Button on the Function Dial handle and rotate the dial
until it clicks in place at one of the three positions.
CautiOn: Move the Function Dial only when the
Motor is stopped. Attempting to move the Function
Dial while the Motor is engaged will result in abrupt
Bit rotation and can cause property damage.
CautiOn: When moving the Function Dial, make sure the
Dial clicks into the desired position. If not actively engaged,
the Dial could slip out of position resulting in tool damage.
2. To Drill: Rotate the Function dial to the Drill setting.
The Rotary Hammer will revolve when powered.
3. To Hammer/Drill: Rotate the Function Dial to
the Hammer/Drill setting. The Rotary Hammer
will revolve and hammer when powered.
4. To Chisel: Rotate the Function Dial to the Hammer setting.
The Rotary Hammer will hammer when powered.
Figure B
Auxiliary Handle
Band
Bracket
Lock Button
Depth Gauge Slot
Figure C
Function
Dial
Drill
Setting
Hammer/Drill Setting
Hammer
Setting
Dial
Release
Button
Sa
FE
tY
Op
ER
ati
O
n
m
aint
Enan
CE
SE
tup