Installation – CDA EXTRACTORS CIGE9 User Manual
Page 8
Installation
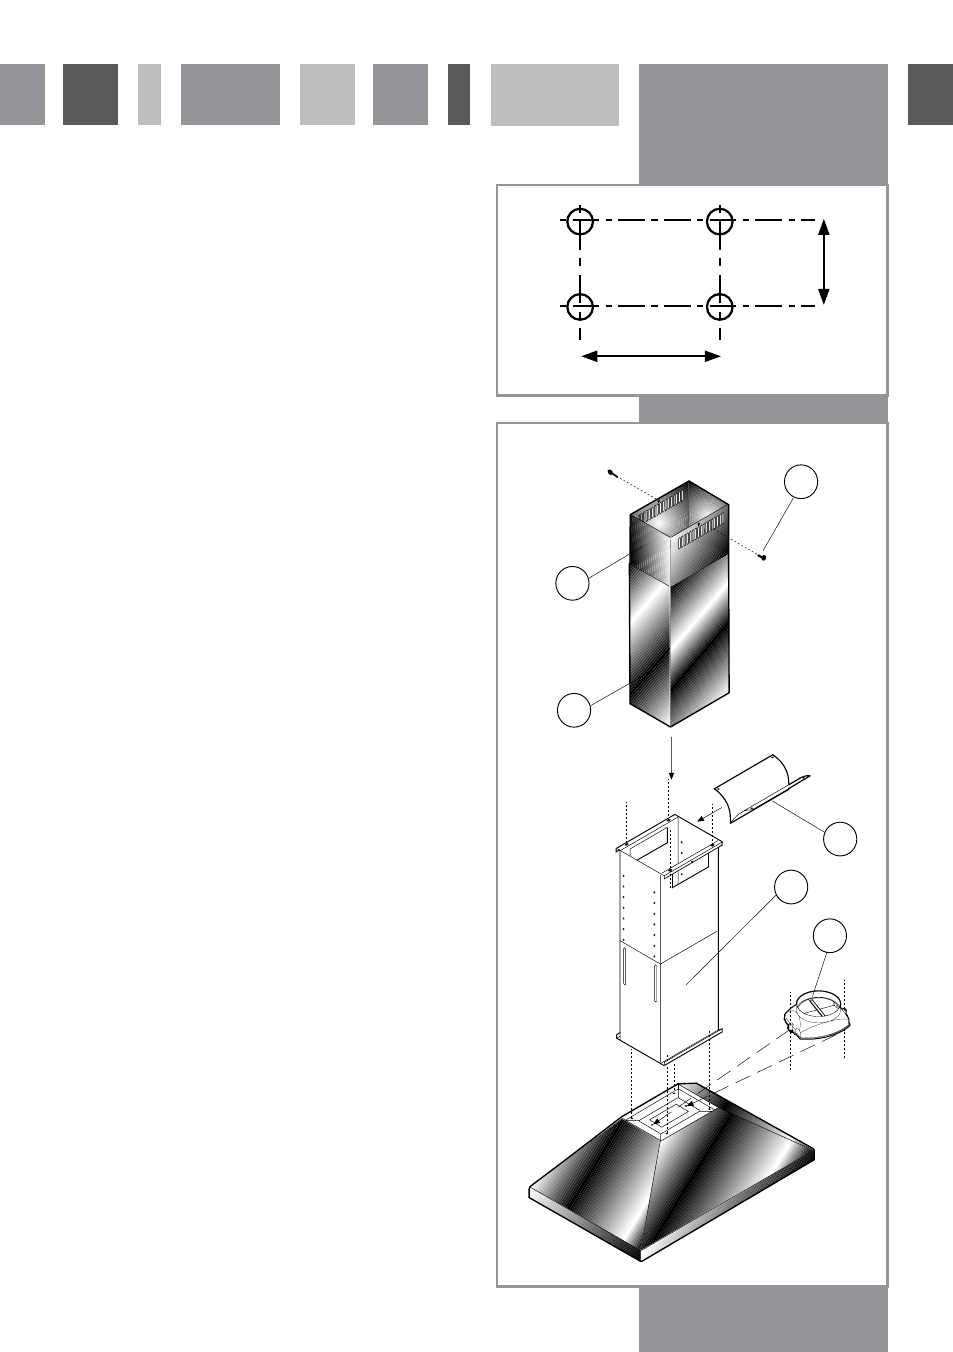
To fix your extractor to the ceiling, proceed as follows
1. Mark the fixing positions of the wall plugs that will be
used to secure your extractor to the ceiling, as shown in
fig. 4
2. Drill 4 holes and insert the wallplugs, ensuring that they
are suitable for use with your ceiling. If the extractor is to
be fixed directly to ceiling joists then wall plugs may not
be required.
3. Fit the vent adaptor (G) to the body of the extractor,
using the 2 self-tapping screws.
4. Calculate the height of the chimney section as follows
Length of support section = Ceiling height – (285 + H + Hob
height above floor)
H= 600 min for electric hobs (650mm recommended)
H=700mm minimum for gas hobs (750mm recommended)
5. Fix the 2 support sections(A) at the required length using
4 self-tapping screws. Note that if the exact height
cannot be set, use the frame position corresponding to
the next highest one.
6. Fix the support sections to the main motor body using 4
machine screws.
7. Slide the two decorative sections over the frame sections.
8. If your extractor is to be used as a recirculation device, fit
the deflector panel (I) onto the top of the frame section,
as shown.
9. With assistance, mount the entire assembly to the ceiling
using appropriate fixing screws. Once this operation
has been completed, the extractor is fully supported by
the ceiling fixings.
10. Mount the top chimney section (D) to the top of the
frame section using 2 screws (E)
11. If using the extractor to extract air outside, connect the
duct pipe to the vent adaptor (G), ensuring a good seal
to prevent air escaping. (The lower decorative section
(B) can be raised and tape to allow access to the outlet
adapter (G))
Fig.5
A
I
E
D
B
G
7
Fig.4
203
191