Golden Eagle K20 Fuel Rail User Manual
Golden eagle mfg, K20 fuel rail install, Do not smoke or have open flame
Golden Eagle Mfg.
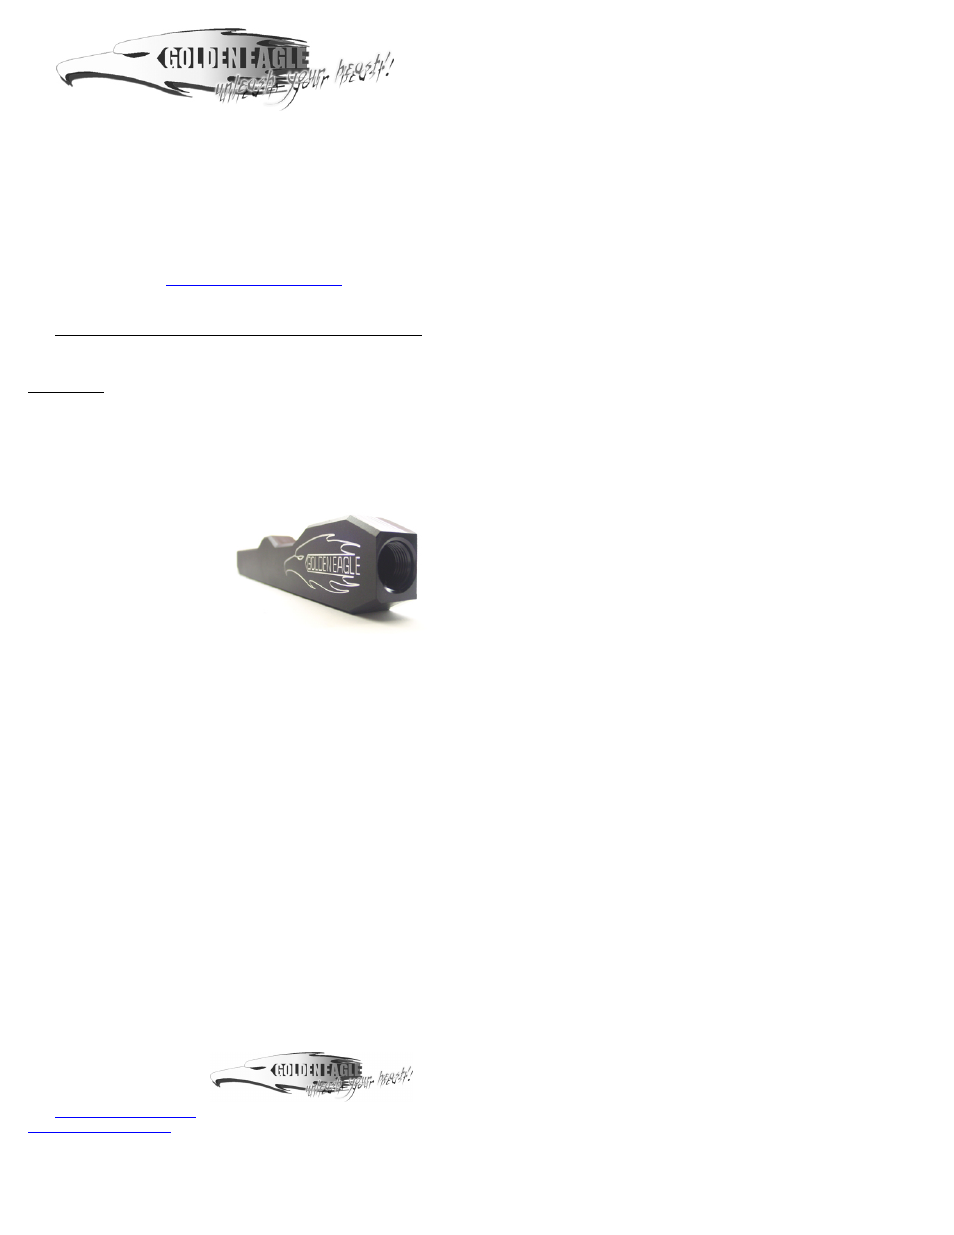
K20 Fuel Rail Install
Thank you for your purchase of Golden Eagle Mfg. products for your high
performance needs. You now own one of the best products on the market, all 100%
made in the USA! We are very confident you will be more than pleased with your
purchase. If you ever experience any problems, have any concerns or just want to
give some advice, we would love to hear from you.
(909) 592 – 4311 or e-mail
DO NOT SMOKE OR HAVE OPEN FLAME
When doing the fuel rail install!! Perform this install in a well ventilated area!
! WARNING ! We strongly suggest having a trained technician perform the fuel
rail install. Do not attempt to perform this installation procedure if you are not very
familiar with how the fuel system works. Incorrect disassembly or re-assembly of
the fuel system could lead to extensive engine damage, fire or personal injury!
Always have a shop manual on hand for reference when performing the fuel rail
install.
Items this box should contain:
•
Fuel rail
•
Stock fuel line banjo fitting
adapter
•
Fuel rail plug
Things you will need:
•
7/8 open end wrench
•
10 mm open end wrench
•
10 mm socket set w/ ratchet
and extension
•
Teflon tape
1.
Disconnect the negative terminal from the battery and open the gas cap to
relieve any pressure in the fuel system.
2.
Remove the two 10mm nuts holding the injector wiring to the fuel rail.
3.
Disconnect the fuel line from the fuel rail using a 7/8" wrench. Once the cap is
off, do not lose the metal washers underneath.
4.
Remove the three 10mm nuts holding the fuel rail to the intake manifold.
These are located on the underside of the rail. Be careful not to drop any of
the nuts.
5.
The rail is now loose and can be pulled off the intake manifold. At this point
you can remove the injectors from the fuel rail by pulling on them. Once they
are out, remove the fuel rail, install the injectors into the new fuel rail. Put
some oil on the o-rings first, it will make them slide in a lot easier.
6.
Tighten the new rail down to the intake manifold by putting the three 10mm
bolts back in. Now is a good time to transfer the fuel pressure regulator from
the old fuel rail over to the new one if desired. There are only two 10mm bolts
holding the regulator on. Remove them and swap the regulator to the new rail.
7.
Put the fuel line back onto the new fuel rail. Be sure to put the metal washers
back in place.
8.
Tidy up the wiring and put the key into the ignition and turn it to the ON
position. Turn off the power and back to the ON position a few times to prime
the fuel pump. Look for any fuel leaks. If there are none, you can start up the
car and make sure there are no leaks! Again, we always suggest to have a shop
manual on hand for reference on this install.
Again, we thank you for your purchase and we are always here for your input.
Golden Eagle Mfg.
414 Borrego Ct.
San Dimas, CA 91773
Ph. (909) 592 – 4311
Web
www.GoldenEagleMfg.com