EFCO 875X Wall Vent User Manual
Page 8
Series 875 Vent Installation
EFCO CORPORATION 2014
Page 8
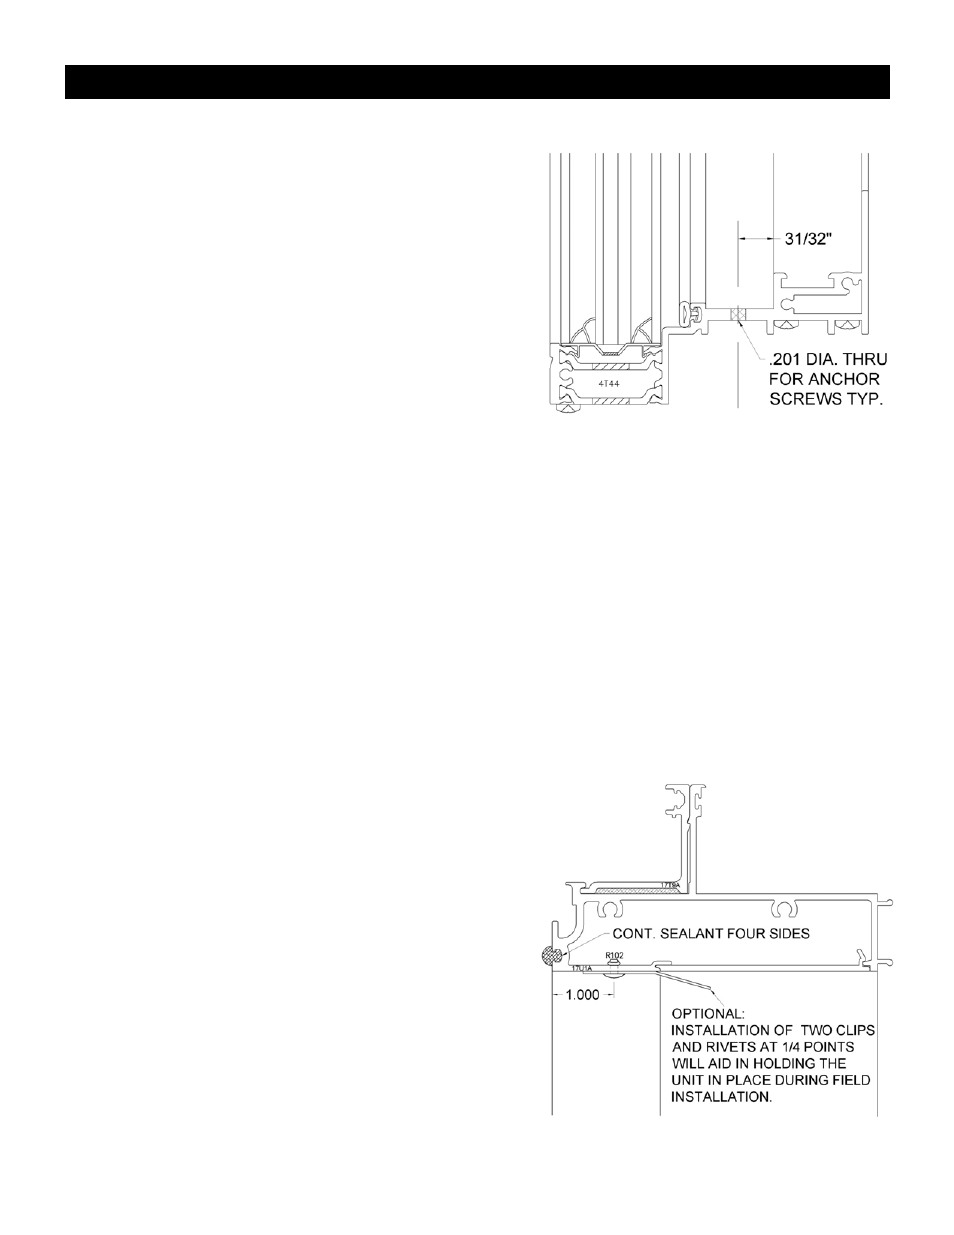
VENT FRAME PREPARATION
1. Do not fasten drapery tracks, ceiling supports or
Stool trims to windows.
2. Fasten window frame into minimum of 0.080"
thickness of framing.
3. Minimum anchor spacing:
a. No more than 6" from each side of frame
joints.
b. No more than 18" on center between anchors.
4. Pre-drill using a 0.201 DIA. - #7 drill bit to make anchor
clearance holes in the vent frame. Make
sure screw heads can be reached when vent is installed.
5. Countersunk anchor holes may be required with some hardware combinations. All screw heads must
be sealed at sill.
6. When installing curtain wall pocket adapters, use silicone to seal in place as directed by instructions
and shop drawings.
VENT INSTALLATION
1. Consult curtain wall assembly instructions and shop drawings before vent installation begins.
2. Install optional vent frame retention clips (FM85) if required.
3. Make sure all curtain wall seals covered by the vent are done and tooled before vent installation.
4. Vent frame sizes: curtain wall clear opening -1/4” in both
directions. This will allow 1/8” shimming on all sides.
5. Apply a continuous bead of sealant around face of
curtain wall clear opening.
6. Perimeter sealant must be applied to SSG front legs
before frame installation.
7. Perimeter sealant on custom SSG units may be applied
and tooled down after vent frame installation.