Warning, Assembly – Boori 3 Tier Change Table BO-3T User Manual
Page 2
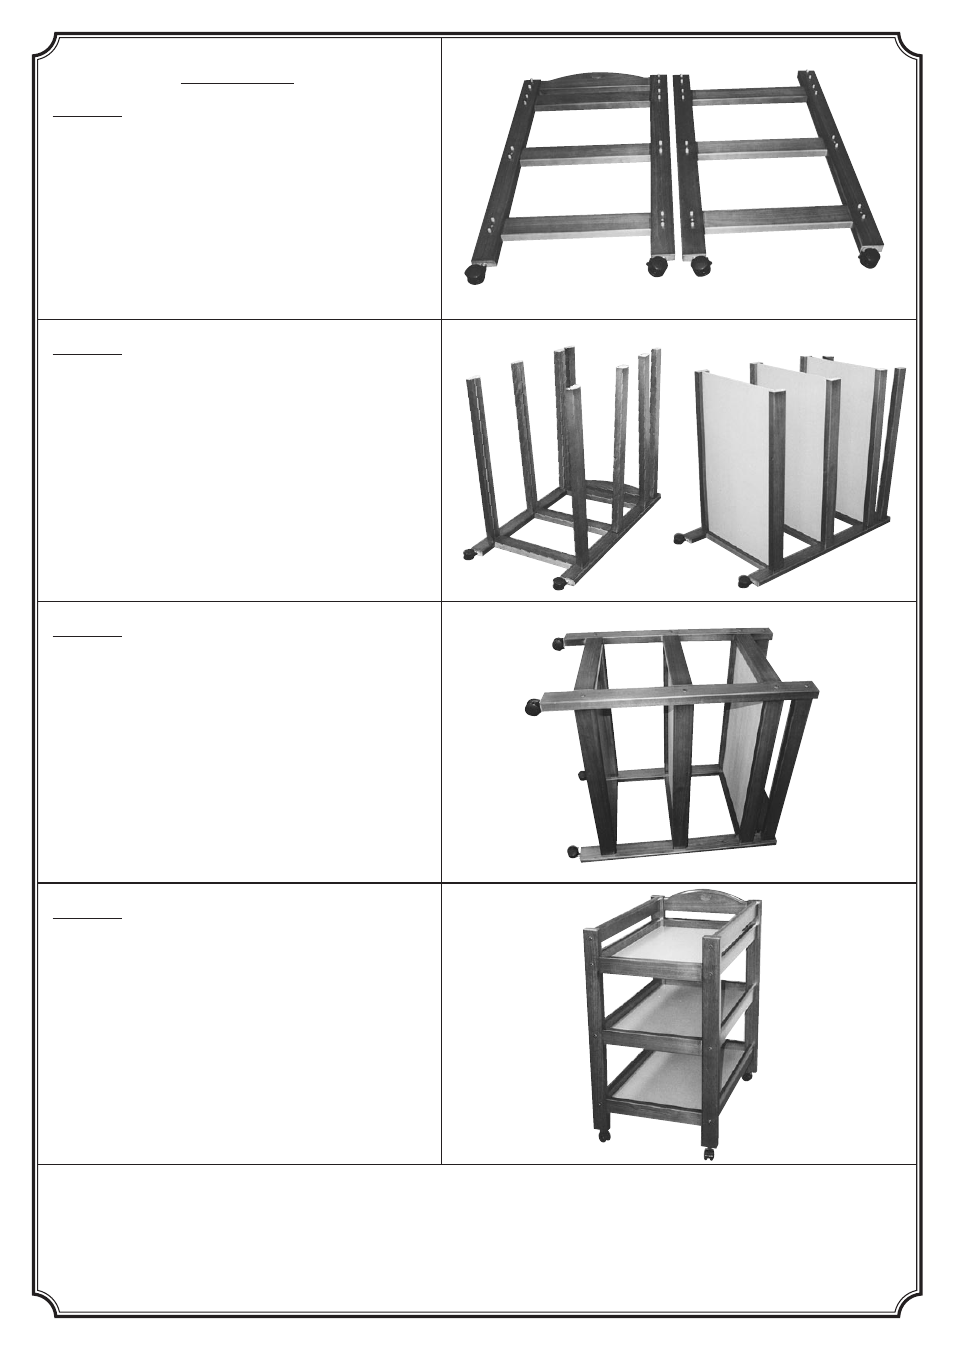
Assembly:
Stage 1:
• Place both end panels on floor with holes facing up.
• Insert all 32 wooden dowels into the dowel holes.
• Gently hammer the 4 castor sleaves into the castor sleave holes at
the bottom of the end panels.
• Push castors into castor sleaves.
Stage 2:
• Attach shelf rails to the head end panel.
• Gently insert shelf panels into the grooves of the shelf rails.
Stage 3:
• Attach foot end panel to shelf rails.
• Place 8 x 70mm connecting bolts into the connecting bolt holes on
top of the foot end panel. Tighten firmly using the allen key provided.
Stage 4:
• Stand changer onto its 4 wheels (castors).
• Place the remaining 8 x 70mm connecting bolts into the connecting
bolt holes on head end panel. Tighten firmly using the allen key
provided.
• Your changer should now be complete.
WARNING:
• Please ensure that the brakes on all four castors are released before moving the cradle.
• Regularly check your changer to ensure that all connecting bolts are tightly in place.
• It is recommended not to leave child unattended on changer.
V2 - 12/01