AItech ProA/V Media Extender - 5GHz Digital User Manual
Page 4
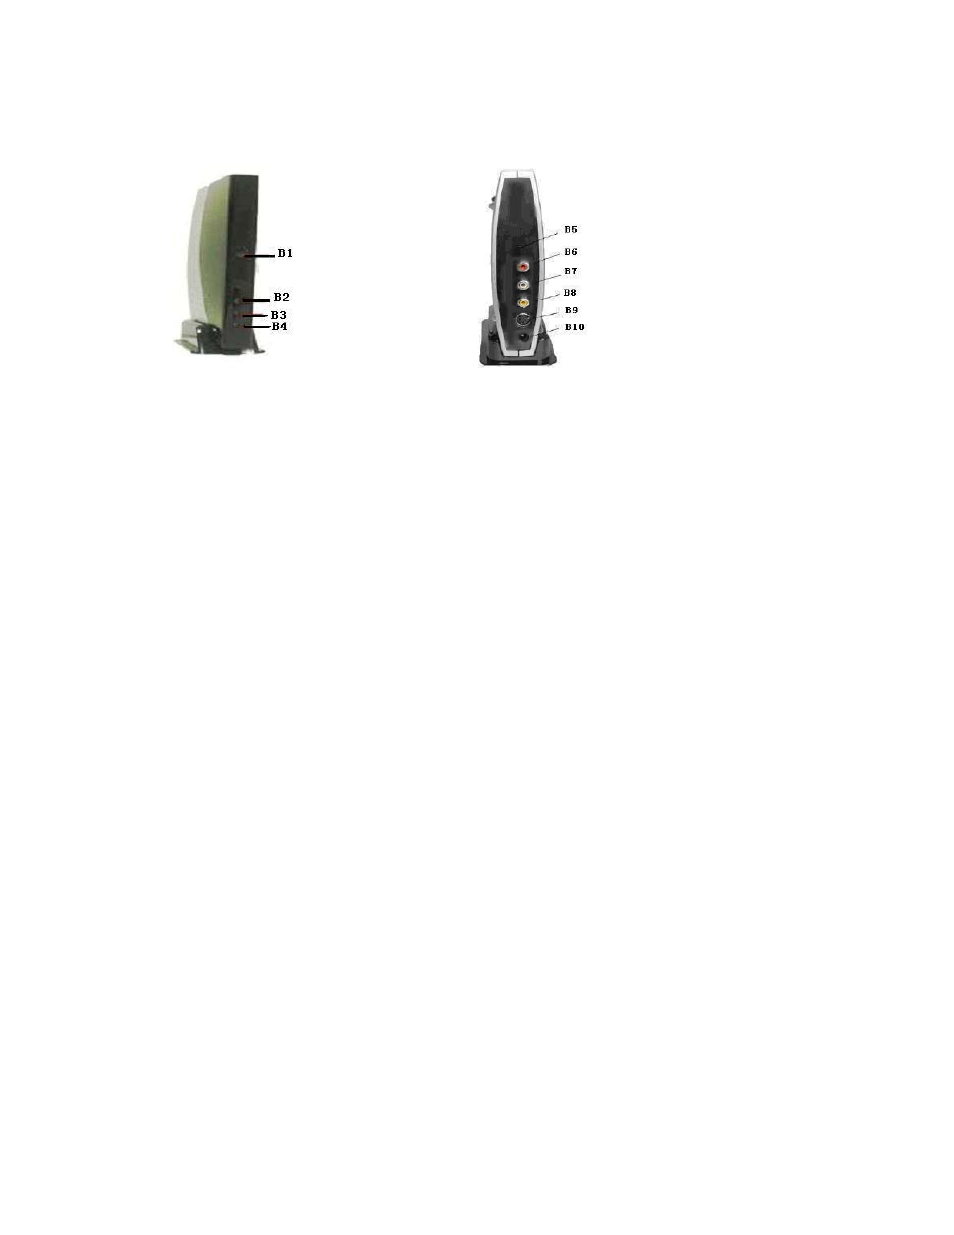
2.2 AV Receiver
Front Panel: Back Panel:
B1 -Power on LED B4 -IR remote control window
B2 -Link LED
B5 -Pairing button
B3 -Paring LED
B6 -Audio output (Right channel)
B7 -Audio output (Lift channel)
B8 -Video output (CVBS)
B9 -S-Video output
B10 -DC power input (5V)
3. Setup Guide
To enjoy a life of wireless video and audio, just connect the AV Sender to any
A/V source you like (cable/satellite set-up box, PVR, DVD, media center PC,
ect.) and connect the AV Receiver to the desired A/V display device, such as
TV, monitor, projector or speaker in another location.
3.1 Connect the AV Sender to an A/V Source
Step 1: Connect one end of the A/V cable (RCA or S-Video) to the audio (A6,
A7), and video (A8 for RCA and A9 for S-Video) input jacks, and
connect the other end of the A/V cable to the source device via its “AV
output”.
Step 2:
Plug the IR Extender in the IR output jack (A4), and place the IR
emitter in front of the source device (make sure that the IR emitter
directly faces the IR sensor window of the source device).
Step 3:
Power on the AV Sender by connecting the DC plug of the Power
Adapter to the DC jack (A10, and connect the power supply to an
outlet.
Step 4:
The Power on LED (A1) shall be on. The Link LED (A2) shall start
blinking in 10 seconds after power on.