Assembly, Lt & yt) lawn tractors – Craftsman 486.24599 User Manual
Page 2
Attention! The text in this document has been recognized automatically. To view the original document, you can use the "Original mode".
Any power equipment can cause injury if operated improperly or if the user does not understand how to operate
the equipment. Exercise caution at ai! times, when using power equipment.
• Refer to your tractor owners manual for "Rules
For Safe Operation".
A
Look for this symbol to point out important
safety
precautions.
It
mean-Attention!!
Become alert!! Your safety is involved.
ASSEMBLY
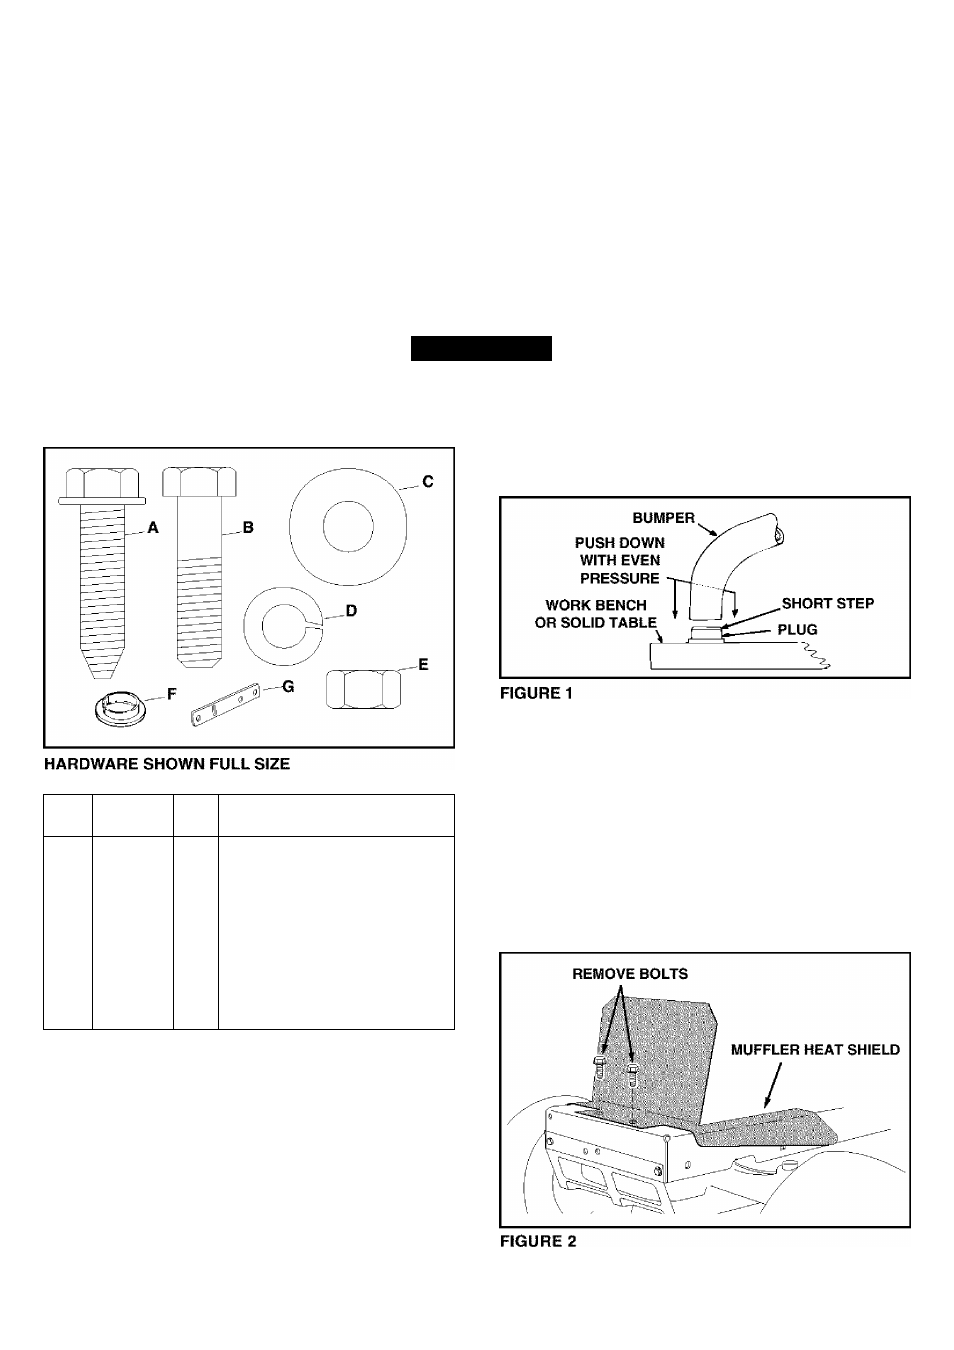
Your bumper carton contains parts listed below, identify
and lay out ai! parts shown.
Ref.
No.
Part
No.
Qty.
Description
A
48894
2
Hex Bolt, Self Threading
3/8-16
X
1-1/2"
B
43062
4
Hex Bolt, 3/8-16
X
1-1/2"
c
43070
4
Flat Washer, 3/8"
D
43003
4
Lock Washer, 3/8"
E
43015
4
Hex Nut, 3/8-16 Thd.
44742
2
Plug
G
24655
2
Bumper Extension Brackets
64623
1
Bumper Assembly
TOOLS REQUIRED
(2)
9/16" Open End or Box Wrenches
Place plug on a work bench or solid table. Set end of
bumper onto plug until it rests on short step of plug.
Using even pressure, push down on bumper until
end of bumper slips over plug. See figure 1.
{LT & YT) LAWN TRACTORS
A
CAUTION! Muffler is hot! Allow engine to
cool down before proceeding with bumper
installation.
Remove tractor hood.
If your tractor has a heat shield like the one in figure
2 remove it to attach bumper, then reinstall shield.