Replacement, Caution, Wall bracket – Craftsman 700995 User Manual
Page 9
Attention! The text in this document has been recognized automatically. To view the original document, you can use the "Original mode".
Inspect the line head assembly for
cracks or damage.
While gently pulling on the cutting line,
press the spool (bump head) until the
line releases. If the jam is cleared, the
spool should spin free a short distance
and the line will advance.
If the unit continues to jam or will
not spin freely, call 800-539-6455.
Failure to stop the unit when the
line is jammed will cause excessive
battery drainage and shorten motor life
(overheating).
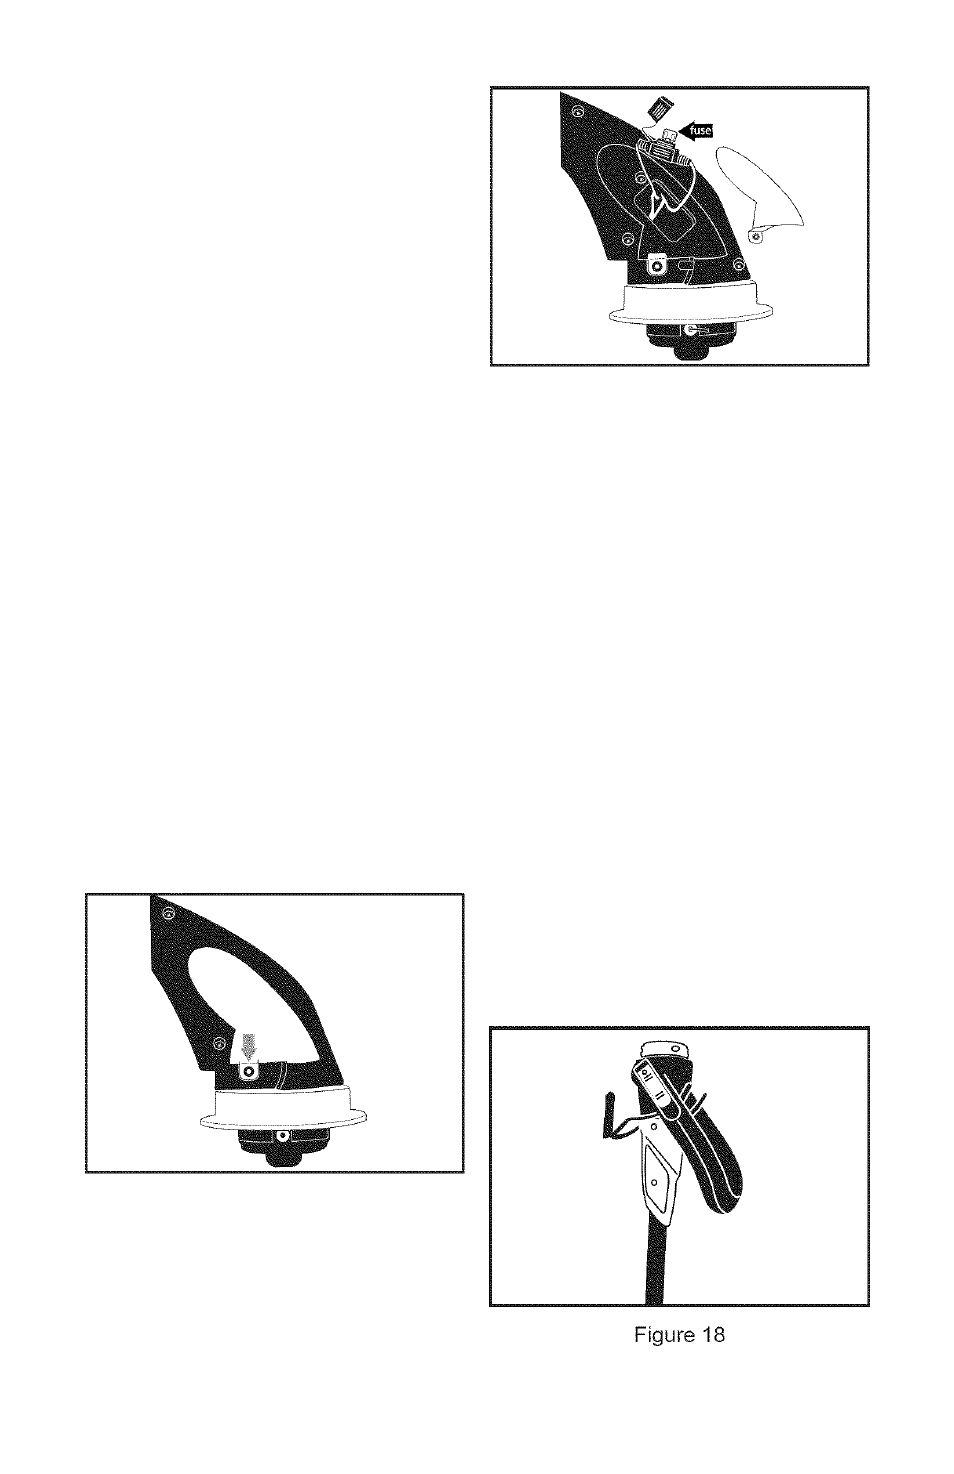
Fuse
Replacement
To replace the fuse, you must
first remove the line guard from
the trimmer. Turn the line trimmer
attachment upside down. Align the
arrow on the edging wheel with the
arrow on the line guard. Remove the
screw that is exposed in the hole in
the edging wheel with a standard
screwdriver. Remove the guard by
pulling away from the trimmer housing.
With the line guard removed, remove
the screw shown in figure 16 from the
tab of the red fuse cover on the right
side of the trimmer housing.
Figure 16
Remove the red cover and set aside.
Pull the fuse holder out from inside
the housing and unsnap its cover as
shown in figure 17.
Figure 17
Pull the fuse straight out of the holder.
Replace the fuse with the same type
15 amp mini auto fuse. Push the fuse
holder back into the trimmer housing.
Replace the red fuse cover by first
inserting the tab at the top of the cover
into the housing and then securing it in
place with the screw that you removed
previously. Attach the line guard to the
trimmer housing (see the section on
attaching the line guard).
CAUTION:
Never operate the trimmer
without the line guard attached.
WALL BRACKET
Mount the wall bracket securely to
the wall; attach with screws to a wall
stud. The use of wall board anchors
is NOT recommended. Place the tool
attachment in the wall bracket as
shown for convenient storage, (see
figure 18)