Craftsman 358.795543 User Manual
Page 10
Attention! The text in this document has been recognized automatically. To view the original document, you can use the "Original mode".
SERVICE AND ADJUSTMENTS
LINE REPLACEMENT
Pre-wound spools offer the most con
venient method for replacing line and
ensuring optimum performance,
• Replacement spools are color-
coded to ensure use of the correct
spool with your unit. Be sure to use
the same color spool as the existing
spool,
NOTE: Always clear dirt and debris
from cutting head components when
performing any type of maintenance,
• Hold spool and unscrew cap by turn
ing in the direction shown on top of
the cap,
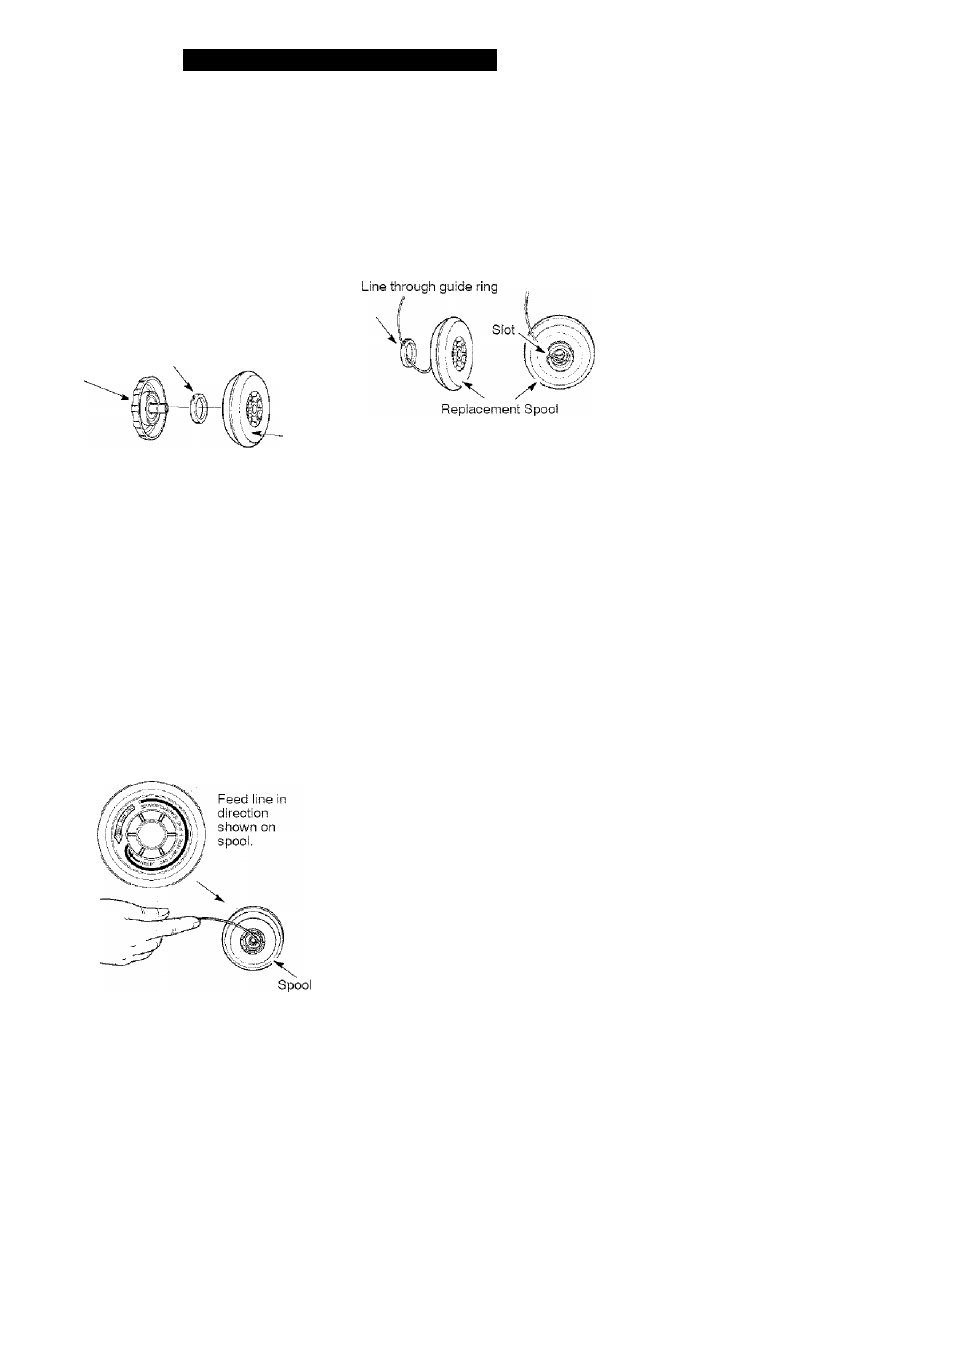
• Remove line guide ring and spool.
Line guide ring
Cap
'
Spool
Use a pre-wound spool or refill spool
with line. If using a pre-wound spool,
remove tape strip from line and spool.
REFILLING THE SPOOL WITH LINE
A WARNING:
Use only 0.080
inch (2 mm) diameter round line.
Other sizes and shapes of line will not
advance properly and will result in im
proper cutting head function or can
cause serious injury. Do not use other
materials such as wire, string, rope,
etc. Wire can break off during cutting
and become a dangerous missile that
can cause serious injury.
1. Cut a length of 25 feet of 0.080 inch
(2 mm) diameter round Crattsman
brand line.
2. Insert one end of line into center
cavity of empty spool. Ensure line
will feed into spool in the direction
shown on the spool (counterclock
wise).
3. Continue feeding line into spool,
leaving 4-6 inches (10 - 15 cm)
unwound from center of spool.
INSTALLING SPOOL WITH LINE
1. Install replacement spool.
2. Thread line through line guide ring.
3. Rest guide ring on spool and place
line through slot. Allow line to ex
tend 4-6 inches (10 - 15 cm) from
center of spool.
4. Ensure line remains in slot while
screwing cap on to the shaft. Only
tighten cap hand tight!
CARBURETOR ADJUSTMENT
A
w
ARNING:
Keep others away
when making idle speed adjustments.
The trimmer head will be spinning dur
ing this procedure. Wear your protec
tive equipment and observe all safety
precautions.
The carburetor has been carefully set
at the factory. Adjustments may be
necessary if you notice any of the fol
lowing conditions:
• Engine will not idle when the throttle is
released.
Make adjustments with the unit sup
ported so the cutting attachment is off
the ground and will not make contact
with any object. Hold the unit by hand
while running and making adjust
ments. Keep all parts of your body
away from the cutting attachment and
muffler.
Idle Speed Adjustment
Allow engine to idle. Adjust speed until
engine runs without stalling (idle
speed too slow).
• Turn idle speed screw clockwise to
increase engine speed if engine
stalls or dies.
10