Assembly, Carton contents, Tools required for assembly – Craftsman 486.24535 User Manual
Page 4
Attention! The text in this document has been recognized automatically. To view the original document, you can use the "Original mode".
ASSEMBLY
CARTON CONTENTS
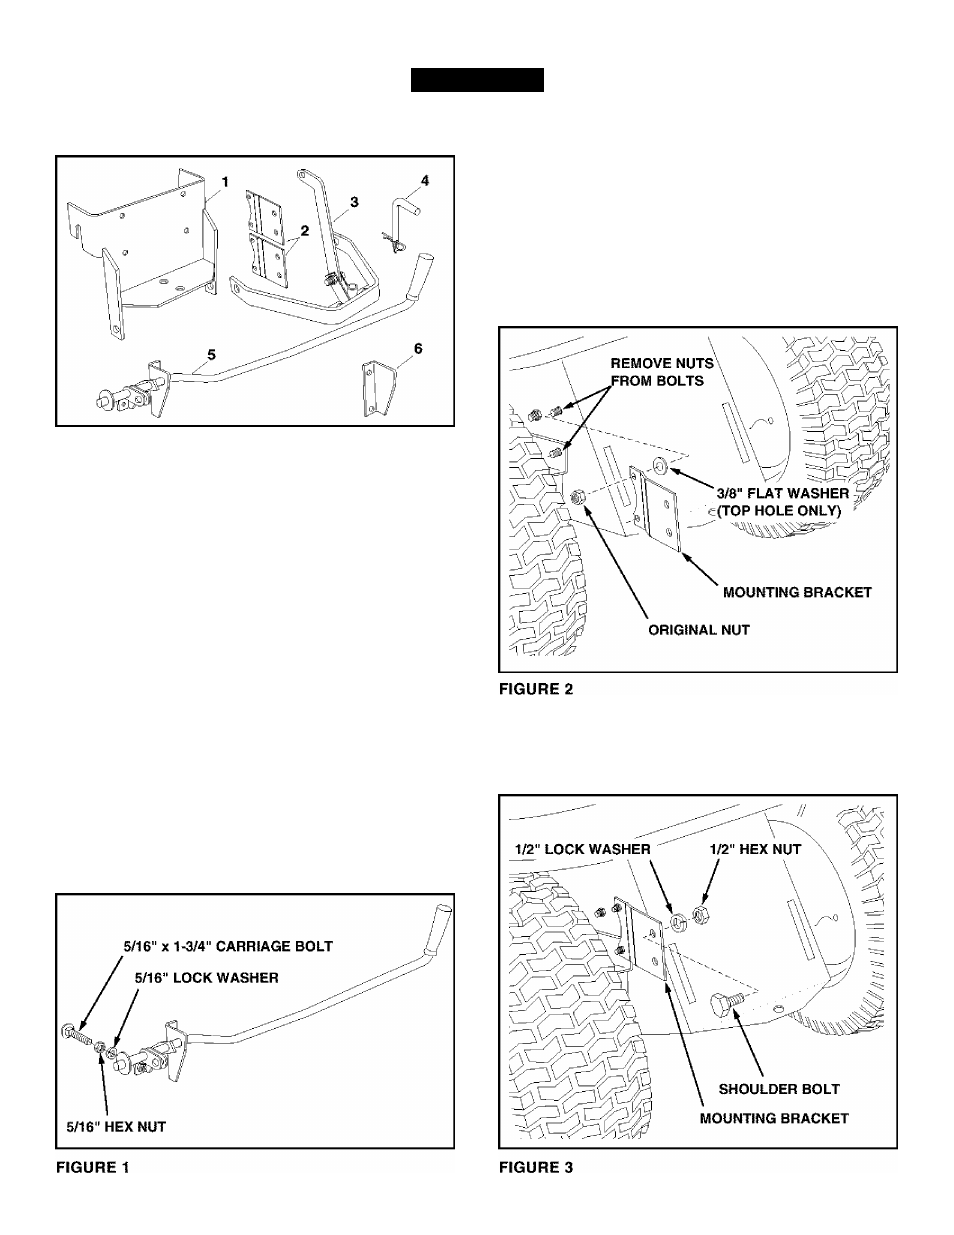
1. Sleeve Hitch Frame Assembiy
2. Mounting Brackets (2)
3. Sleeve Hitch Lift Assembiy
4. Hitch Pin with 5/32" Hair Cotter Pin
5. Lift Lever Assembiy (with R.H. Pivot Bracket)
6. L.H. Pivot Bracket
Hardware Package (see page 3)
TOOLS REQUIRED FOR ASSEMBLY
(1) 1 /2" Wrench or Adjustabie Wrench
(2) 9/16" Wrenches or Adjustable Wrenches
(1) 5/8" Wrench
(1) 11/16" Wrench
(1) 3/4" Wrench or Adjustabie Wrench
(1) 15/16" Wrenches or Adjustabie Wrenches
Assemble the 5/16" hex nut and then the 5/16" lock
washer onto the 5/16" x 1-3/4" carriage bolt. Screw
the bolt into the nut welded to the stop bracket on
the handle. The bolt is a depth adjustment for
attached implements. See figure 1.
•
Remove the nuts from the two bolts in each side of
the tractor, leaving the bolts in place. See figure 2.
• Attach the Mounting Brackets to the bolts using the
original nuts and two 3/8" flat washers. The brack
ets should be turned so that the bends increase the
distance between the rear of the brackets. See
Figure 2.
NOTE: If no bolt and nut are present in a hole, use a
3/8" X 1-1/4" hex bolt, 3/8" lock washer and 3/8"
hex nut to attach the Mounting Bracket to the hoie.
• Assemble a shoulder bolt to each mounting bracket
using a 1/2" lock washer and 1/2" hex nut. See
figure 3.