Step 5: (see figure 6) – Craftsman 486.24611 User Manual
Page 7
Attention! The text in this document has been recognized automatically. To view the original document, you can use the "Original mode".
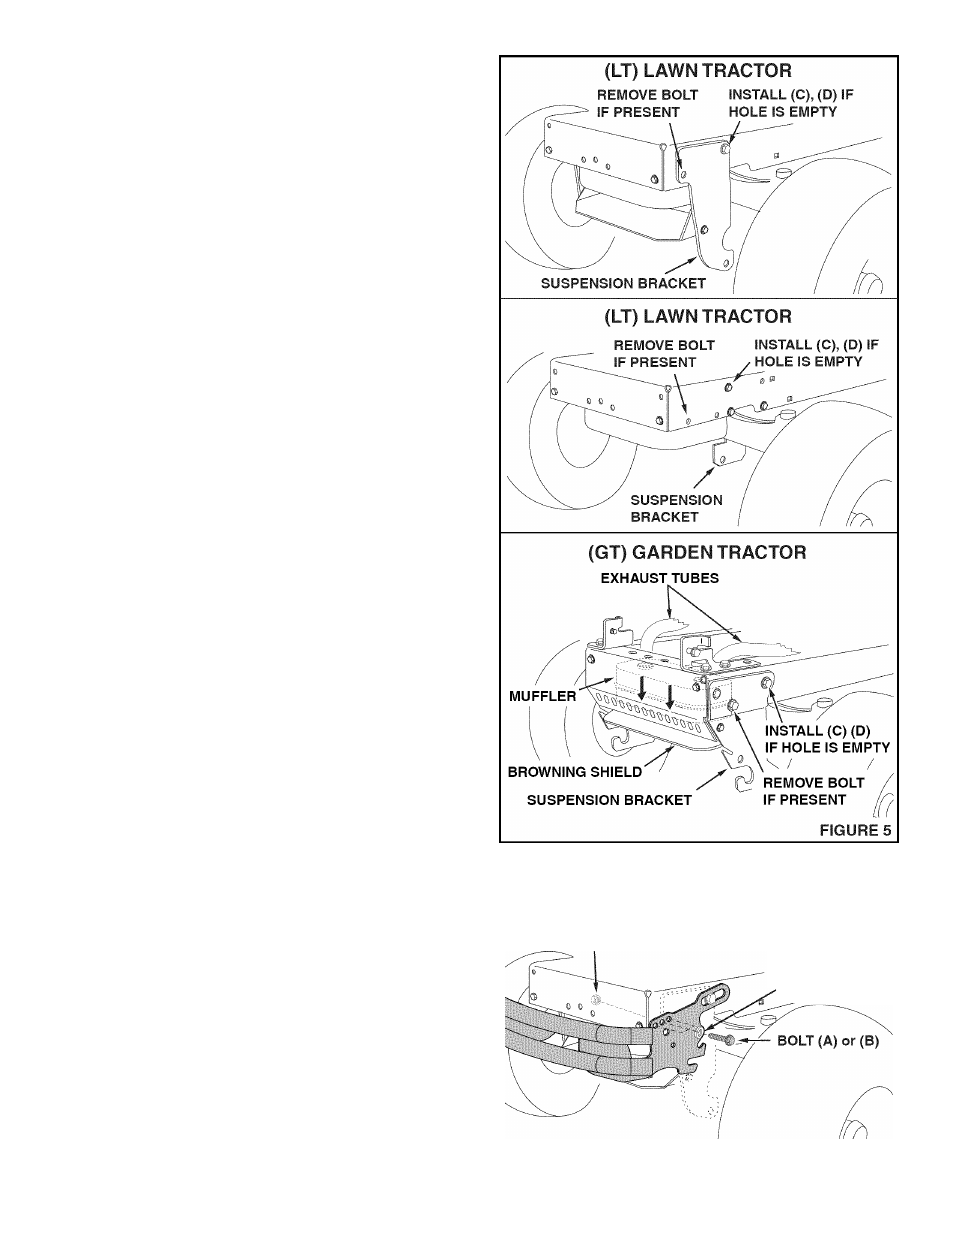
STEP 4
:
(SEE FIGURE 5)
•
Remove any bolts present in front mounting holes in
side of tractor frame. If bolt will not screw out of hole,
check if a nut is present on bolt on inside of frame.
On GT tractors, if access to nut is blocked by a front
mounted muffler, slide muffler down exhaust tubes to
rest on top of browning shield.
IMPORTANT: Be sure to re-attach muffler and heat
shield after bumper is installed.
•
If rear mounting holes in tractor frame are empty,
install hex bolts and whiziock nuts supplied in the
parts bags. See figure 5.
STEP 5: (SEE FIGURE 6)
•
Spread ends of bumper enough to fit slots onto bolts
in rear mounting holes in tractor frame.
•
The bumper has three mounting holes. The rear
hole provides the most clearance while the forward
holes provide a neater appearance. Use a hole
that provides enough clearance for hood to stay in
raised position when opened. Attach the bumper
using either standard hex bolts and whiziock nuts or
self threading bolts and lock washers. Use the self
threading bolts if standard hex bolts do not insert
freely into the hole in the tractor frame.
IMPORTANT: Before fully tightening bolts, be sure
tractor hood will stay in raised position when opened.
LAWN TRACTOR
(LT)
SHOWN
WHIZLOCK NUT (D)
FOR BOLT (B)
LOCKWASHER (E)
FOR BOLT (A)
FIGURES
Call 1 -866-576-8388 for missing parts or assembly help
DO NOT RETURN TO STORE