Assembly, Assembly ^warning, A warning – Craftsman 358.792443 User Manual
Page 5
Attention! The text in this document has been recognized automatically. To view the original document, you can use the "Original mode".
ASSEMBLY
CARTON CONTENTS
Check carton contents against the fol
lowing list.
Model 358.792443
• Brushcutter attachment
• Handlebar
• Handlebar mounting bracket for 1''
{2.5 cm) shaft
• Handlebar mounting bracket for 7/8"
(2.2 cm) shaft
• Bracket cover (2)
• Shoulder strap
• Upper shoulder strap clamp
• Lower shoulder strap clamp (with
spacer tabs)
• Handlebar bracket screws (4)
• Shoulder strap clamp screws (2)
• 4-point weed blade (assembled on
brushcutter attachment)
• Large nut for installing blade
• Retaining washer
• Cupped washer
• Metal shield (assembled on brush
cutter attachment)
• Trimmer head
• Plastic shield
• Wing nut (screwed onto plastic shield)
• Attachment Hanger
• Hex Wrench
• Container of line
Examine parts for damage. Do not use
damaged parts.
NOTE;
if you need assistance or find
that parts are missing or damaged, call
1-800-235-5878.
ASSEMBLY
^WARNING:
If received assembled,
repeat all steps to ensure your unit is
properly assembled and all fasteners
are secure.
• A hex wrench (provided) is required
for assembly.
INSTALLING BRUSHCUTTER AT
TACHMENT
CAUTION:
When removing or instal
ling attachments, place the unit on a
flat surface for stability.
1.
Loosen the coupler by turning the
knob counterclockwise.
Coupler
TIGHTEN
LOOSEN
Knob
2
.
4.
5.
Remove the shaft cap from the
brushcutter attachment (if present).
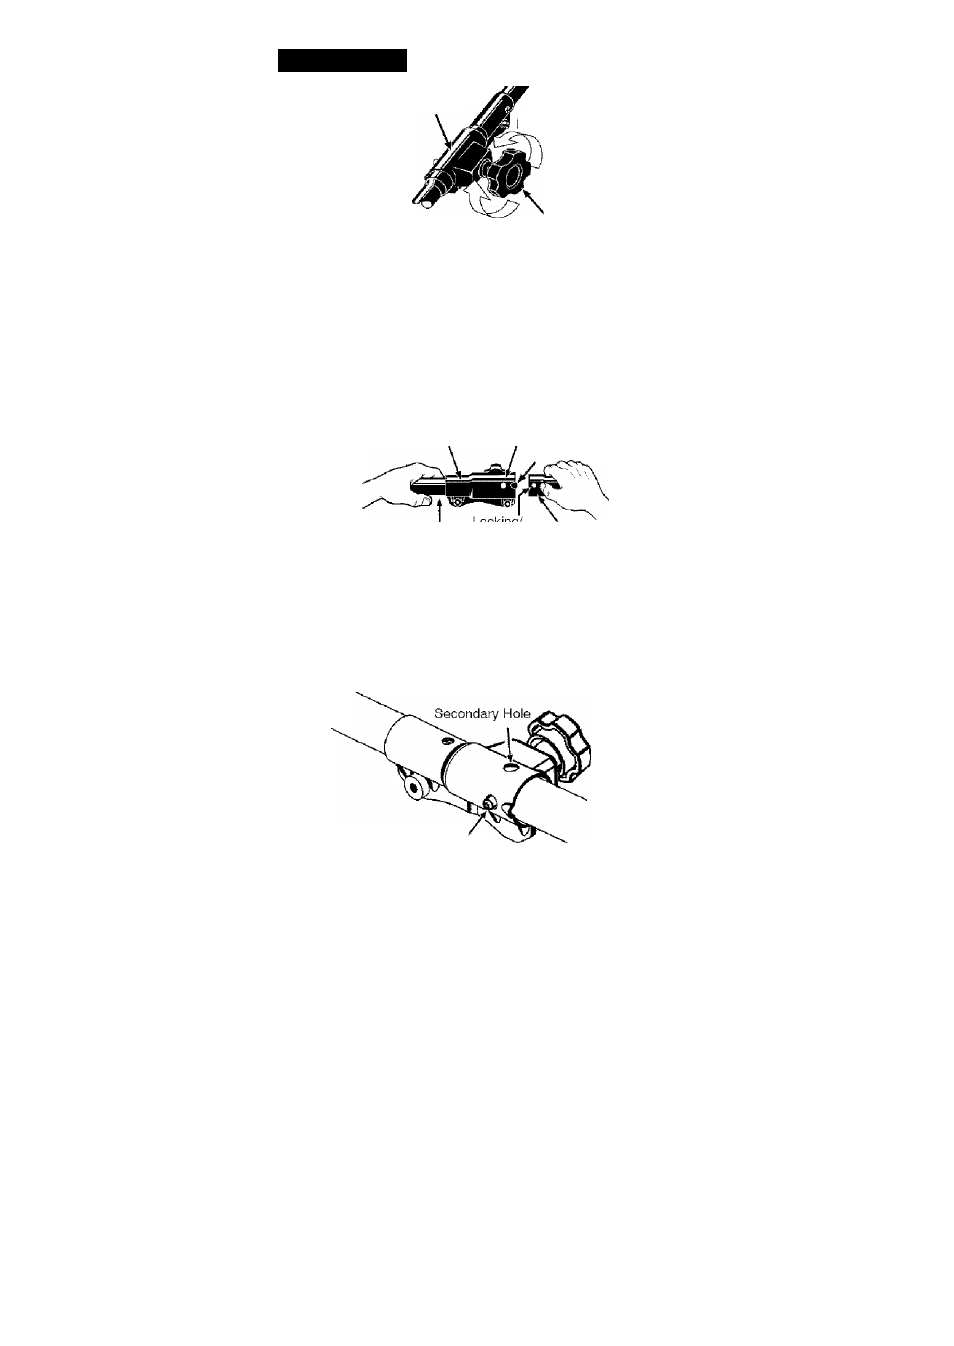
Position locking/release button of
attachment into guide recess of
coupler.
Push the attachment into the cou
pler until the locking/release button
snaps into the primary hole.
Before using the unit, tighten the
knob securely by turning clock
wise.
Coupler
Primary Hole
Guide Recess
Uooer Looking/
Release
Button
Attachment
a WARNING:
Make sure the lock
ing/release button is locked in the pri
mary hole and the knob is securely
tightened before operating the unit. Us
ing the wrong hole could lead to serious
injury or damage to the unit.
Locking/Reiease ,
Button in Primary Hole