QHYCCD QHY9 User Manual
Page 12
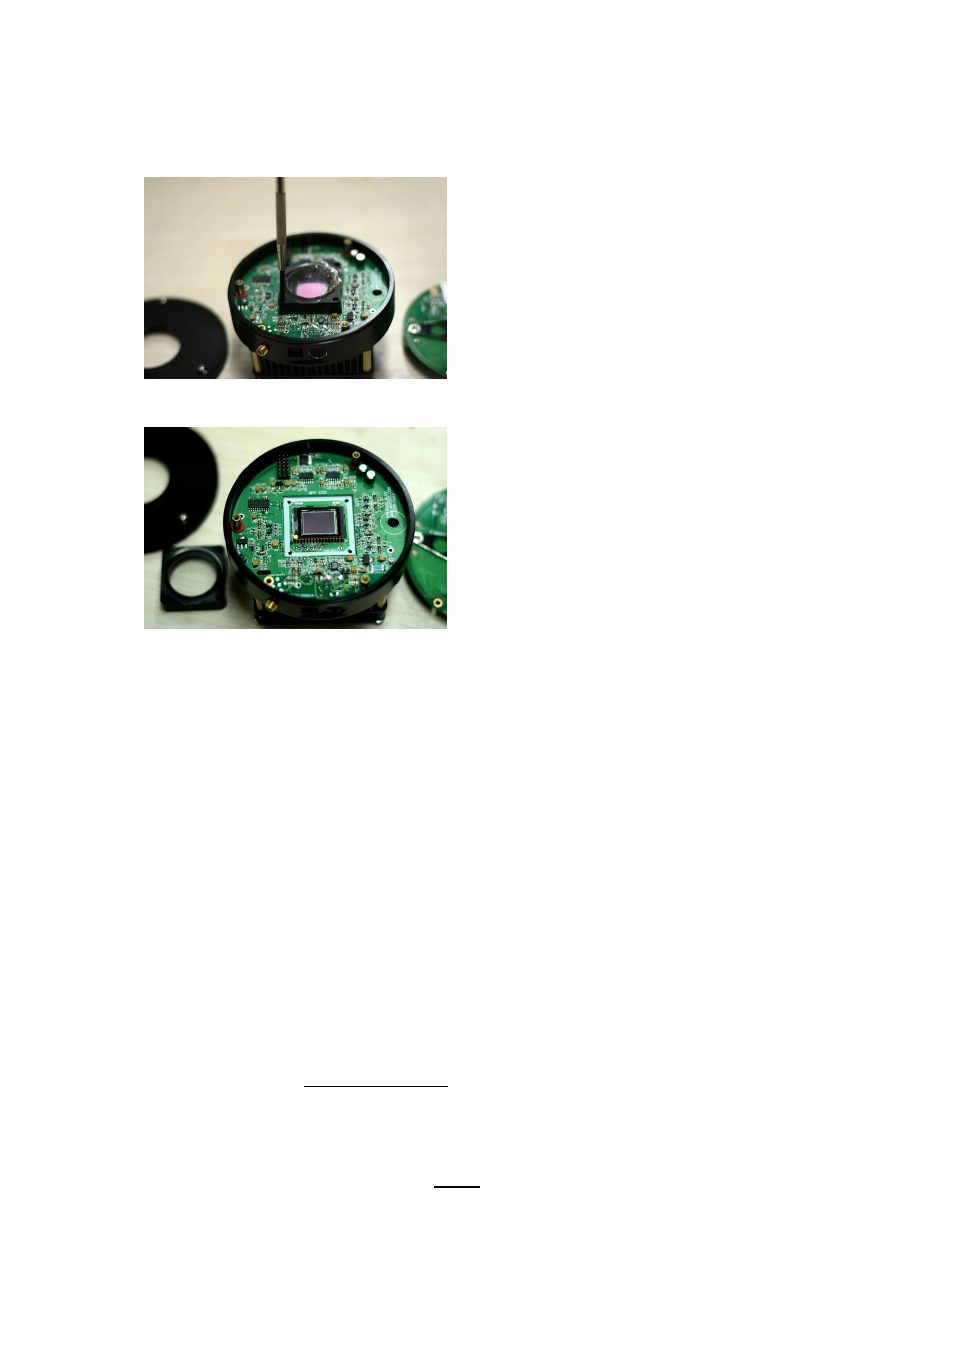
3. Remove the four screws of the CCD chamber (Chamber will need to be re gassed if you proceed)
If you just want to clean the glass, then do not proceed by unscrewing the chamber.
4. Lift the CCD chamber case of the main board
Clean the CCD surface carefully. The CCD surface has an AR (Anti Reflection) coating, so care
must be used when cleaning. For dust or fibers, a blower bulb should be used, and alcohol or
similar cleaning agent with a very soft lint free cloth (Micro Fiber cloth) for hard to remove spots.
Use single sweeps while cleaning, turning over and using a clean side on every sweep of the glass.
After cleaning, re fit the front CCD chamber. If alcohol or other cleaning liquid is used, make sure
the chamber is dry before re assembly, otherwise it will freeze and show as moisture when the
CCD is cooling down.
We suggest the re assembly of the chamber in a dry environment to avoid any moisture from
remaining.
A simple way to do this is to re assemble the chamber while a heater blows dry hot/warm air
around the chamber, e.g. Hair dryer, room heater etc.
5. When re assembling the upper PCB board, take care that each of the sockets and pins line up
correctly and sit over the right positions. The crucial one is the mini connector, located between
upper PCB board and the camera socket board. There is also two 1x2 pin connector, one is for
CCD signal and one is for temp sensor. It is easy for it to get bent, avoid any tension to the board
while inserting, and DO NOT FORCE IT.
6. Make sure the upper PCB board is connected correctly by gently pushing evenly all around the
board. Then re assemble the upper housing. Take Note, there is a depression position for the
shutter motor in the upper case, and this MUST sit over the shutter motor.