E400 fr, Quick start guide – Proavio EB400FR User Manual
Page 3
E400 FR
Disk Installation
If your system was purchased with capacity, please skip this section and
immediately go to next section. If your system was purchased without disks,
install each disk into the provided disk trays and fasten using the supplied
hdd screws. Do not use any other mounting screws other than the ones provided
with your system. System or disk damage may occur if using non-approved
mounting hardware.
Hard Disk
Figure 1.
Figure 2.
Disk tray - Bottom view
Disk Tray
6
Figure 7.
Insert Disk Module
After fastening each disk, insert the disk trays in the open disk bay on your
system. For added security your system is equipped with locking
disk bays to prevent accidental or malicious disk removal.
Quick start guide
ENHANCE
|
TECHNOLOGY
7
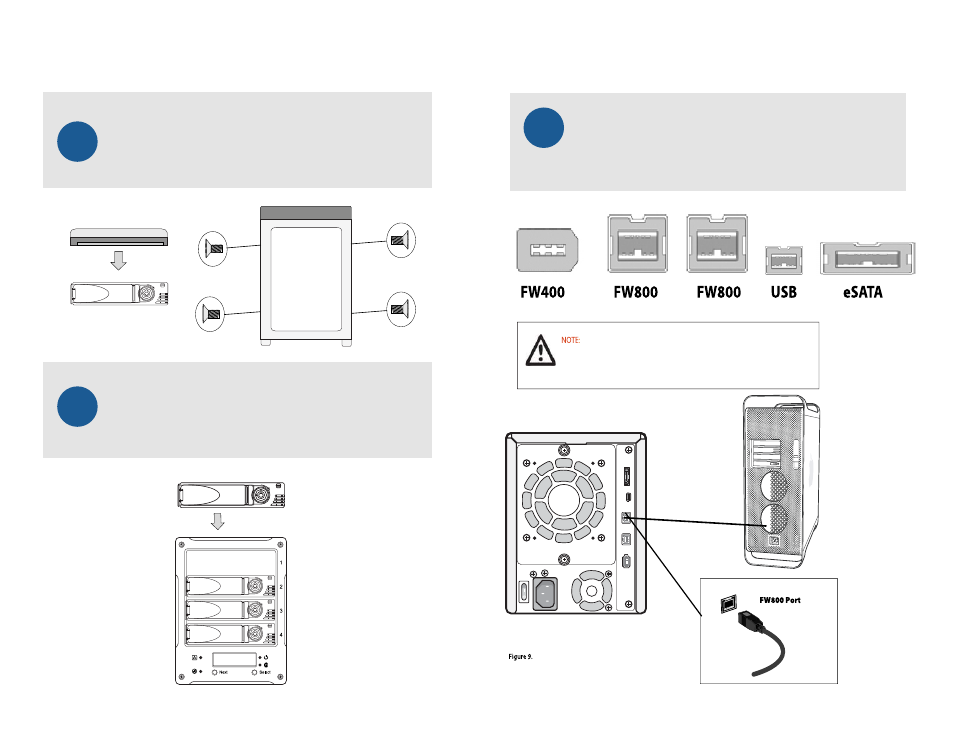
Connecting Your E400 FR
Figure 8.
Gently “press” tray handle to insert HDD
4 Bay Simple & Efficient Hardware RAID-5 Desktop Storage
Your E400 FR can be connected to a Mac or Windows-based workstations through
a choice of small computer interface connections such as FW400, FW800, High-
speed USB2.0 and eSATA.
5
Do not connect two ports at the same time. Doing so may
cause your E400 FR to function incorrectly. Always select
one interface port at atime.