Wall mounting (optional), Setting up the monitor, Figure 1 – Dell E1715S Monitor User Manual
Page 27
Setting Up the Monitor
27
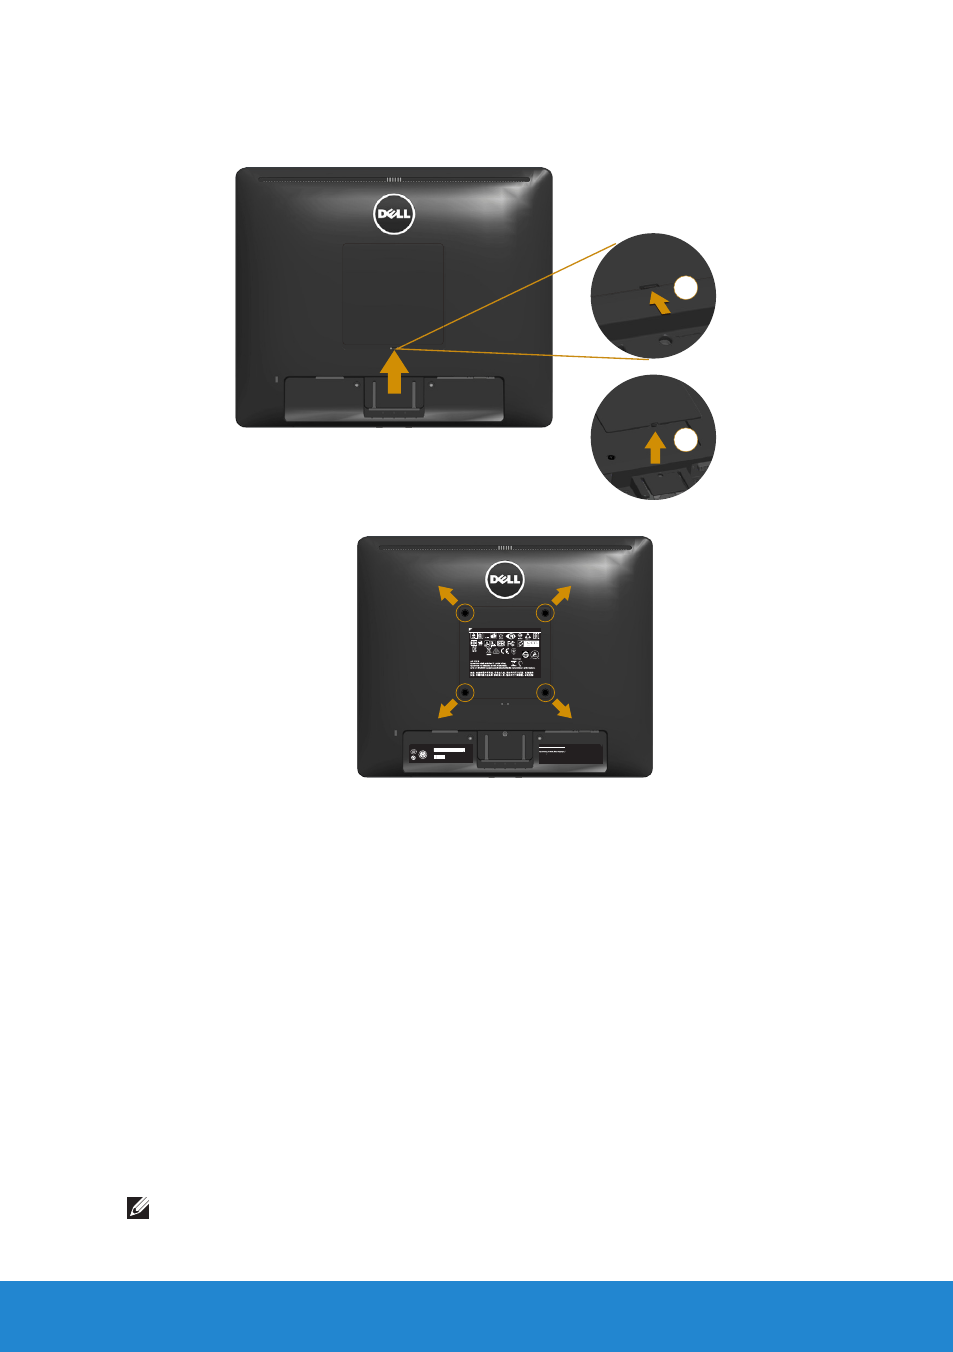
Wall Mounting (Optional)
1
2
figure 1
+
+
+
+
CAN ICES-3 (B)/NMB-3(B)
3
XXXXXXX-XXXXX
MSIP-REM-TPV-E1715Sc
TPV Electronics (Fujian) Co., Ltd.
080-854-0066
신청인:
제조자:
xxxxx
x x x x x x - x x
E1715Sc
TOP VICTORY ELECTRONICS (FUJIAN) CO., LTD.
S/N: CN-12MWY-64180-341-001L
REV A00
E1715Sc
100-240V 50/60Hz 1.5A 輸入電源: 交流電壓100-240伏特, 1.5安培, 50/60赫茲
Consumo de energía: xx.x Wh
Consumo de energía en modo de espera: x.xx Wh
Удельная мощность рабочего режима - x.xxx Вт/см²
Потребляемая мощность изделием в режиме ожидания - x.xx Вт
Потребляемая мощность изделием в выключенном режиме - x.xx Вт
Made in China /Fabricado en China /中國製造/中国制造/중국에서 만든 Q40G017N-700-39A
输入电源
/정격입력:
Flat Panel Monitor /Monitor Plano Panel /液晶顯示器 /液晶显示器 /모니터 www.dell.com
figure 2
(Screw dimension: M4 x 10 mm).
Refer to the instructions that come with the VESA-compatible base
mounting kit.
1. Place the monitor panel on a soft cloth or cushion on a stable flat
table.
2. Remove the stand.
3. Remove the VESA™ Screw Cover (figure 1)
4. Use a screwdriver to remove the four screws securing the plastic
cover. (figure 2)
5. Attach the mounting bracket from the wall mounting kit to the LCD.
6. Mount the LCD on the wall by following the instructions that came
with the base-mounting kit.
NOTE: For use only with UL-listed wall mount bracket with minimum
weight/load bearing capacity of 9.00 kg.