Assembly, Warning, Attach handle to vacuum – Bissell 3243e User Manual
Page 6: Attach vacuum hose, clips & tools
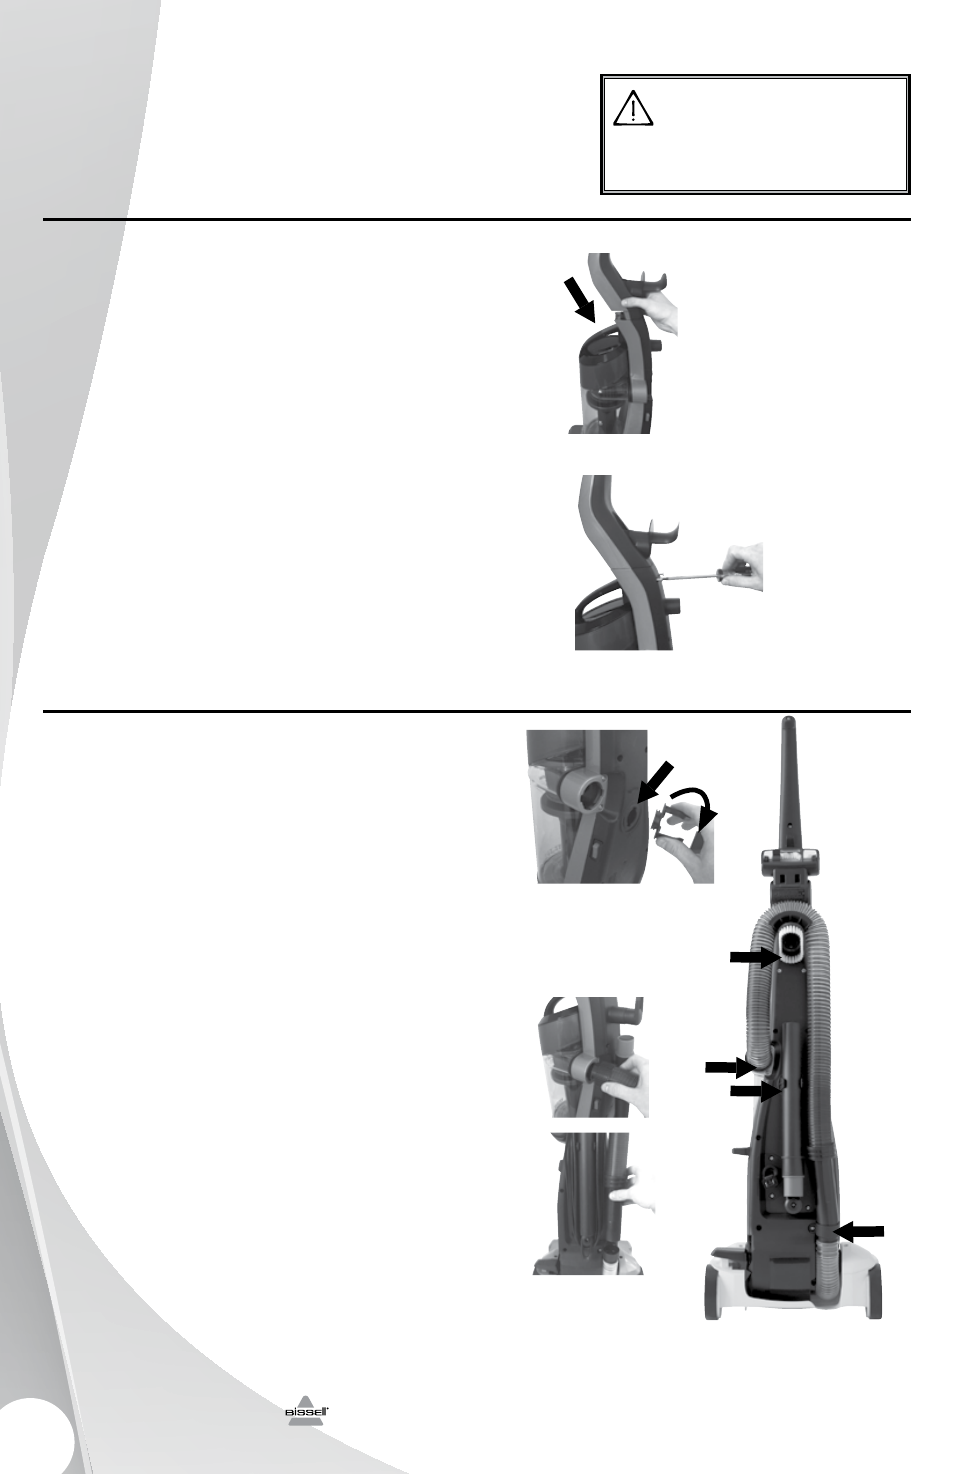
Assembly
The only tool you’ll need to assemble your
vacuum cleaner is a Phillips-head screwdriver.
Attach handle to vacuum
1. Locate the vacuum handle and remove the
screw packet taped to the handle. The screw
packet contains two screws of equal length.
2. Stand the vacuum upright and slide the
base of the handle firmly into the opening at
the top of the vacuum body.
3. Check to be sure the handle is fitted to the
vacuum body. If there are any gaps between
the handle and the vacuum base, continue to
push the handle firmly into the base until the
handle is flush.
4. Insert the two screws from the screw packet
into the existing holes. Push each screw firmly
into the hole before beginning to secure the
screw with a Phillips head screwdriver. If the
handle is aligned properly on the vacuum base,
you should be able to push the screw almost
entirely into the hole until only the screw head
is visible. Tighten the screw with a Phillips head
screwdriver by rotating the screw clockwise.
Attach vacuum hose, clips & tools
1. Attach the extension wand clip by inserting
the clip into the back of the vacuum base
and twisting clockwise. Mount the extension
wand (with crevice tool inside) on the back
of the vacuum.
2. Attach the Twist ‘n Snap™ hose by lining
up the tabs on the cuff with the corresponding
notches on the back of the vacuum. Twist the
Twist ‘n Snap hose clockwise to lock the hose
into place.
3. Slide the end of the hose wand into the
hose wand base, and fold the hose over the
upper hose wrap.
NOTE: The powerfoot will not suction properly
unless the hose wand is firmly attached.
4. Slide the dusting brush into the opening
below the upper hose wrap.
5. The TurboBrush/TurboEraser pet tool
(on select models) secures to the back of
the handle in the mount above the upper
hose wrap.
www.BISSELL.com
6
WARNING
Do not operate vacuum with damp or wet filters
or without all filters in place first.
2.
1.
2.
3.
5.
3.
1.
4.
2.
3.
4.