Camlink Film scanner User Manual
Page 6
6
©2012 NEDIS BV. Camlink is a registered trademark of NEDIS BV. Although every effort has been
made to ensure the accuracy of the information contained in this manual specifications are subject to
change and therefore NEDIS BV cannot guarantee its correctness and completeness at all times.
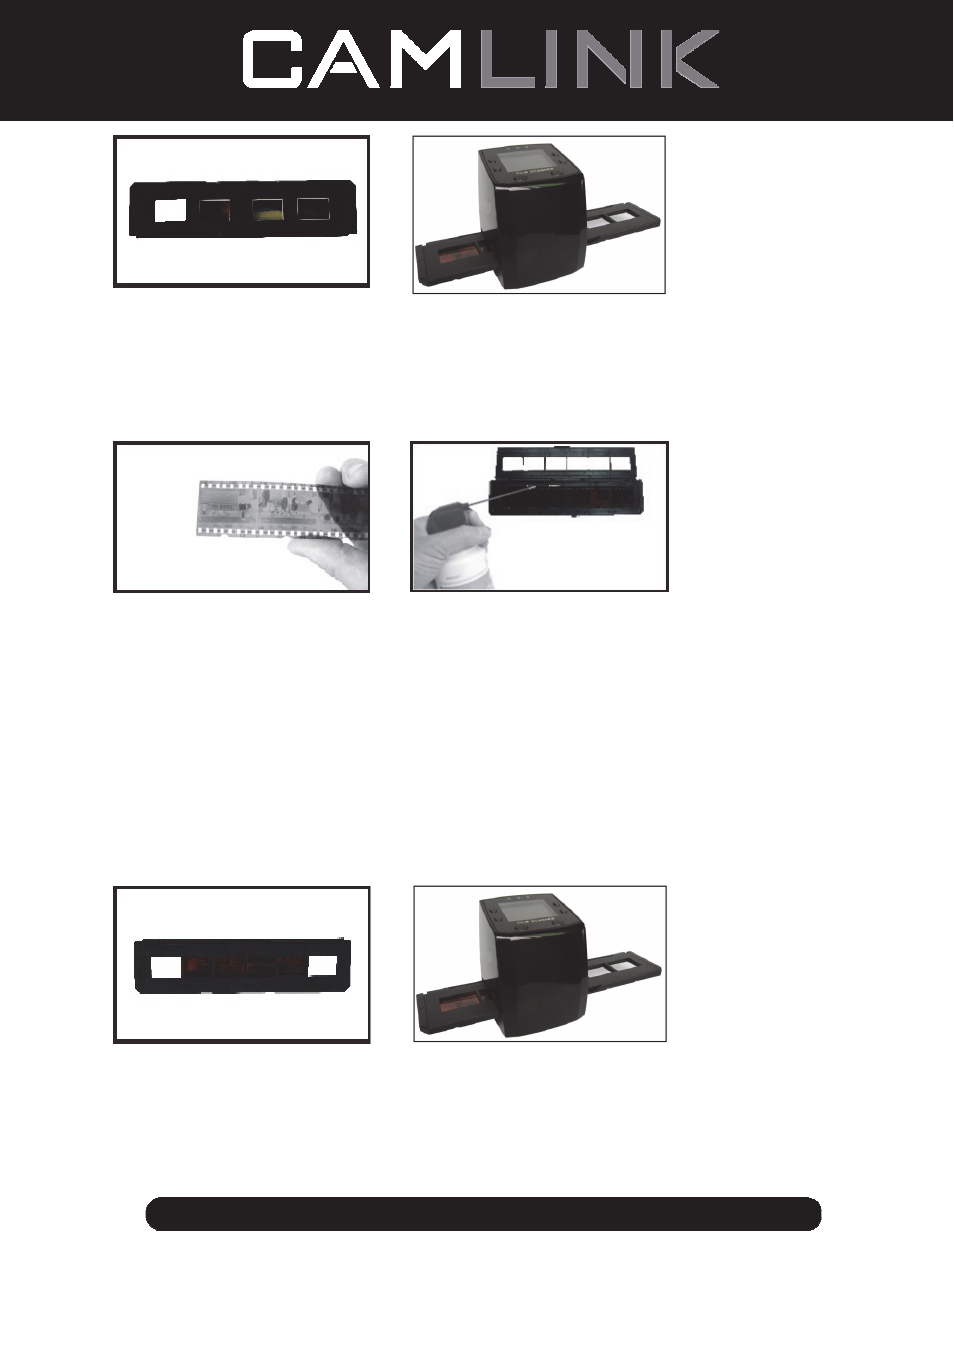
(3)
(4)
(3) Close the slide holder and press the edges so that it locks in place.
(4) Hold it in the position as showing the film scanner.
Insert the Slide Holder into the slot on the right side of the film scanner as shown.
Loading Negatives
(1)
(2)
(1) Hold up the negative toward the light. As you look through the negative, you should be
able to read the small negative numbers normally (not a mirror image).
Now turn the negative so the image is upside down while looking at the same side.
(2) Open the negative holder at the marked spot on the top. With the negative holder laid
open place the negative into holder so the notches line up with the notches on the
holder.
Note: Handle negatives with care. Any dust, scratches or finger prints will show up on
your saved images. If possible use cotton gloves when handling negatives. It is
recommended to use compressed air to remove any dust on the negatives.
This is not included with the film scanner but can be purchased from an office supply or
electronics retailers.
(3)
(4)
(3) Close the negative holder and press the edges so that it locks in place. Hold it in the
position as shown in the film scanner.
(4) Insert the negative holder into the slot on the right side of the film scanner as shown.