Amico Emerald Series Recessed Console With Rail User Manual
Page 4
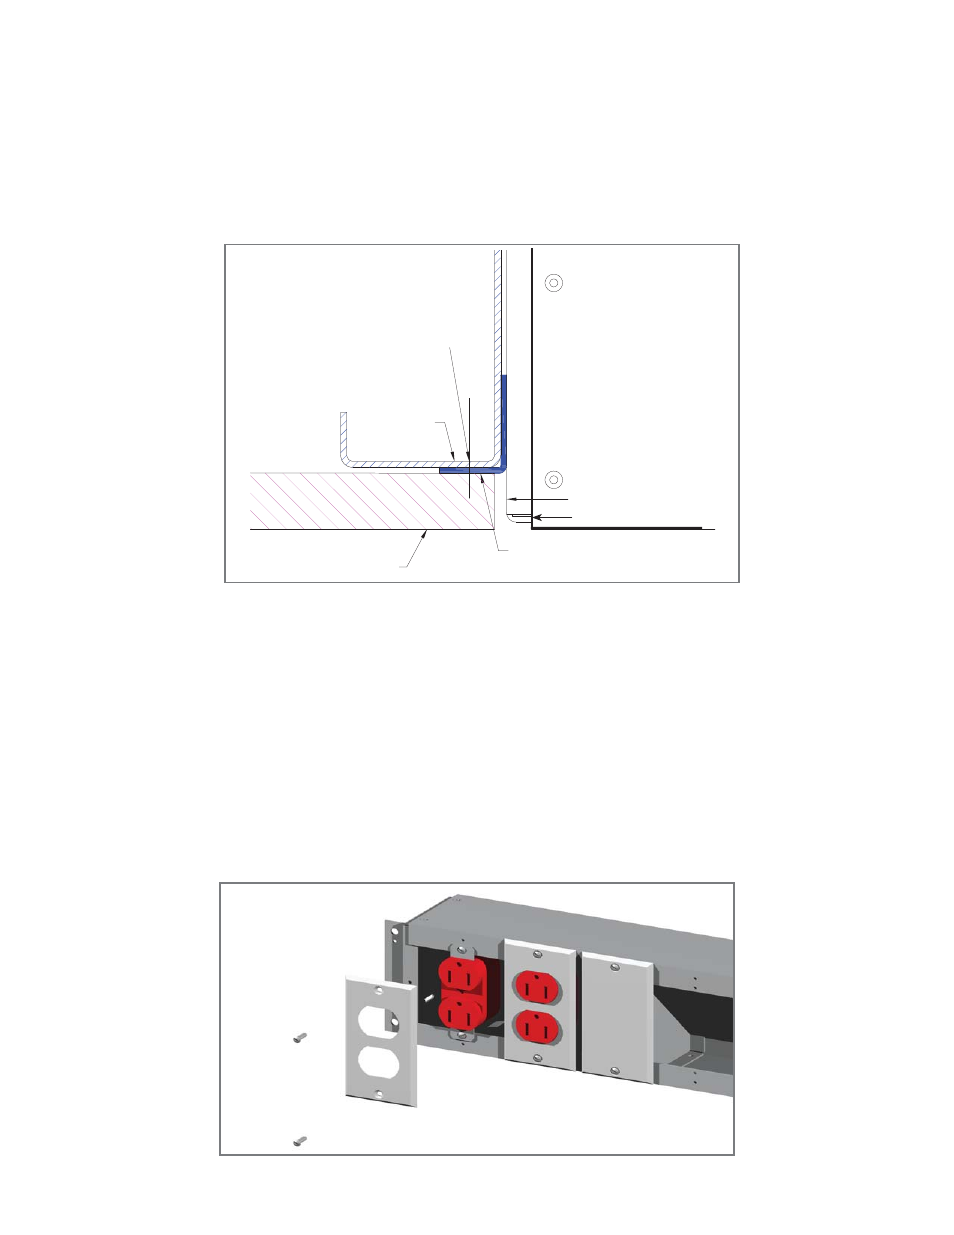
NOTE:
Fig 1
3.
The console should be fl ush with the fi nished drywall after installation (see Fig. 1). Check the positioning of the
fl anges to determine if adjustment of the fl anges is necessary. If adjustment is not required, skip steps 4 through 8,
and proceed with step 9.
NOTE: The fl anges are preset for 5/8” drywall.
Go to step 9 if fl anges do not require adjustment
4.
Remove any aluminum device covers that are blocking access to the screws (2 per fl ange) holding the
fl ange to the console box. This is done by loosening the screws (typically 2 per cover) attaching it to
the console box. Place everything in a safe and clean location.
CONSOLE BOX
END CAP
FLANGE
DRYWALL
STUD
CONSOLE BOX
NOTE 1:
Mounting hardware
(rivets or screws)
by others
4
Amico Pipeline