Handle assembly, Power cord storage, Caution – Aerus Lux Legacy Upright User Manual
Page 4
4
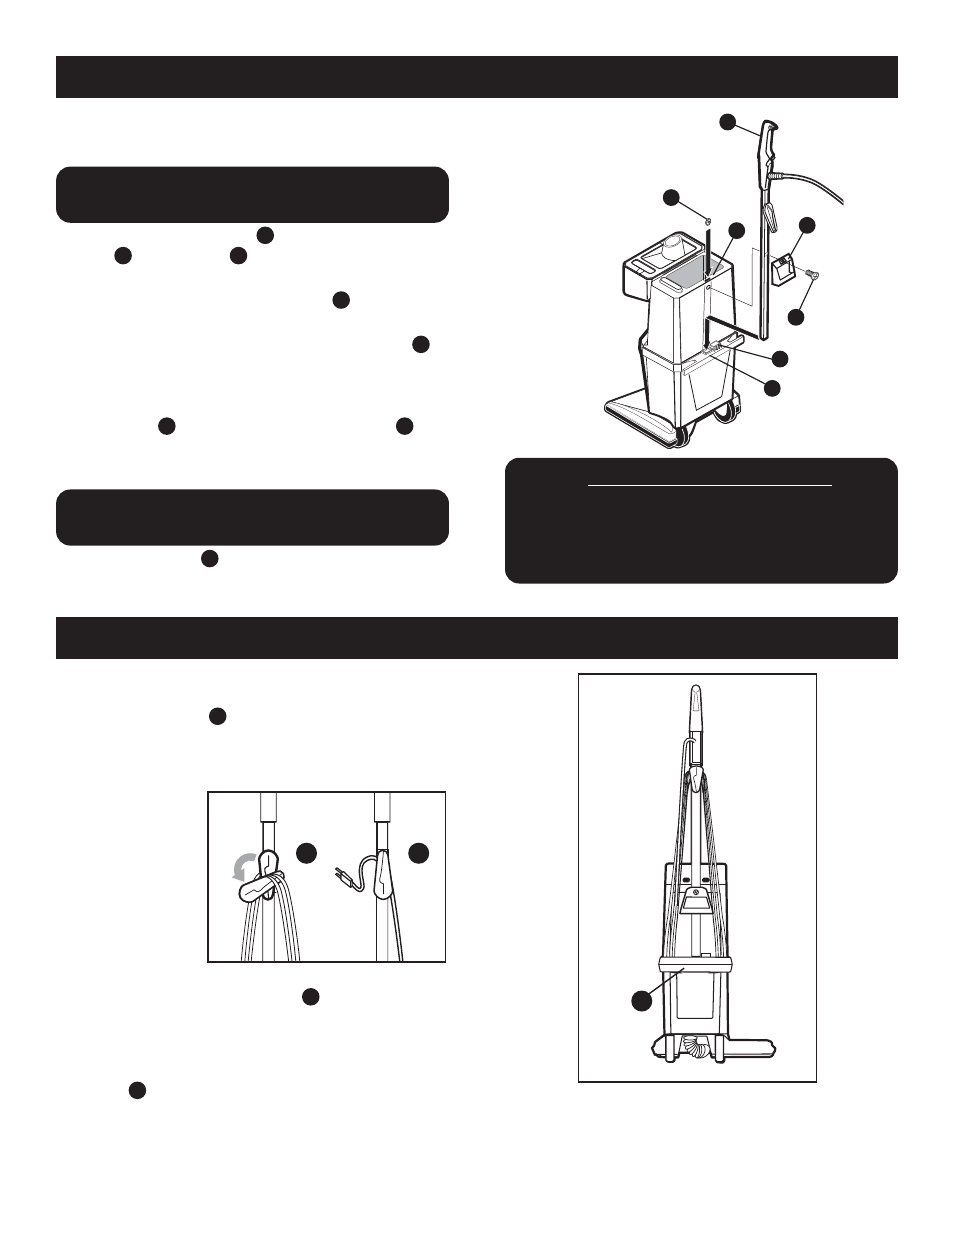
The operating handle of your new Lux® Legacy can
easily be attached to your cleaner as follows:
CAUTION:
Be sure unit is NOT plugged in
before assembling handle.
• Locate the handle assembly
. Remove the mounting
screw
and nut plate
from the handle.
• Open the cleaner bag compartment lid, remove the filter
bag. Place the nut plate into the pocket
inside the bag
compartment as shown.
• Fit the end of the handle into the handle receptacle
IMPORTANT: Press down firmly when plugging handle
into the receptacle.
• Hold the handle against the bag compartment, attach the
carry handle
and thread the mounting screw
through the handles into the nut plate.
• Tighten the mounting screw securely using a screwdriver.
NOTE:
The handle must be properly inserted into the
receptacle for the screw to engage the nut plate(2).
• The accessory plug
is an electrical connection for
powered accessories such as the Sidekick®.
NOTE:
This appliance has a polarized plug (one
blade is wider than the other). This plug will fit in a
polarized outlet only one way. If the plug does not fit
fully in the outlet, reverse the plug. If it still does
not fit, contact a qualified electrician to install the
proper outlet. Do not change the plug in any way.
5
6
7
4
3
2
6
1
1
2
3
6
5
4
7
HANDLE ASSEMBLY
Your cleaner includes a Combination Cord Cleat/Cord
Holder: To remove the cord rotate the cord cleat until the
power cord is released
. Remove the cord from the lower
cord wrap. Connect the cord plug into a 120V/60Hz
power supply.
As an additional
feature the cord
cleat serves as a
cord holder while
the cleaner is in use.
Rotate the cord
cleat until it snaps
into the "Release"
position, the top
portion of the cord
cleat forms a cord
holder. Snap the cord into the holder
and the cord will
be held out of the way while you vacuum.
To store the cord: Rotate the cord cleat into the "Storage"
position. Wrap the cord around the cord cleat and the lower
cord wrap
. Snap the end of the cord plug over the cord
for secure storage.
C
B
A
POWER CORD STORAGE
K
A
B
C