Remove mid weight set – Great Plains NTA607HD Operator Manual User Manual
Page 5
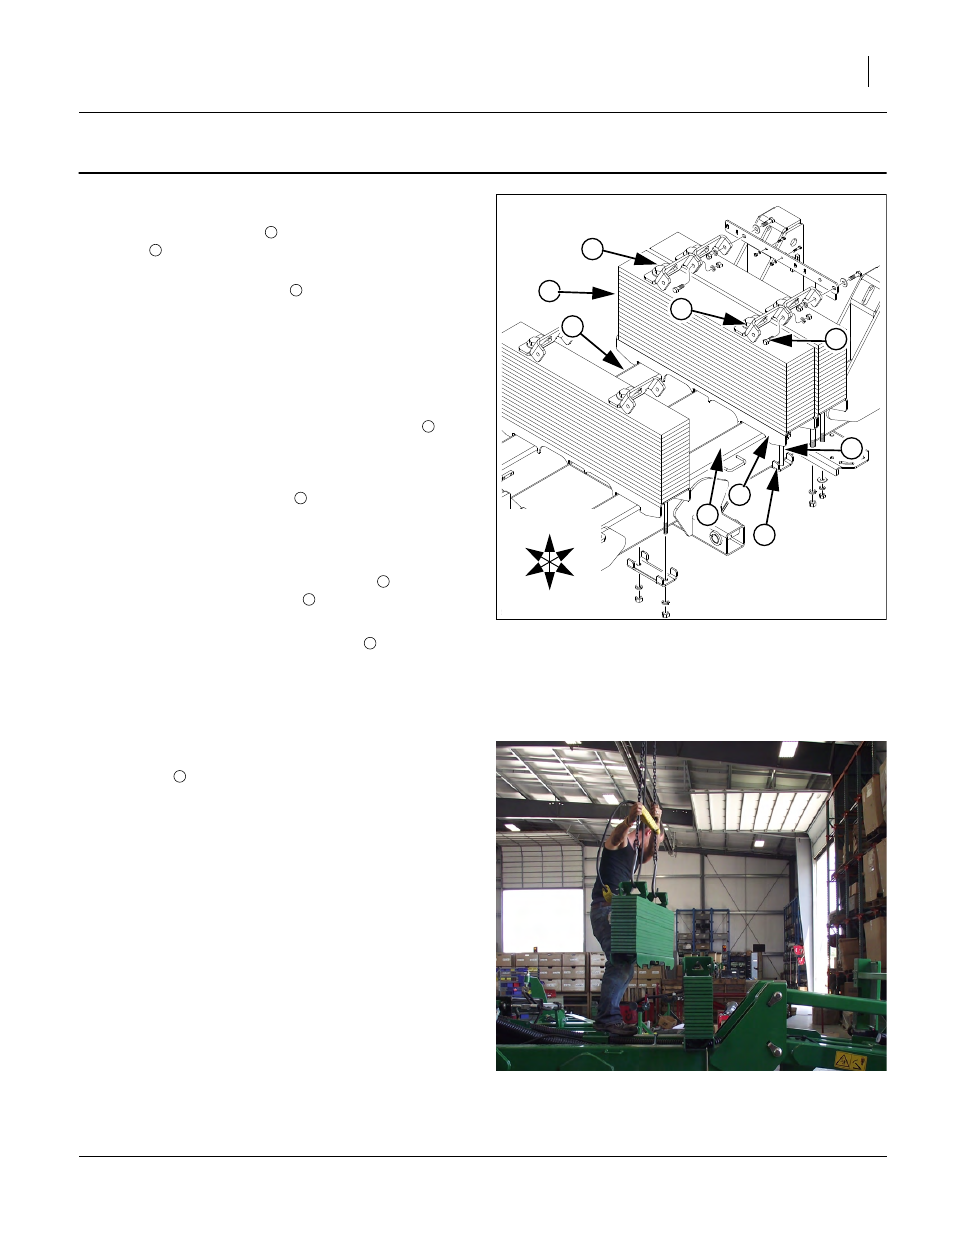
Remove Mid Weight Set
Great Plains Manufacturing, Inc.
5
12/02/2010
166-365M
Remove Mid Weight Set
Refer to Figure 4 and Figure 5
1.
Remaining clear of seed towers and hoses, disas-
semble mid weight set
from the center frame
tubes
.
Remove the
1
⁄
2
x1
1
⁄
2
in bolt
, hex nut and lock
washer from each top mount that hook the mid
weight and rear weight top mounts together.
(Retain bolt, nut and washer by securing them back
in the top mount holes of the mid weight after the
stack is removed.)
2.
Remove the two weight bracket bolt channels
that
keep the weights attached to the frame (only the left
one is visible in Figure 4). This requires removing the
nut and lock washer on the bottom of the bracket
securing each
5
⁄
8
x9in bolt
.
When you take the nut off the bolt should slip out.
Before Proceeding:
The individual weight bars, two top mounts
and long
weight mount channel weldment
remain assembled as
one unit.
3.
There are two weight bracket mounts
on the top of
each stack of weights. Secure lifting hooks or chains
to these two mounts on the mid weight. (Take up
slack gradually to avoid deforming mounts. Minimize
load sway to avoid damage to nearby objects and the drill.)
4.
Hoist mid weight up and away from implement. Place
in storage along with the two weight bracket bolt
channels
(Note: channels may be used later).
Adjust Back Pressure
5.
To manipulate the amount of down force:
In addition to removing the mid weight stack you will
need to adjust the back pressure at the pressure
reducing valve located on the left wing. See “Adjust
Weight Transfer Valves” on page 6.
Figure 4
Remove Mid Weight Stack
31736
6
5
2
1
U
D
F
B
L
R
2
4
4
7
8
1
4
8
6
7
2
5
2
Figure 5
Place Hooks on Top Weight Mounts
6