Appendix b - brace update – Great Plains CTA4000HD Assembly Instructions User Manual
Page 9
Great Plains Mfg., Inc.
Installation Instructions
9
2013-10-01
122-280M
Appendix B - Brace Update
The steps in this appendix apply only if the drill is a
pre-2010 model that lacks holes in the opener disk shield
brace plates.
On a drill with narrow row spacing, there is apt to be
insufficient clearance at rear rows for marking and
drilling. In that case, mark and drill all front rows first.
Then connect a hoist to, or install a jack under a rear row
unit. Release the rear row at a spring rod pin, and fully
lower it for marking and drilling. You may wish to leave all
rear rows lowered for knock down installation and
adjustment as well.
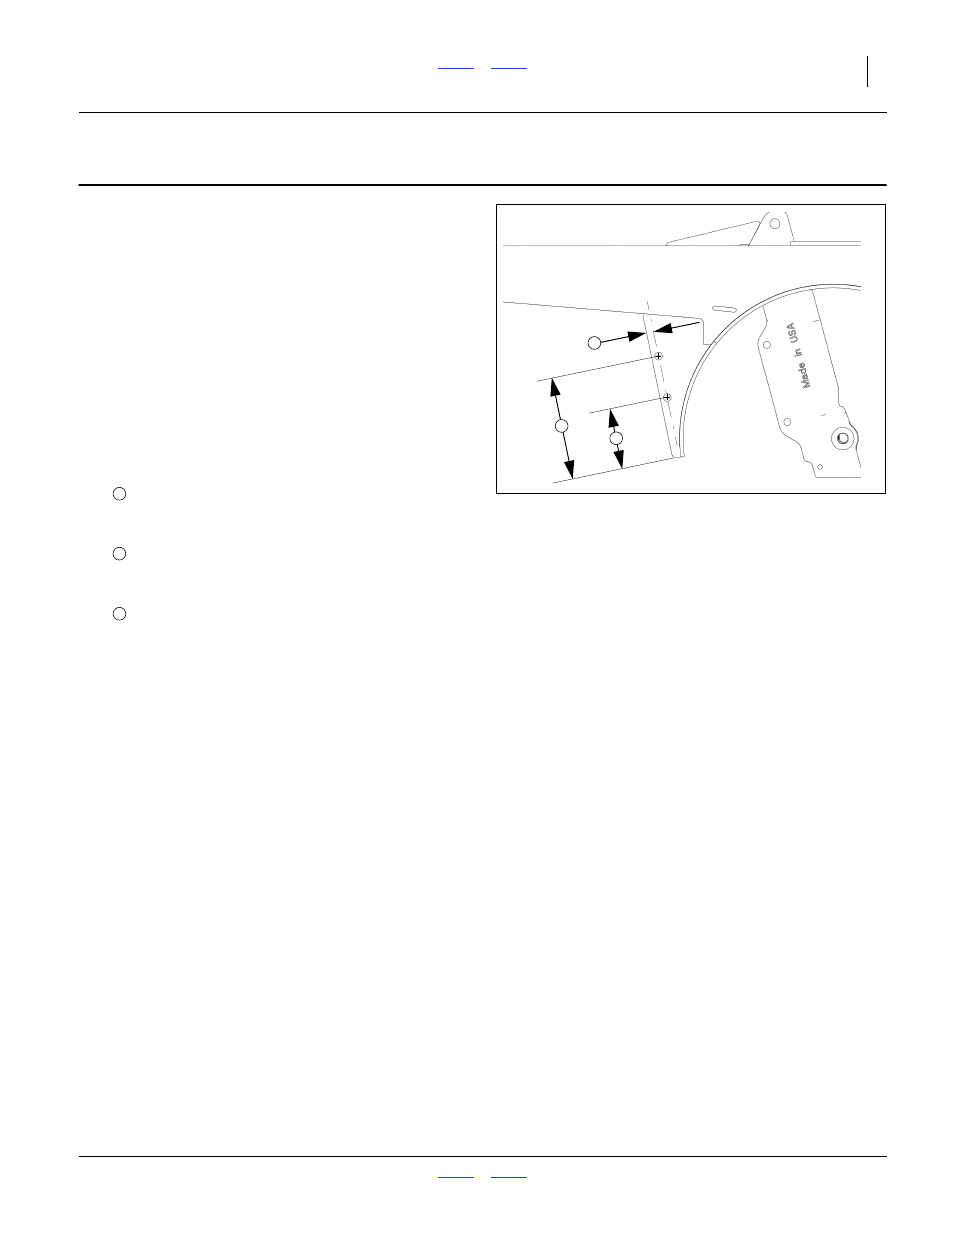
Refer to Figure 11
1.
Mark and center-punch holes at the following
locations relative to the bottom and front edges of
the brace plate:
2.
At each marked location, drill a pilot hole using a bit
that is
1
⁄
3
to
1
⁄
2
the size of the finale hole.
3.
At each pilot hole, drill a final hole size of:
13
⁄
32
inch, letter size Z, 10.5 mm
3
⁄
8
inch,
0.375 inch,
0.95 cm
Front edge to hole center-lines
3
1
⁄
4
inch,
3.25 inch,
8.25 cm
Bottom edge to lower hole center-line
5
1
⁄
2
inch,
5.5 inch,
13.97 cm
Bottom edge to upper hole center-
line
Figure 11
00HD Kit Mounting Holes
31409
A
C
B
A
B
C