Warning, Tools required, Pre-assembly checklist – Great Plains SR5030 Predelivery Manual User Manual
Page 5: Planter assembly
3
Section 1 Assembly
4/8/04
SR5030 Split-Row Planter 401-140Q
Great Plains Mfg., Inc.
Section 1
Assembly
The following headings are step-by-step instructions for
assembling the split-row planter. Begin with Tools Re-
quired and Pre-Assembly Checklist to make sure you have
all necessary parts and equipment. Follow each step to
make the job as quick and safe as possible and produce a
properly working machine.
The split-row planter is shipped via flat bed truck. It is the
dealer’s responsibility to unload the new machine. Unload
all equipment before beginning assembly. Do not attempt
any assembly work while the split-row planter is on the
truck.
Tools Required
•
Forklift or Hoist
•
General Hand Tools
Pre-Assembly Checklist
1.
Read and understand “Important Safety Informa-
tion” on page 1 before assembling.
2.
Have at least two people on hand while assembling.
3.
Make sure the assembly area is level and free of ob-
structions (preferably an open concrete area).
4.
Have all major components.
5.
Have all fasteners and pins shipped with the planter
IMPORTANT: If a pre-assembled part or fastener is
temporarily removed, remember where it goes. Keep
the parts separated.
.
6.
Have a copy of the parts manual on hand. If unsure of
proper placement or use of any part or fastener, refer
to the parts manual.
7.
Check that all working parts are moving freely, bolts
are tight, and cotter pins are spread.
8.
Check for proper tension and alignment on all drive
chains.
9.
Check that all safety labels and reflectors are correctly
located and legible. Replace if improperly located or
damaged. Refer to Safety Labels, “Important Safety
Information” in the operator’s manual.
10. Inflate tires to recommended pressure as listed on the
Tire Inflation Chart on the “Appendix” on page 5.
Tighten wheel bolts as specified on Torque Values
Chart on the “Appendix” on page 5.
Planter Assembly
!
WARNING!
Crushing hazard. The hitch could fall on you during planter as-
sembly, causing severe injury. Make certain the hitch is at-
tached securely to a mechanical hoist.
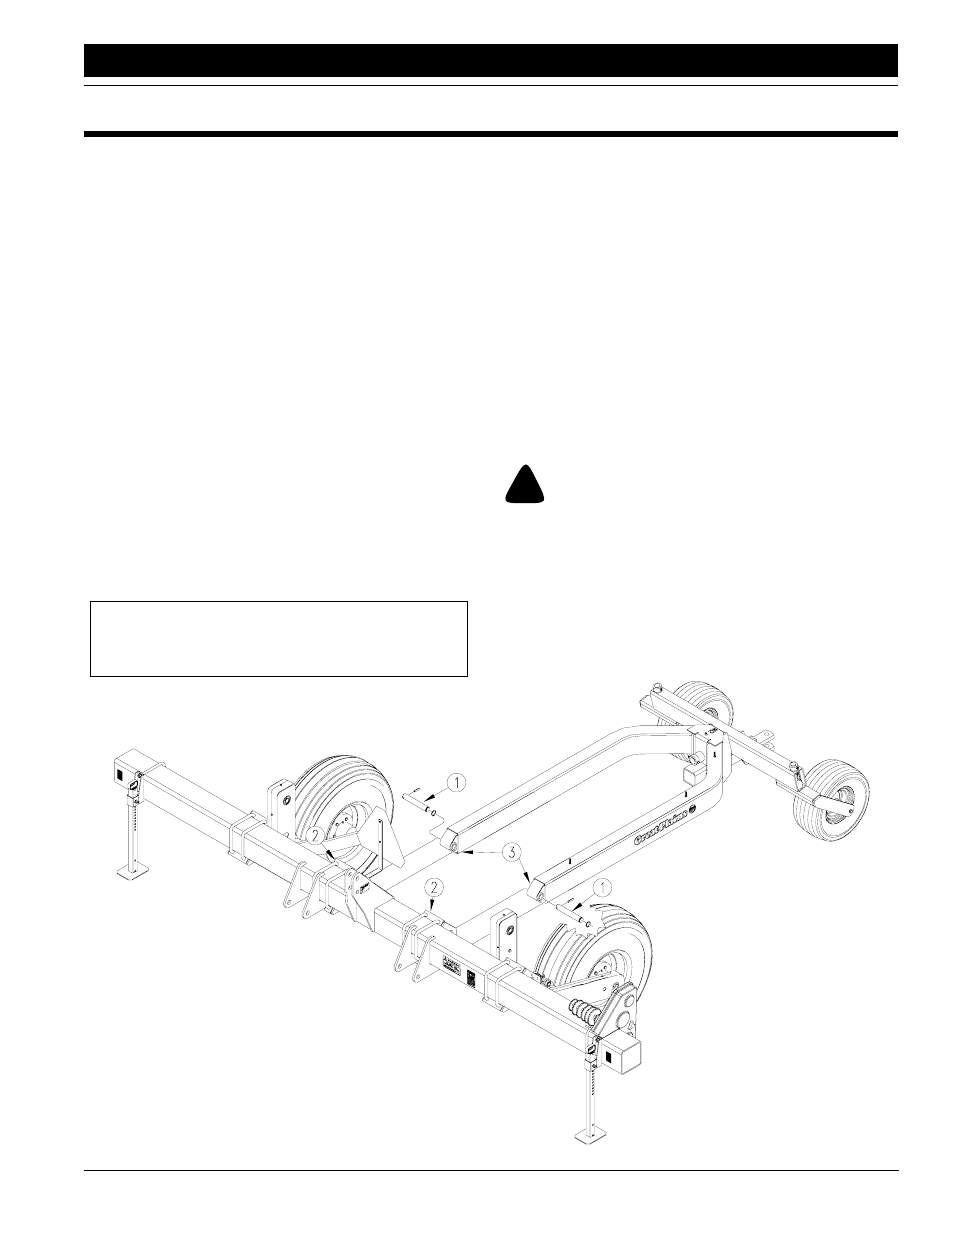
To assemble planter, remove pivot pins (1) from hitch
mounts (2). Using mechanical assistance, position hitch
arms (3) in hitch mounts. Secure hitch arms to hitch
mounts with pivot pins. Secure each pivot pin with snap
ring.
Figure 1
Planter Assembly
17768