Preparation intended use operation – Triton TPL 180 User Manual
Page 7
6
GB
PREPARATION
INTENDED USE
OPERATION
UNPACKING YOUR TOOL
Carefully unpack and inspect your tool. Familiarise
yourself with all its features and functions.
Ensure that all parts of the tool are present and in good
condition. If any parts are missing or damaged, have such
parts replaced before attempting to use this tool.
The Triton Planer is packed, fully assembled except for the
dust extraction adaptor and combined parallel and bevel
fence guide.
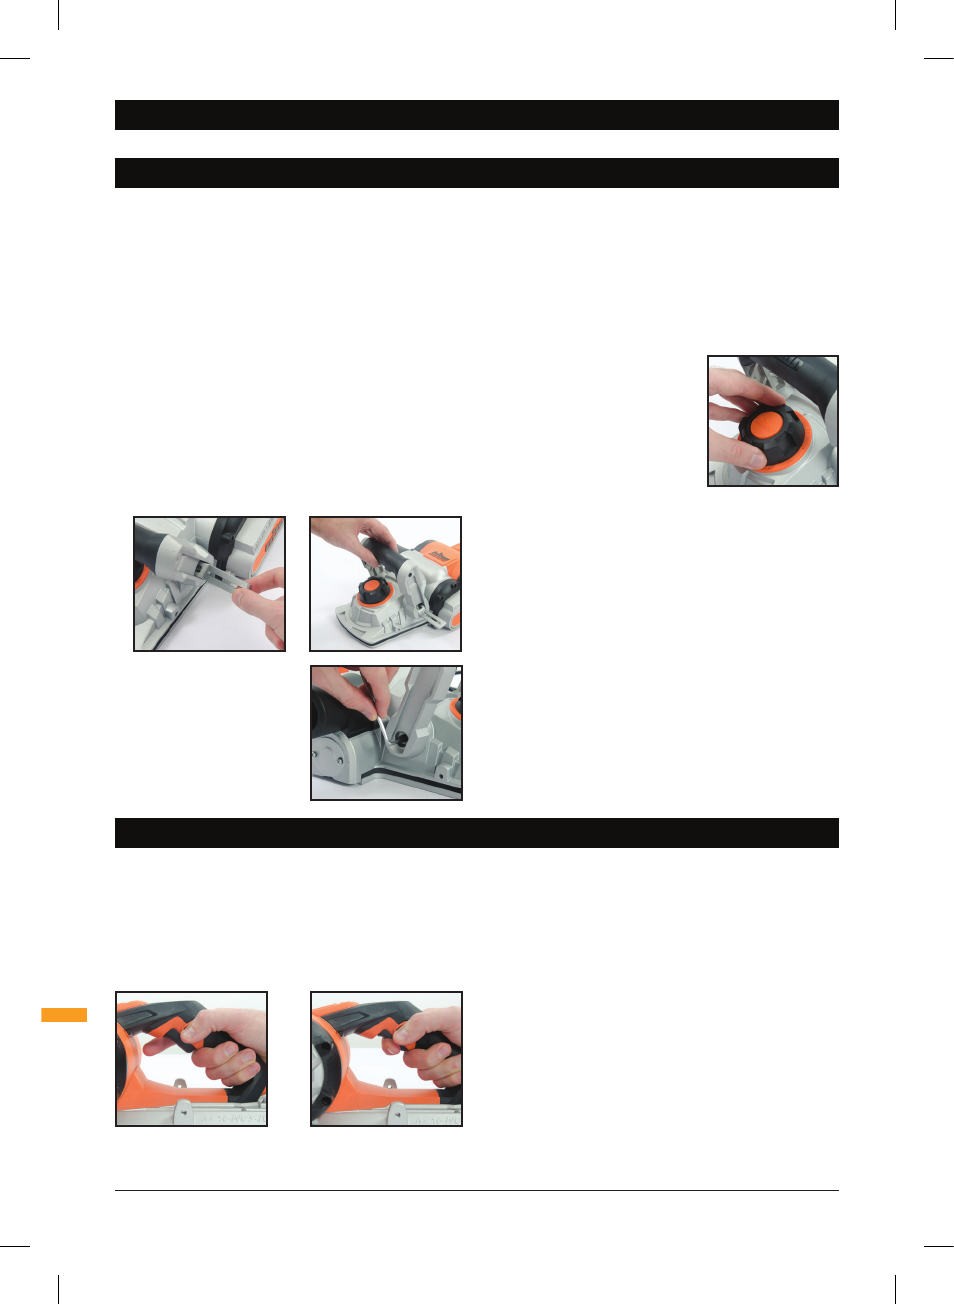
Adjusting the front handle
1. Hinge out the Front Handle Lock Lever (9) and move
the front handle to one of four positions to best suit
the task at hand
2. Hinge back lever (9) to secure the front handle in the
selected position
Note: If necessary, the lever
action mechanism can be
adjusted using the Front
Handle Set Screw (13).
Adjusting the depth of cut
CAUTION: Always ensure that the tool is switched off
and unplugged from the power supply before making
adjustments or installing or removing blades.
Note: The Power Indicator (2) lights when the tool is
connected to a live mains supply. This is a quick indicator
of a live power connection to the tool for normal use but
it is important to still physically check the power tool is
disconnected from the mains when
making adjustments or installing or
removing blades.
1. Rotate the Depth Adjustment
Knob (12) clockwise for a
deeper cut and anti-clockwise
for a shallower cut
2. The numbers on the ring under
the depth adjustment knob indicate the depth of cut.
There are 8 click stop positions from 0.25-2.00mm that
increment by 0.25mm
3. If it is necessary to plane to a precise depth, plane
a scrap piece of wood, measure the difference in
thickness and adjust the setting if necessary
4. To check accuracy and tolerance of the Movable Front
Base (11) set the depth adjustment knob to the ‘0’
position so the blade can be measured against the
Fixed Rear Base (6) and Movable Front Base (11). The
rear base, blade and front base should be at the same
level at the ‘0’ position
5. After use always move the depth adjustment knob
to the ‘P’ parked position. This protects the blade by
moving the movable front base so that the blade is not
in contact with the surface the planer is resting on
Intended Use / Preparation / Operation
Switching On and Off
CAUTION: Before plugging the machine into the power
point always check that the Trigger Switch (3) and Trigger
Safety Lock (4) work properly. Before switching on, ensure
that the blade drum or blade is not making contact with
any surface.
1. Plug in the machine, push in the Trigger Safety Lock
(4) and pull the Trigger Switch (3)
2. To stop the tool, simply release the trigger Switch
3. In order to restart the machine, it is necessary to
operate both the Trigger Safety Lock (4) and the Trigger
Switch (3). This is an important safety feature that
helps prevent accidental operation of the planer
CAUTION: Please note that the planer blades continue to
spin for some time after switching off the planer. Wait until
the motor has completely stopped before setting down the
tool to prevent damage to the planer blades or the surface.
• If you wish to rest the planer on its side, do not rest it
on the side with the vents to prevent dust or chips from
getting into the motor
• When the planer is not to be used for a short period, set
the depth control knob to the ‘P’ parked position and
make sure both bases (6) and (11) are both resting on
the same level surface
Large hand-held electric planer for heavy duty planing tasks on hard and softwood timber.
366649_Z1MANPRO2.indd 6
07/07/2014 10:25