Trail Master Suspension TM101_TM101N GM SILVERADO 6-LUG GM 1500 2WD & 4WD 2 1/4 FRONT SPACER KIT User Manual
Page 5
TM101 & TM101N
Revised
7.27.13
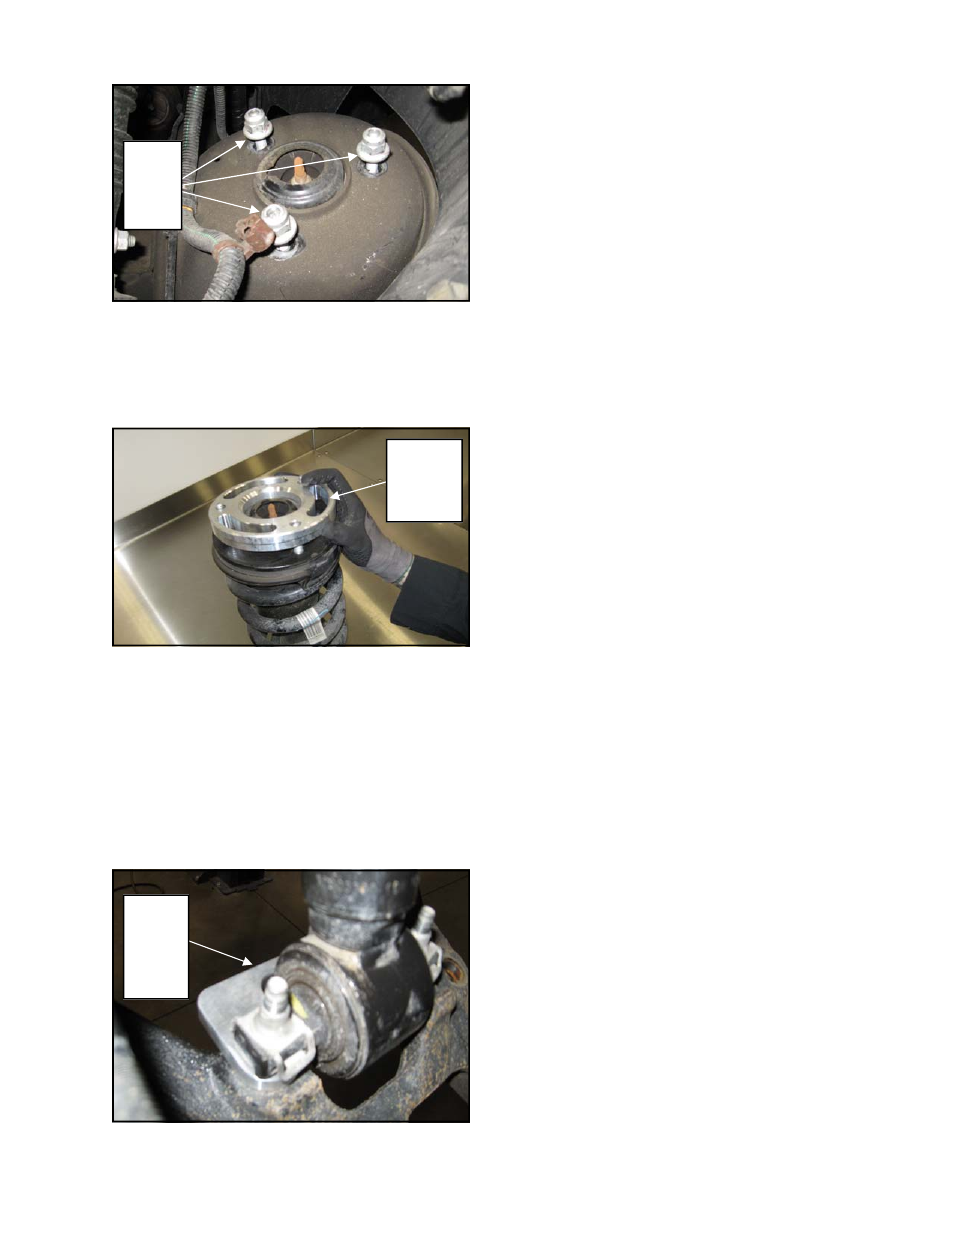
10. Install the upper strut spacer (90-4183m)
onto the OE studs on the strut.
NOTE: Because this kit retains the
use of the OE studs the vehicle can eas-
ily be returned to it’s stock form.
12. Install the strut assembly into the strut
tower and secure using the supplied
10mm flange nuts. Leave the bolts hand
tight only at this point.
13. Place a jack the lower control arm with
and raise it up. Install the 3/8” lower strut
mount spacer (90-4265)
over the factory
lower shock mount holes.
14. Install the strut and nut clips over the
spacer and secure the lower strut to the
control arm using the previously removed
OE hardware.
15. Torque the upper and lower strut mount-
ing hardware to manufacturers specifica-
tions.
16. Reinstall the spindle to the upper ball joint.
Torque the upper ball joint nut to manufac-
turers specifications.
NOTE: It may be necessary to pry the
upper control arm down, using a pry bar
inserted into the coil spring, to force the
ball joint stem into the spindle.
17. Reinstall the sway bar end link to the lower
control arm and secure top the sway bar.
Torque according to manufacturers specifi-
cations.
18. Reinstall the brake line bracket to the con-
trol arm using the previously removed hard-
ware.
19. Reinstall the wheel speed sensor cables into
the factory harnesses.
20. Repeat the steps 5 Through 19 On the re-
maining side of the vehicle.
21. Install the front tires/wheels and lower the
vehicle onto the ground.
22. Reinstall the OE skid plate to the vehicle
using the previously removed OE hard-
ware.
23. Torque all bolts to factory specifications.
Re-torque all bolts after 500 miles.
IMPORTANT! BE SURE TO
BRING THE VEHICLE IMMEDIATELY
TO A REPUTABLE ALIGNMENT SHOP
TO BE ALIGNED!
Upper
Strut
Mount
Nuts
Lower
Strut
Mount
Spacer
90-4265
Upper
Strut
Spacer
90-4183m