Location and installation of receiver, Installation of system, Mounting – TeachLogic VOICELINK I User Manual
Page 13
7
location and Installation of receiver
Since the VoiceLink I is a supplement to an existing
power amplifier system, you will want to locate the
receiver near the power amplifier to minimize audio
cable length from receiver to sound system.
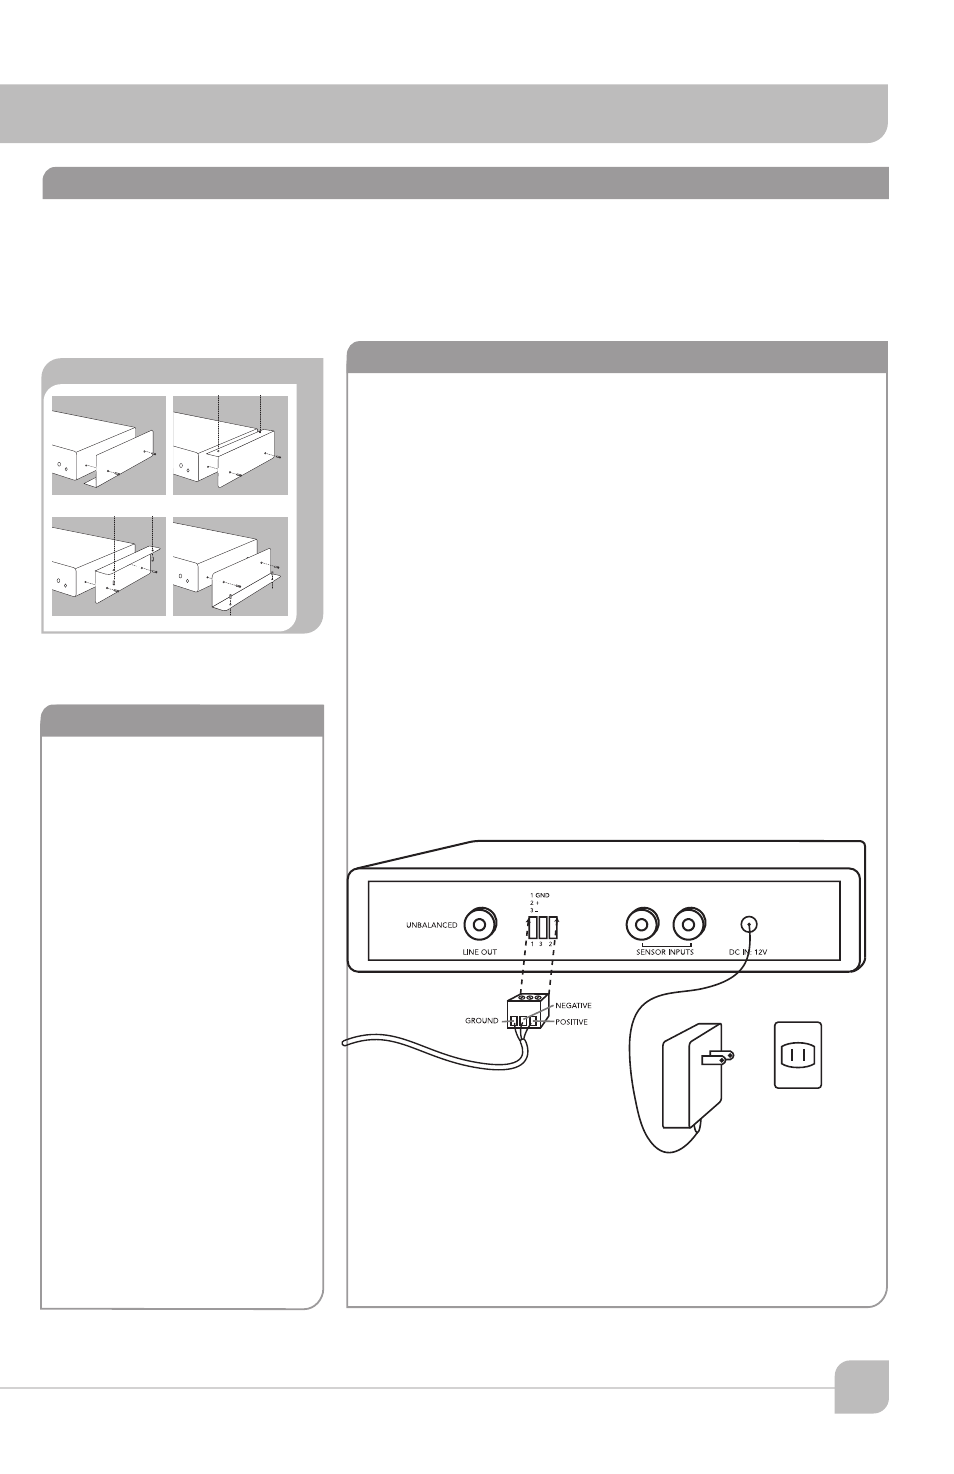
Connect the output of the receiver to the line input
of the sound system.
• Unbalanced: Use a shielded cable with
RCA connectors
• Balanced: Use two conductor shielded cable.
Connect to three pin phoenix connector
• Pin 1 – Ground (Chassis)
• Pin 2 – Positive (Hot)
• Pin 3 – Negative
Plug power supply into AC outlet.
Plug power cable into receiver.
installation of system
Location of receiver is primarily determined by user accessibility, location of sound system
and availability of an electrical outlet. Location of the sensor and routing of the sensor cable
is a more critical issue.
mounting
Desk Top Location
• Install soft vinyl pads on
bottom of receiver
• Locate for convenient use
Shelf or Wall Mount
• Attach the mounting
flanges using round holes
and small plastic rivets.
• Caution: Assure rivets are
aligned and seated before
pushing rivet into hole
• With flanges attached, hold
receiver in place.
• Mark mounting holes
• Drill a 3/32" pilot hole
for screwing directly into
a solid surface using the
mounting screws.
• Drill a 5/32" hole and
insert a plastic anchor in
drywall or concrete wall.