Connecting a telescope – Sky-Watcher AZ4 MOUNT User Manual
Page 5
5
Your AZ4 mount is now fully assembled and it
should look like Figure 1a. Please move ahead
to section 3 to read about connecting your
telescope to the mount.
B. AZ4 (Aluminum)
1. Stand the tripod upright and spread the legs
out as far as they can go. For now, keep the
tripod legs at their fully retracted (shortest)
length. After the mount is fully assembled,
you can extend them to a more desirable
length.
2. Attach the accessory tray to the accessory
tray bracket using the three wing screws
already installed in the tray. Remove the
wing screws from the tray and place the tray
on top of the accessory tray bracket
oriented with the flat surface against the
accessory tray bracket. Thread the wing
screws from underneath the assembly by
first placing the wing screw up through the
hole in the bracket and threading into the
tray itself. Do not completely tighten the
wing screws until all three are in place, as
you may need to make minor adjustments
to the tray position in order to align all three
holes.
3. Place the base of the AZ4 head into the
base of the tripod. Orient the AZ4 head so
that the post on the base (referencing north)
of the tripod lines up with the notch on the
AZ4 head. To secure the mount
head to the tripod, there is a captive bolt
located on the underside of the leg casting.
Use the black knob to insert the post into
the threading on the head and turn until
tight. Be careful not to cross thread when
assembling.
4. Thread the handle into the threaded
receptacle of the AZ4 head. The handle will
thread in at a slight angle so as to position it
at a more comfortable angle for use in the
field. To have the handle in a different
position, you can remove the Phillips-head
screw and thread the handle on the other
side of the thumbscrew that secures the
telescope. The Phillips-head screw can be
used to cover the additional hole.
Your AZ4 mount is now fully assembled, and
should resemble Figure 1b. You can now con-
nect your telescope to the mount.
2. Connecting a Telescope
The AZ4 mount was designed to be compat-
ible with telescopes of apertures 6” or less.
Telescopes exceeding that size will not be able
to point at the horizon (horizontal) or zenith
(vertical). For optimal results, the telescope
optical tube assembly should weigh no more
than around 15 lbs, less for longer optical
tubes, as it may not provide sufficient stability
otherwise.
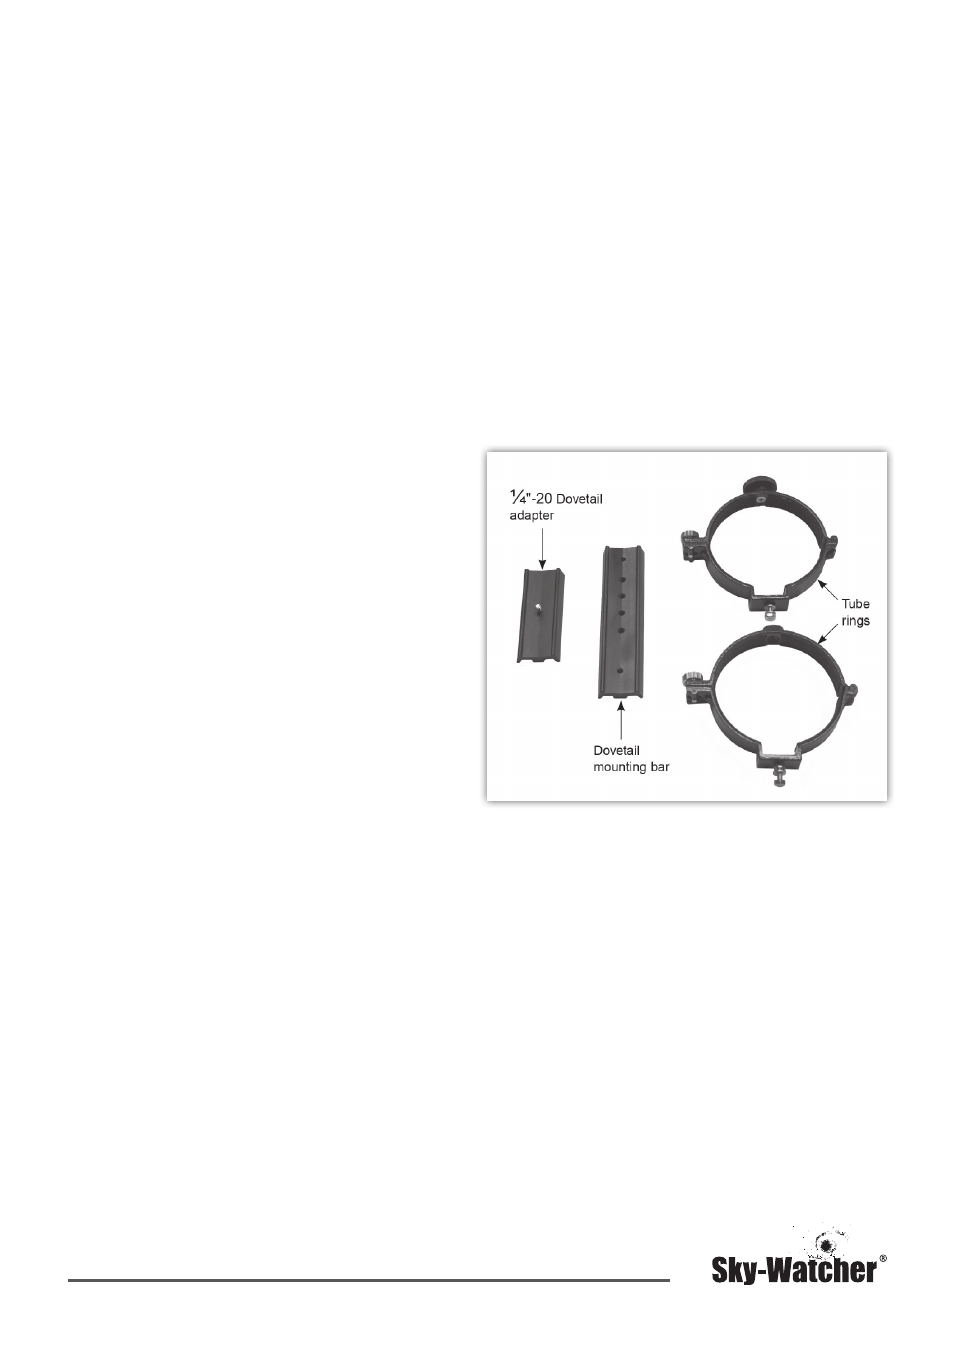
A dovetail mounting bar is required to con-
nect your telescope. If your telescope has this
bar directly attached to the tube already, then
please move on to the next paragraph. For
telescopes that do not have a dovetail bar at-
tached or use a ¼”-20 mounting block, you will
need a set of tube rings to attach a dovetail
bar. These accessories are available through
Sky-Watcher Telescopes. Additionally, if your
telescope has a ¼”-20 threaded mounting
hole, you can use the dovetail “L-bracket” that
has been supplied with this mount to fit the
dovetail receptacle of the AZ4 and thread into
this hole.