Connections (continued), Bi-wired system connections, Connector panel – Revel Salon User Manual
Page 14: Revel ultima studio rear
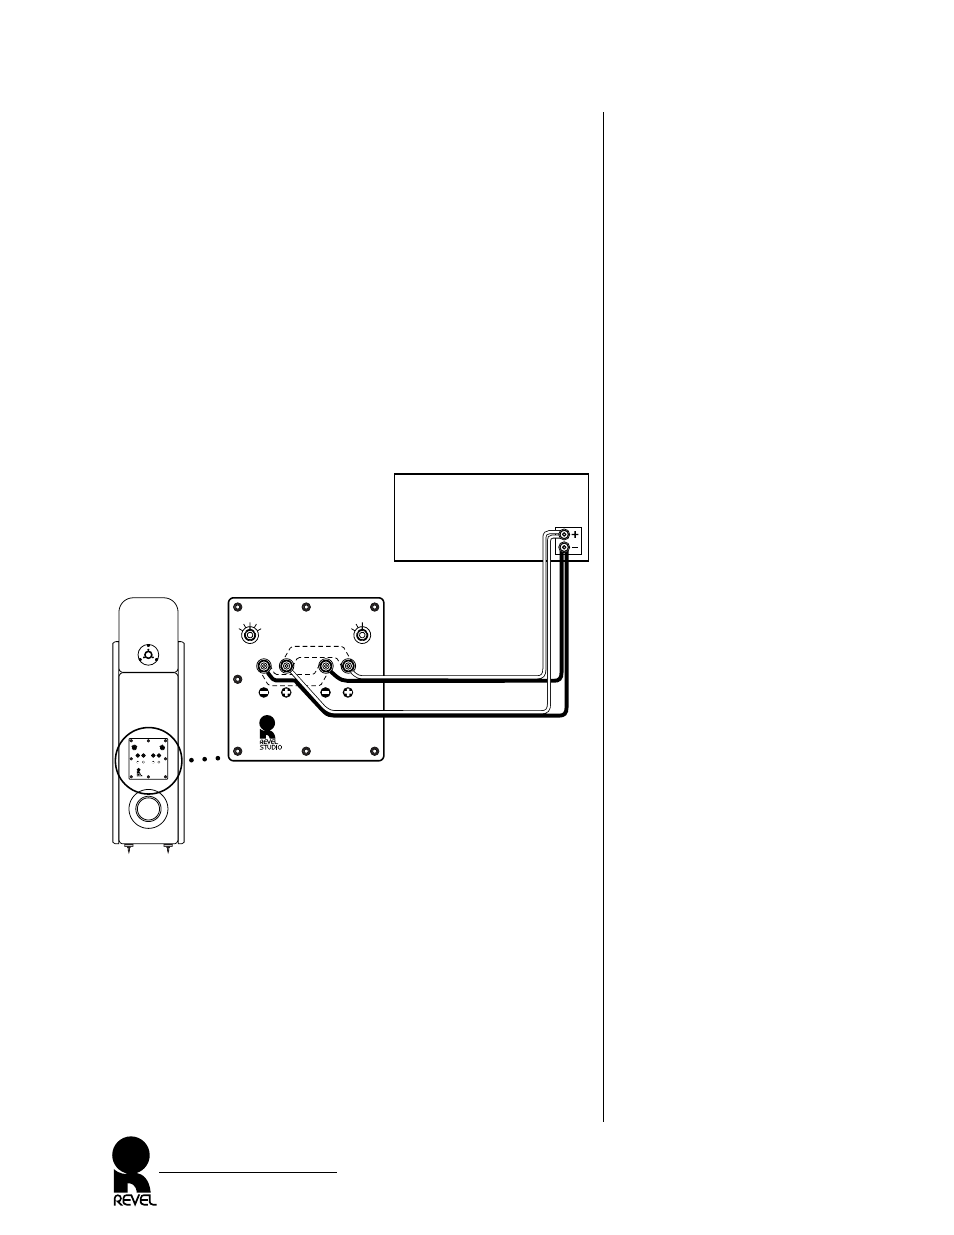
Figure 10. How to connect
the REVEL ULTIMA STUDIO
in a bi-wired system.
CONNECTIONS (CONTINUED)
BI-WIRED SYSTEM CONNECTIONS
A bi-wired system involves two pairs of loudspeaker wires connected
to a single amplifier channel. On the rear of the REVEL ULTIMA
STUDIO, remove the shorting straps and connect the
+
and
−
of
one pair of wires to the HIGH FREQUENCY INPUT terminals
and the
+
and
−
of the other pair of wires to the LOW FRE-
QUENCY INPUT terminals, as shown in Figure 10.
Check with your Revel dealer for recommendations and possible
benefits for your application.
CAUTION: Failure to remove the shorting straps when bi-wiring
may damage some amplifiers.
REVEL ULTIMA STUDIO
Owner’s Manual
14
Remove straps
for bi-wire
or bi-amp
Low Frequency Input
High Frequency Input
+1
-1
0
+.5
-.5
Serial Number
xxxx
Front Tweeter Level
Rear Tweeter Level
Revel Corporation
Northridge, California
Made in U.S.A.
-3
0
Off
Remove straps
for bi-wire
or bi-amp
Low Frequency Input
High Frequency Input
+1
-1
0
+.5
-.5
Serial Number
xxxx
Front Tweeter Level
Rear Tweeter Level
Revel Corporation
Northridge, California
Made in U.S.A.
-3
0
Off
Install straps for
single-wired operation
Amplifier
(rear)
(one channel shown)
Shorting Straps Removed
red
wht
Connector
Panel
(one channel shown)
REVEL
ULTIMA
STUDIO
Rear