Installation, Installation (continued) – OSD Audio SMP-250 User Manual
Page 4
4
place on its side or resting on the back where the terminals are located.
l Don’t place the amplifier near heat sources, or in an area that it would be exposed to moisture or
excessive humidity.
YOU SHOULD KNOW
l The power supply may cause a hum to be heard in some components if they are placed very close
to the amplifier.
Installation
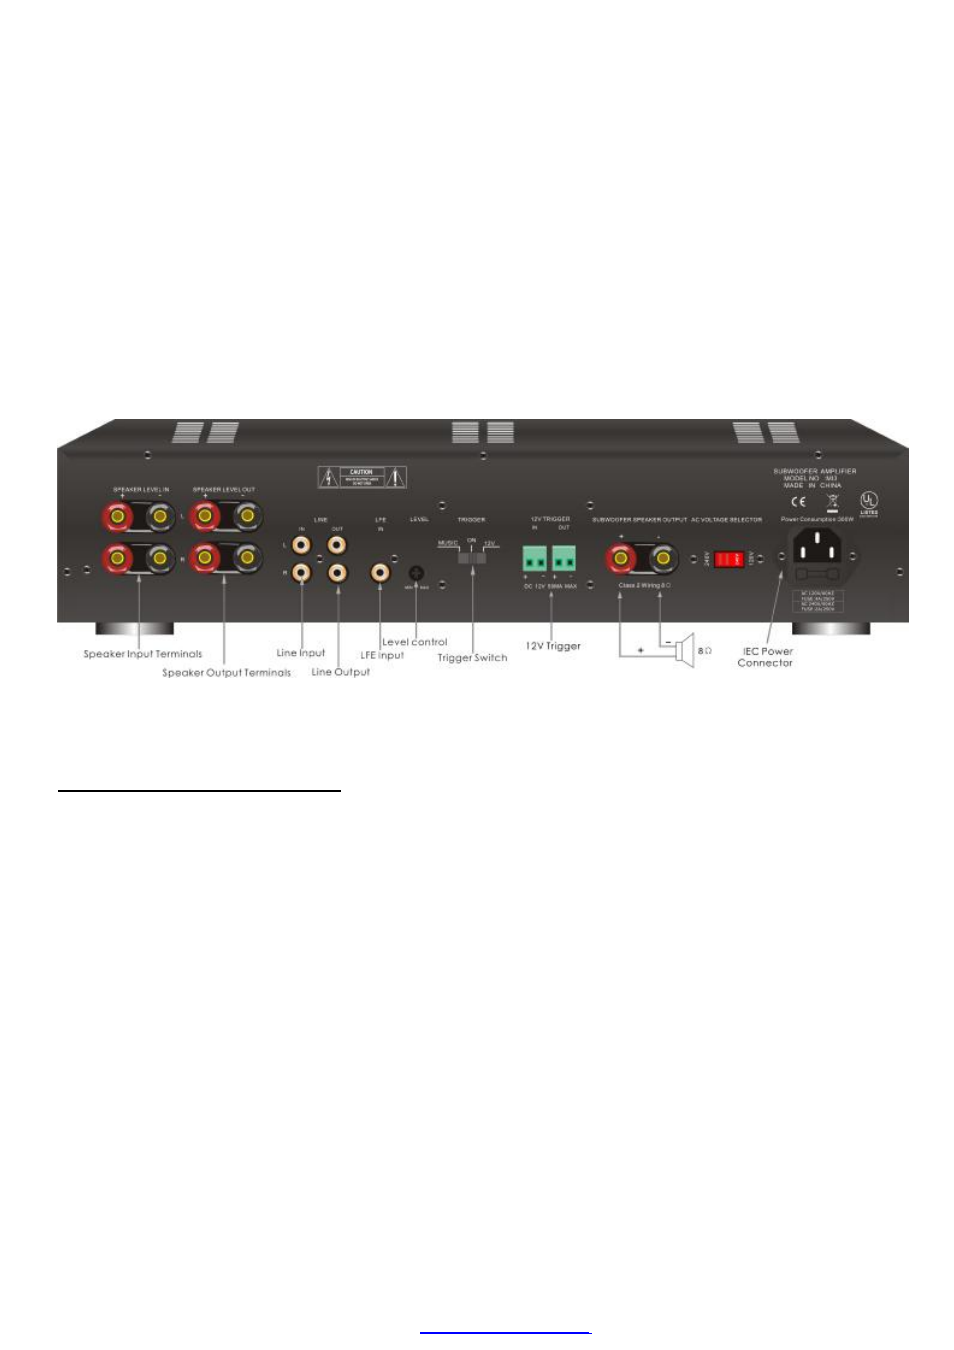
Please use Diagram 1 to familiarize yourself with the rear panel of subwoofer.
DIAGRAM 1
Subwoofer Rear Panel
INSTALLATION (continued)
1. Connecting the Subwoofer to the Amplifier
CAUTION: Only make connections when the amplifier is turned off.
There are 2 output terminals on the back of the amplifier, one positive and one negative(see diagram 1). These
3-way binding post output terminals allow for a variety of ways to connect your subwoofer wiring to the amplifier,
including stripped wire, spade con-nectors, etc. You MUST use a minimum of 14 gauge speaker wire. Be sure all
connections are solid.
2. Connecting the Audio Inputs
CAUTION: To avoid possible damage to the amplifier or subwoofer, only make connections when the amplifier is
turned off.
.LFE (Low Frequency Effects) Input – If your preamplifier or receiver has a Sub Out or LFE out, you can connect it to the
LFE input. Be aware that using the LFE input bypasses the amplifier’s adjustable low frequency (low pass) crossover.
.Line Level Inputs (Left & Right) –The line outputs from a preamplifier or receiver can be connected to the line level inputs
of the Bass power with RCA cables. If the line level signal is also required by other equipment, you can con-nect the line level
PDF created with pdfFactory Pro trial versi